 API-FOOTBALL
We will see how to optimize and secure the use of widgets as much as possible.
This is done in several steps and you will need
- An api-sports account with a valid API-KEY (works with the free plan) Your API-KEY is available here in the dashboard
- An account on BunnyCDN (free registration)
With our new widgets, everything happens in the configuration block.
<api-sports-widget data-type="config" data-sport="football" data-key="Your-Api-Key-Here" data-url-football="https://v3.football.api-sports.io/"
    data-refresh="20" data-logo-url="https://media.api-sports.io" data-favorite="true" data-player-trophies="true" data-standings="true"
    data-target-game="#game-content .card-body" data-target-standings="#standings-content" data-theme="grey" data-player-injuries="true"
    data-lang="en" data-show-error="true" data-show-logos="true" data-team-squad="true" data-team-statistics="true" data-tab="games"
    data-target-player="modal" data-target-league="#games-list" data-target-team="#team-content" data-player-statistics="true"
    data-game-tab="statistics">
</api-sports-widget>
The fields we are interested in are data-key and data-url-football.
Currently, with this configuration, the widget will directly call the API, exposing your API-KEY every time a user browses your site. Although it is possible to protect your API-KEY in the dashboard so that it only works with one or more domains that you have selected, we will see how to hide it completely from the widget code.
We will also see how to cache API responses using BunnyCDN, thereby drastically reducing the number of API calls generated by visitors to your site.
With a fairly simple configuration on the BunnyCDN side, we will be able to cache data for a defined period of time and protect our API-KEY.
Here are the steps:
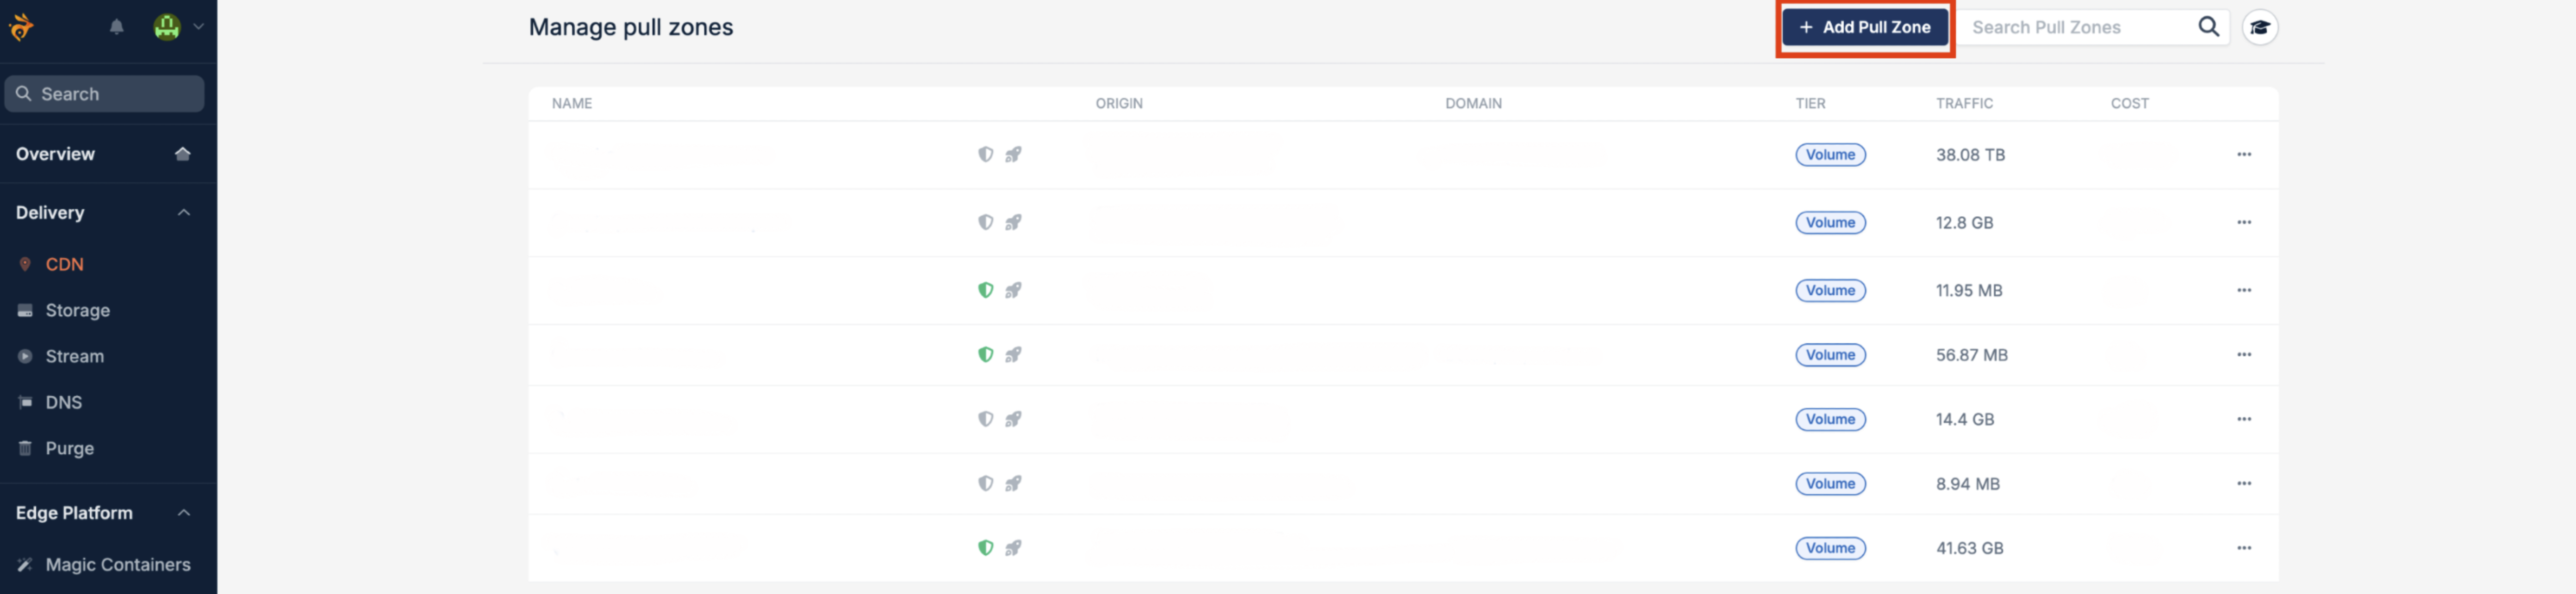
Log in to the BunnyCDN dashboard or create an account if you haven't already done so. Click on CDN

Then click on Add Pull Zone
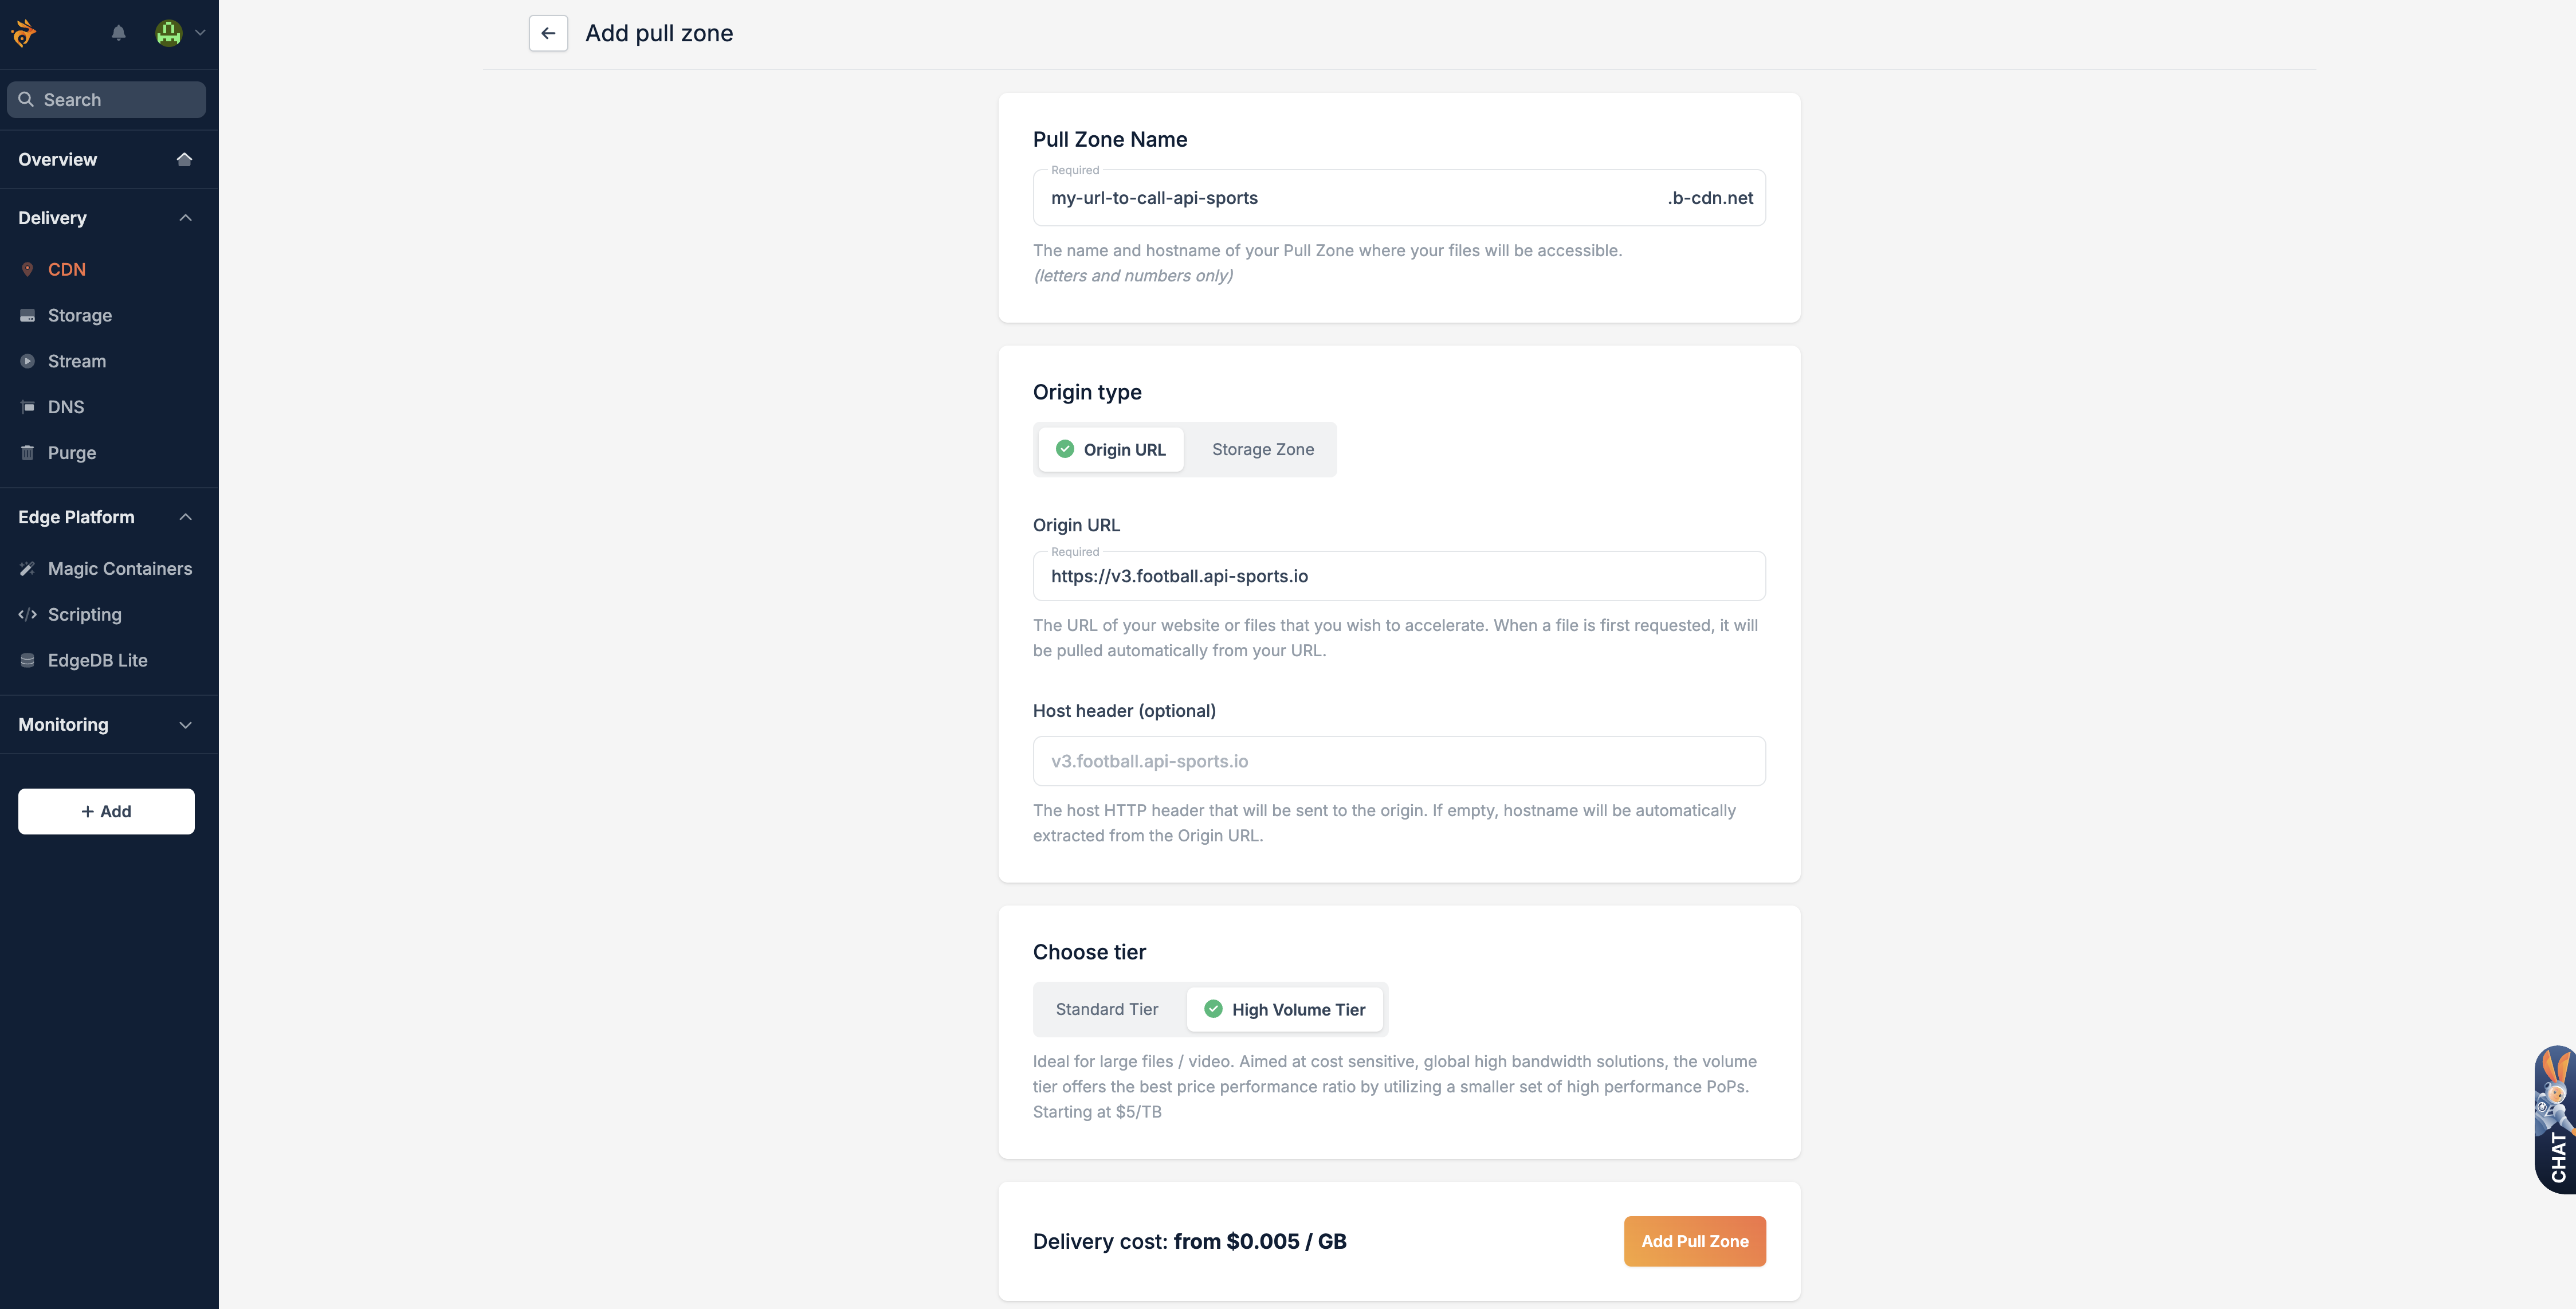
Fill in the following fields
Pull Zone Name : Choose a name that suits you (you can attach a domain to it later).
Origin URL : https://v3.football.api-sports.io
Choose tier :
- Standard Tier
- High Volume Tier
It's up to you to choose the plan you want. In our example, we'll go with the High Volume Tier, which works very well and is competitively priced.
One all done save by clicking on Add Pull Zone
Click on Skip Instructions
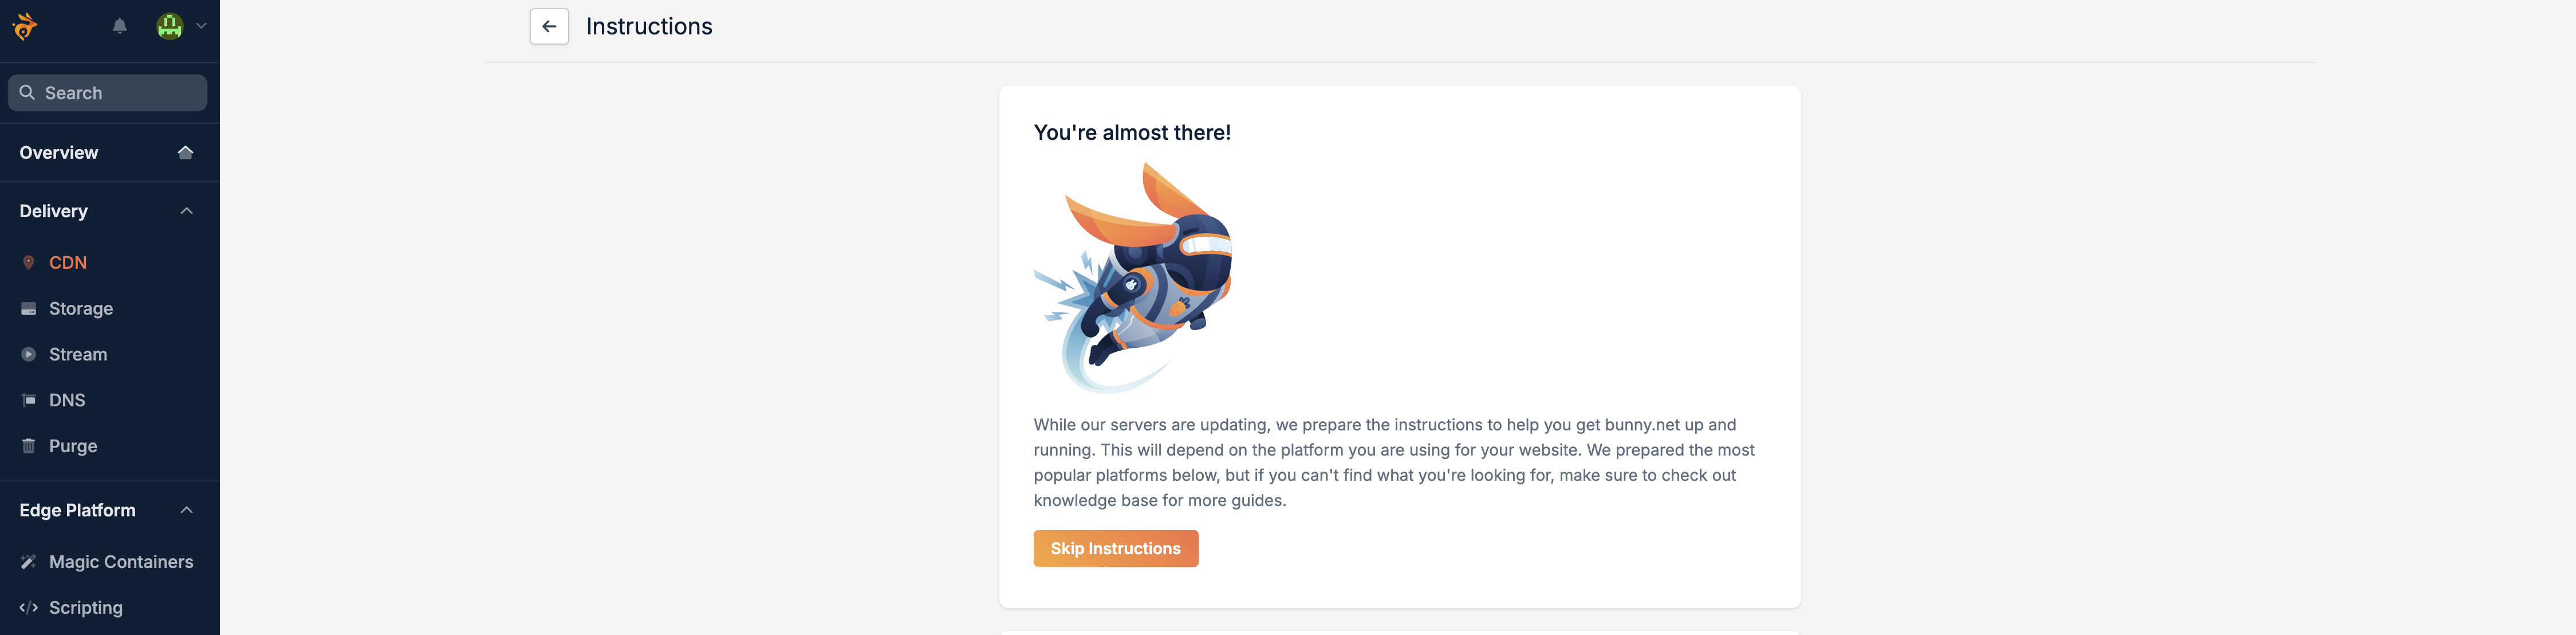
There you go, the first step is complete. Now let's move on to the configuration.
The default configuration applied by BunnyCDN is already almost ready for us. We will only modify the essentials for our needs, but you are free to modify other options to further increase security.
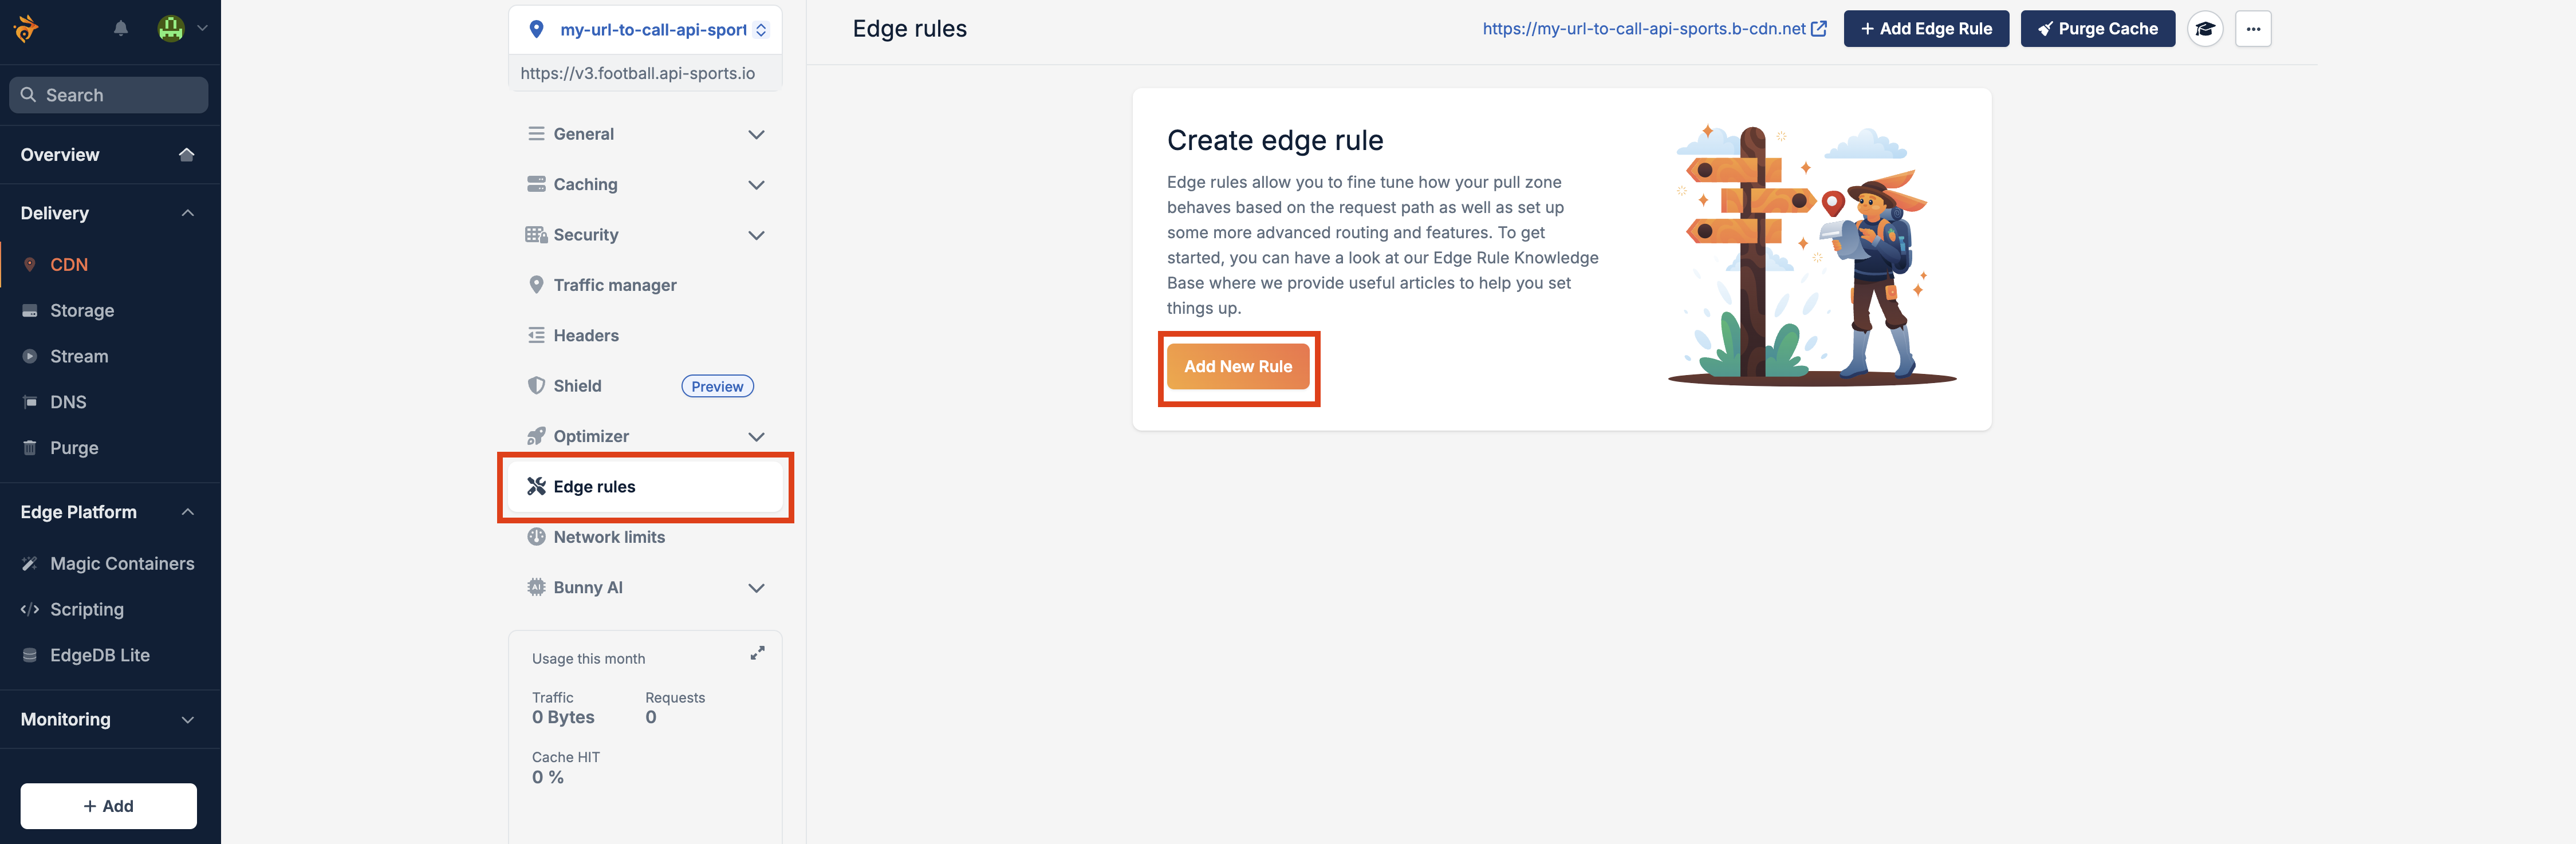
Click on Edges Rules and then Add New Rule
For our rule, we will do two things:
- Put our API-KEY in the headers
- Define a cache time for each request
In the Action section, click on the drop-down menu and select Add Request Header
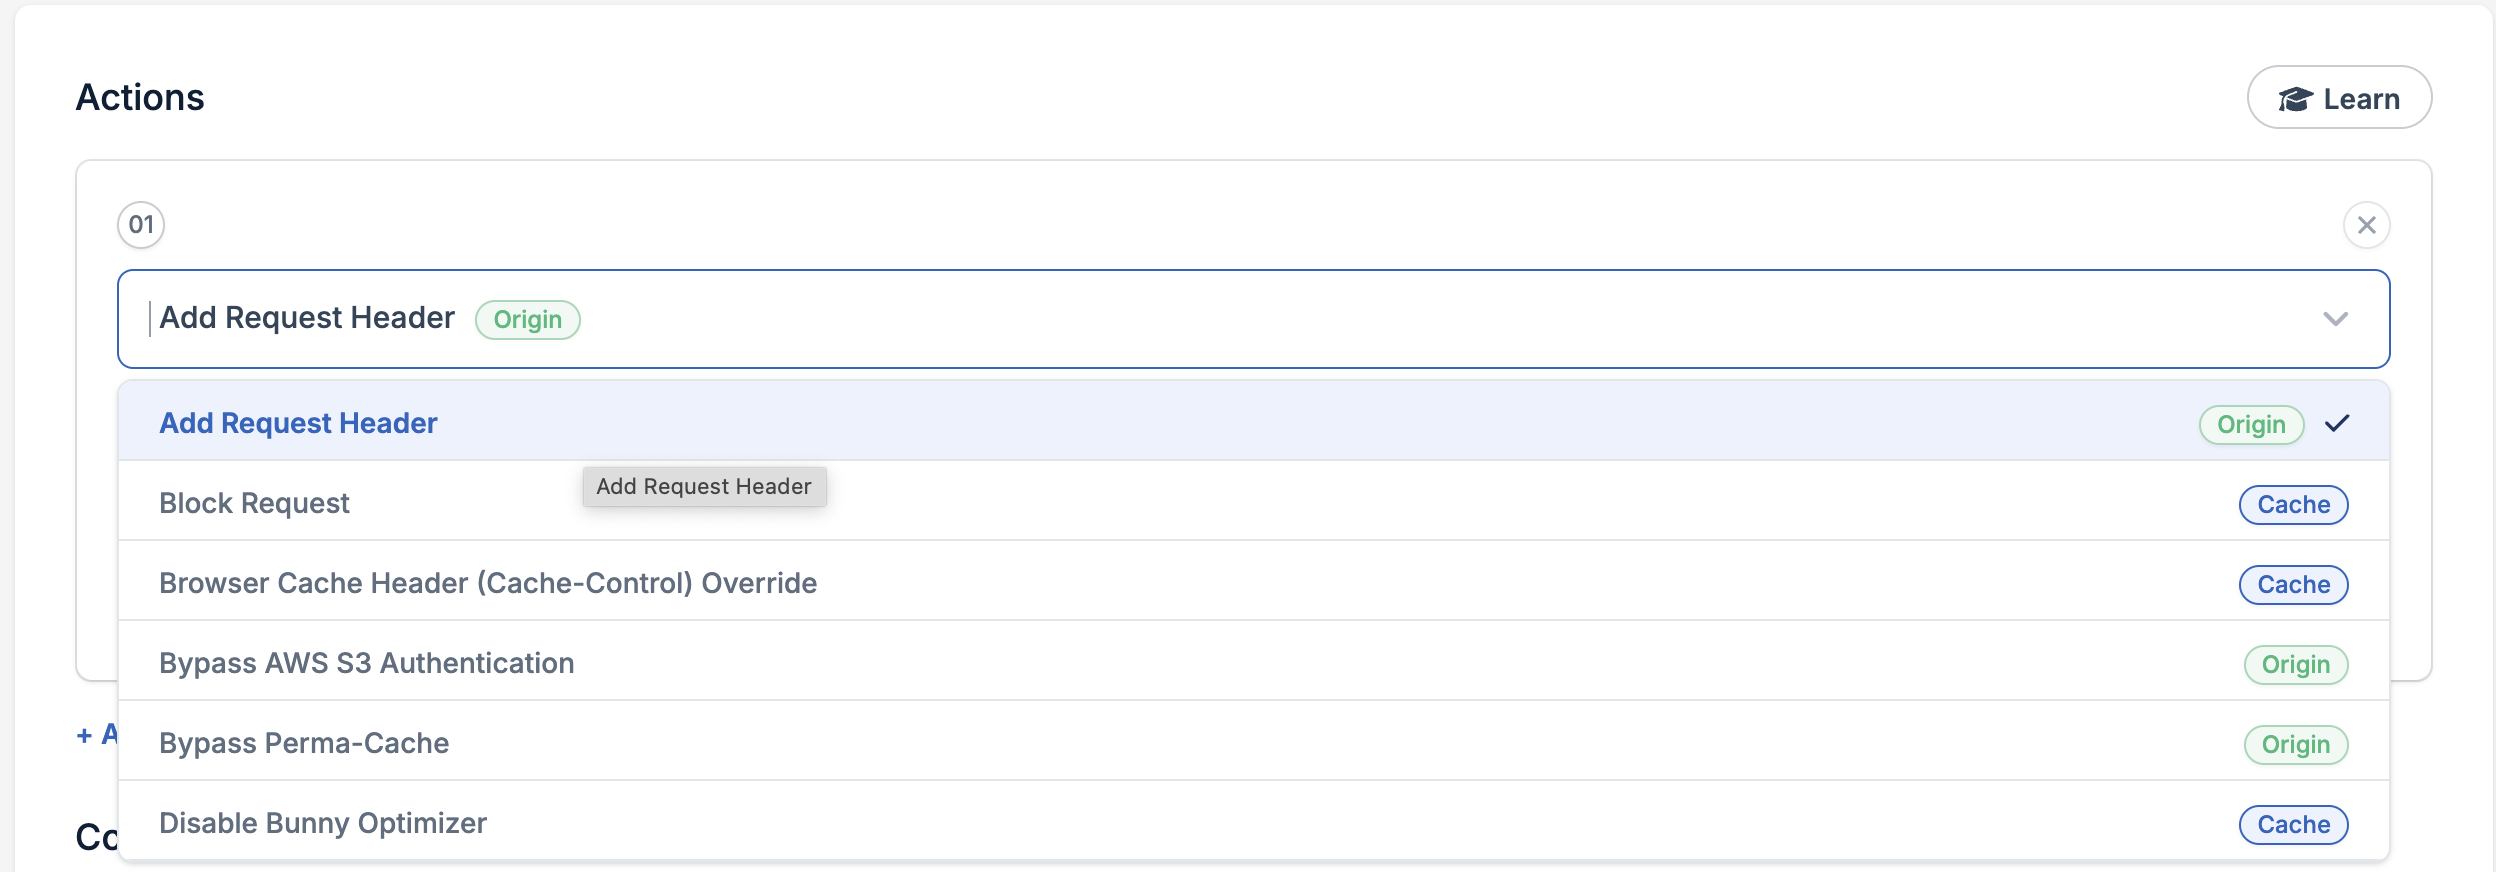
Then fill in the fields:
- Header Name : x-apisports-key
- Header Value : Your-API-KEY from the Dashboard
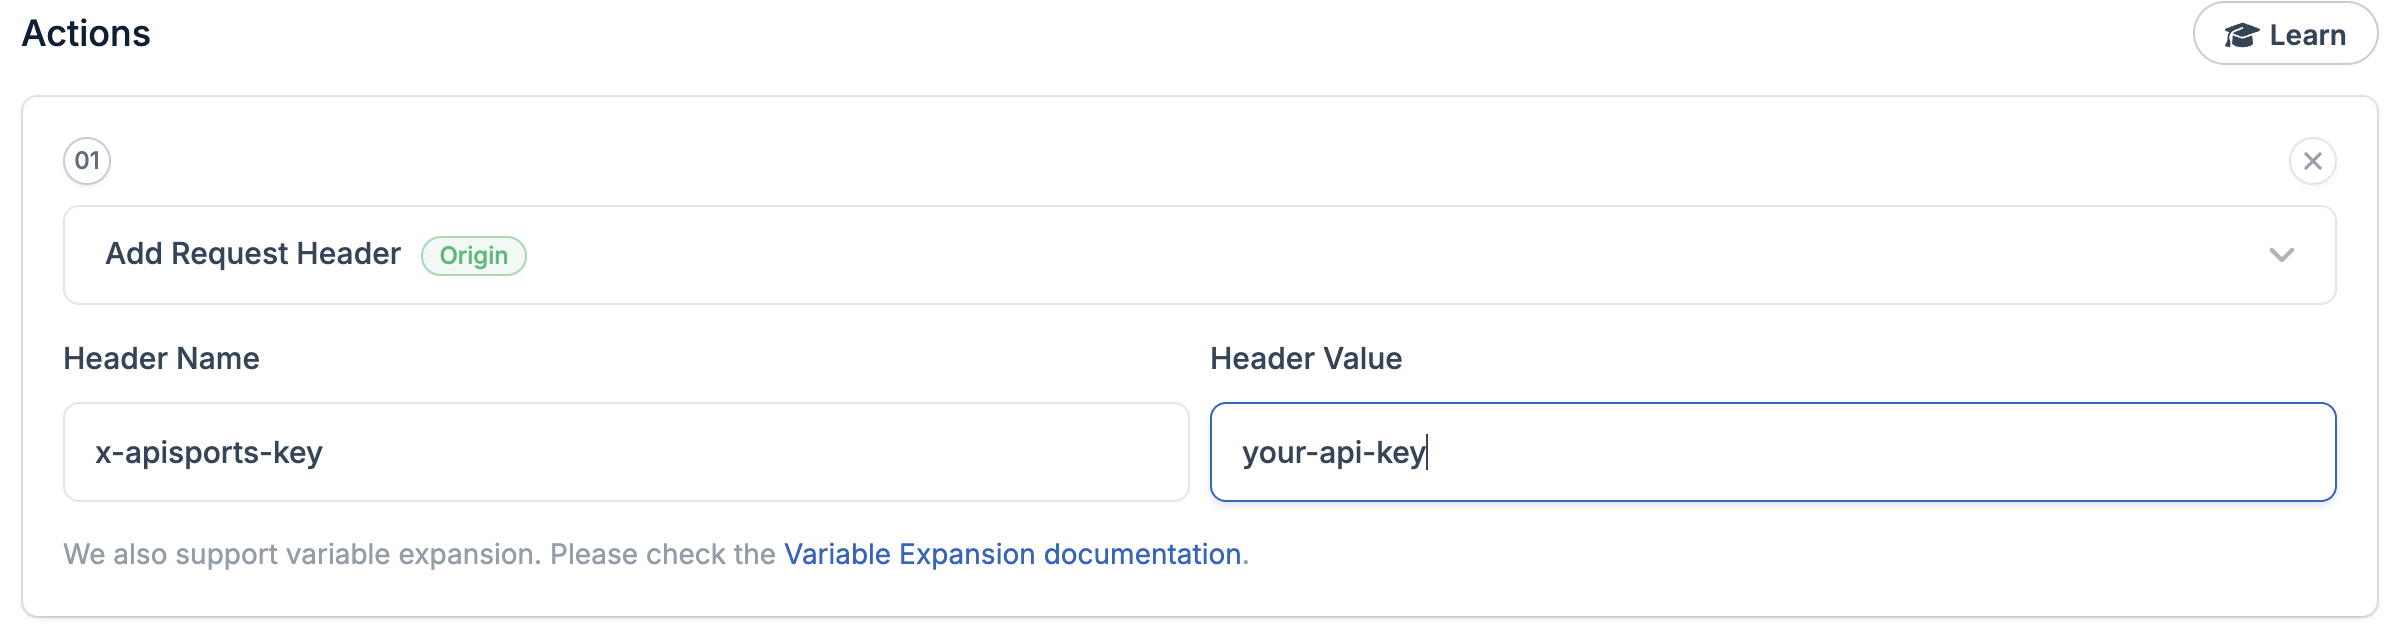
This part of the rule will mean that every time a request is made to your pull zone, your API-KEY will be automatically added to the header before being redirected to our servers.
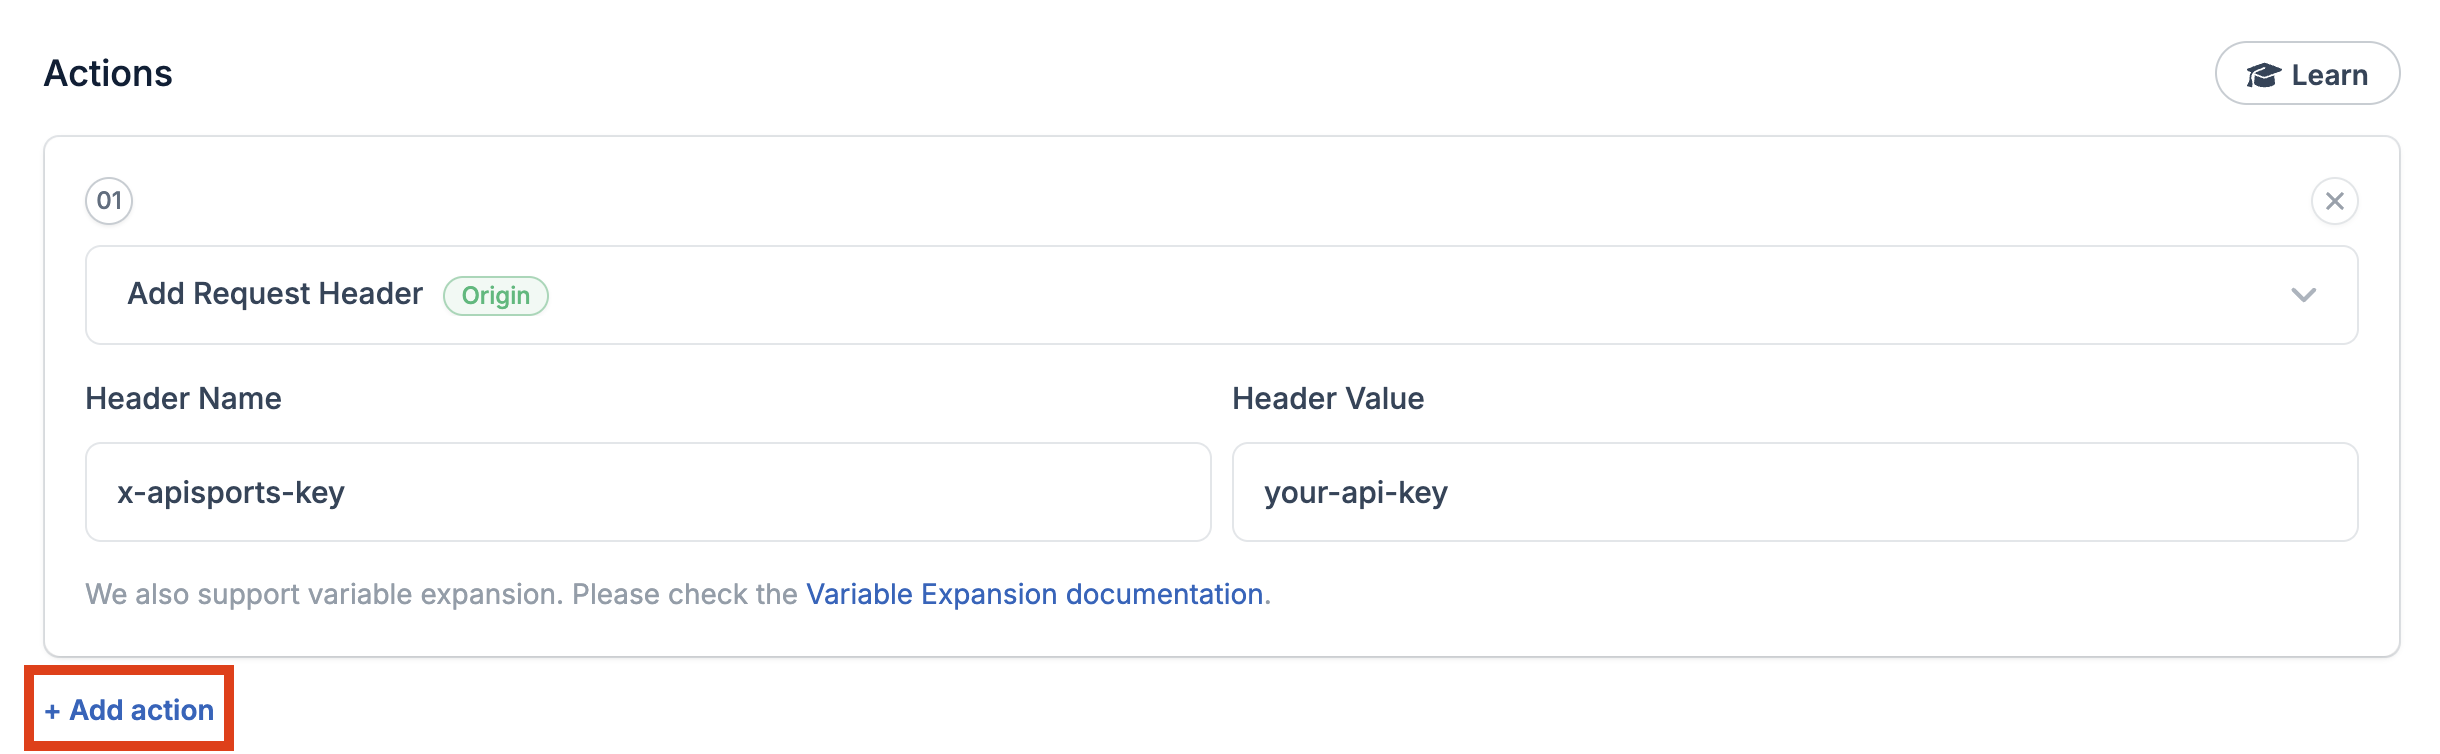
We will now define the cache for each request and how long BunnyCDN should keep it.
Still in the Action section, click on Add Action
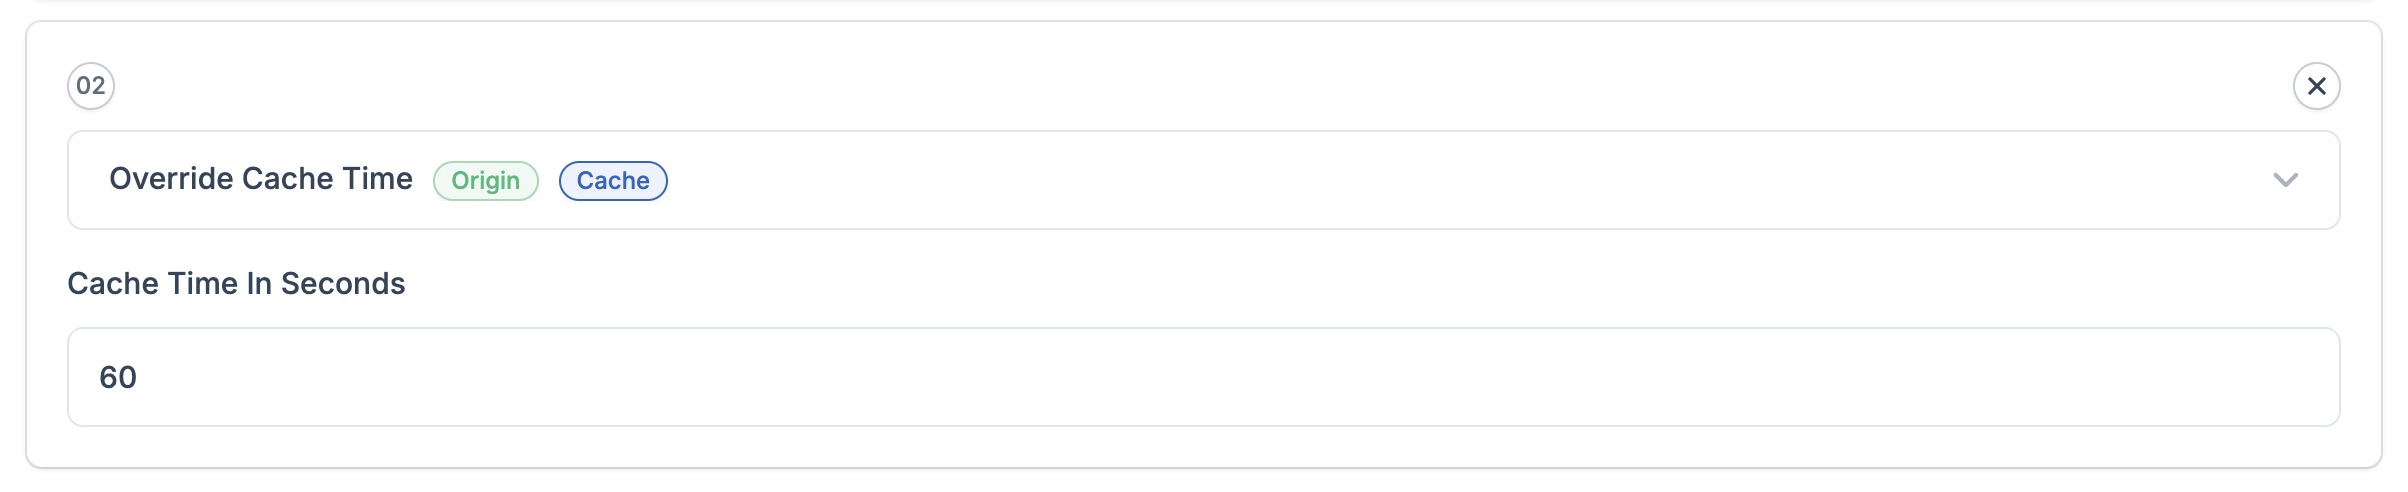
And in the drop-down menu, look for Override Cache Time
You will need to enter a value for the Cache Time In Seconds. It is up to you to decide on the cache value you want, but in this example we will use 60 seconds. This means that if a user triggers a call to the “leagues” endpoint, for example, and the cache is not present, our servers will be called to retrieve the data and BunnyCDN will cache this data for 60 seconds. This means that any other calls made during the next 60 seconds to the same endpoint and with the same parameters will be returned directly by BunnyCDN and not by our servers, which will reduce the number of requests used by your Plan.
You need to add another action, so click Add Action again and this time look for the Override Browser Cache Time option in the drop-down menu.
Then fill the same value as Override Cache Time
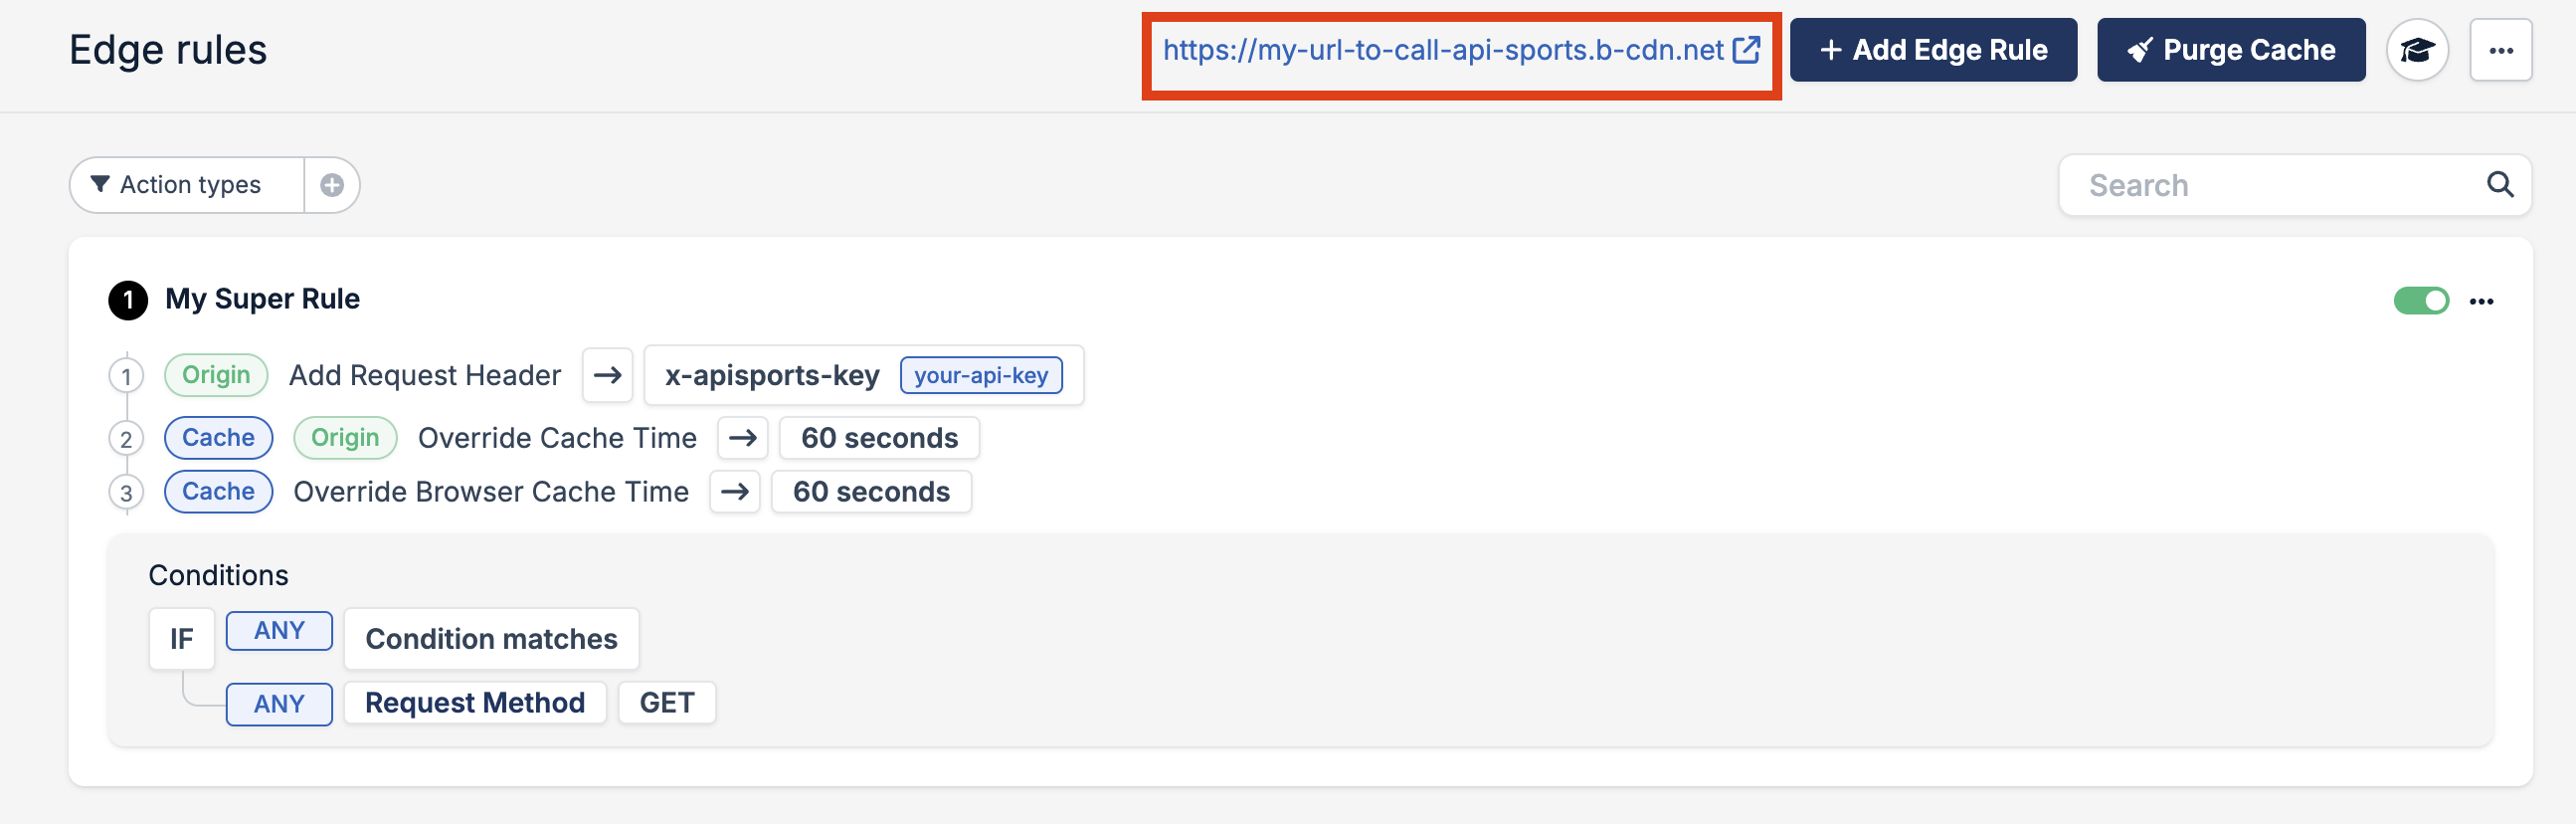
The Action section of your Rule should now look like this :

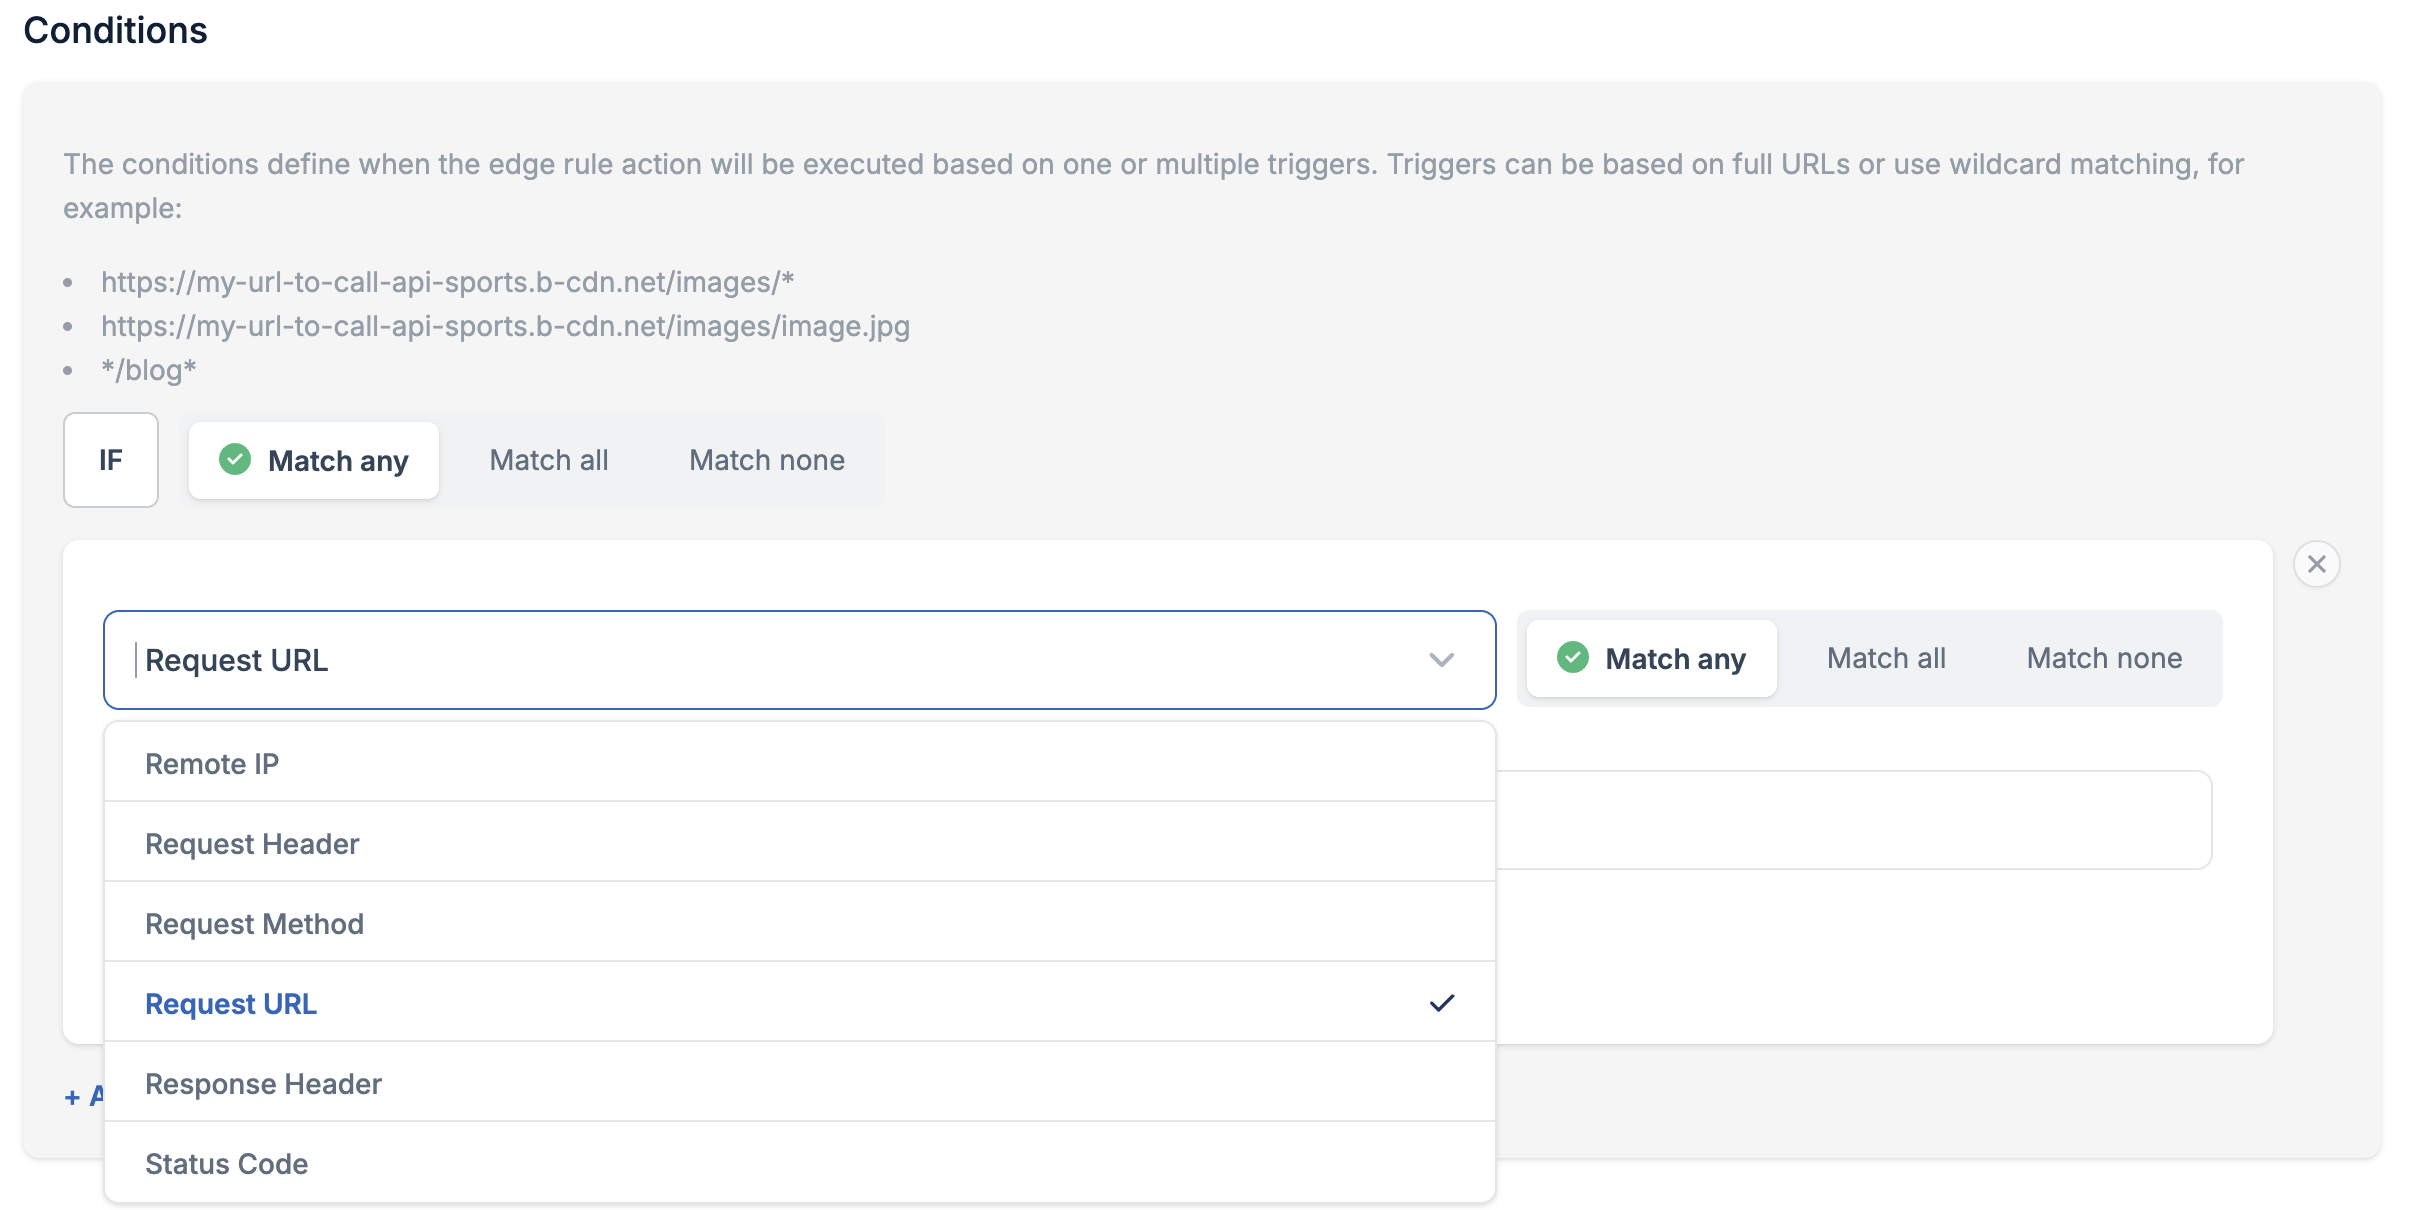
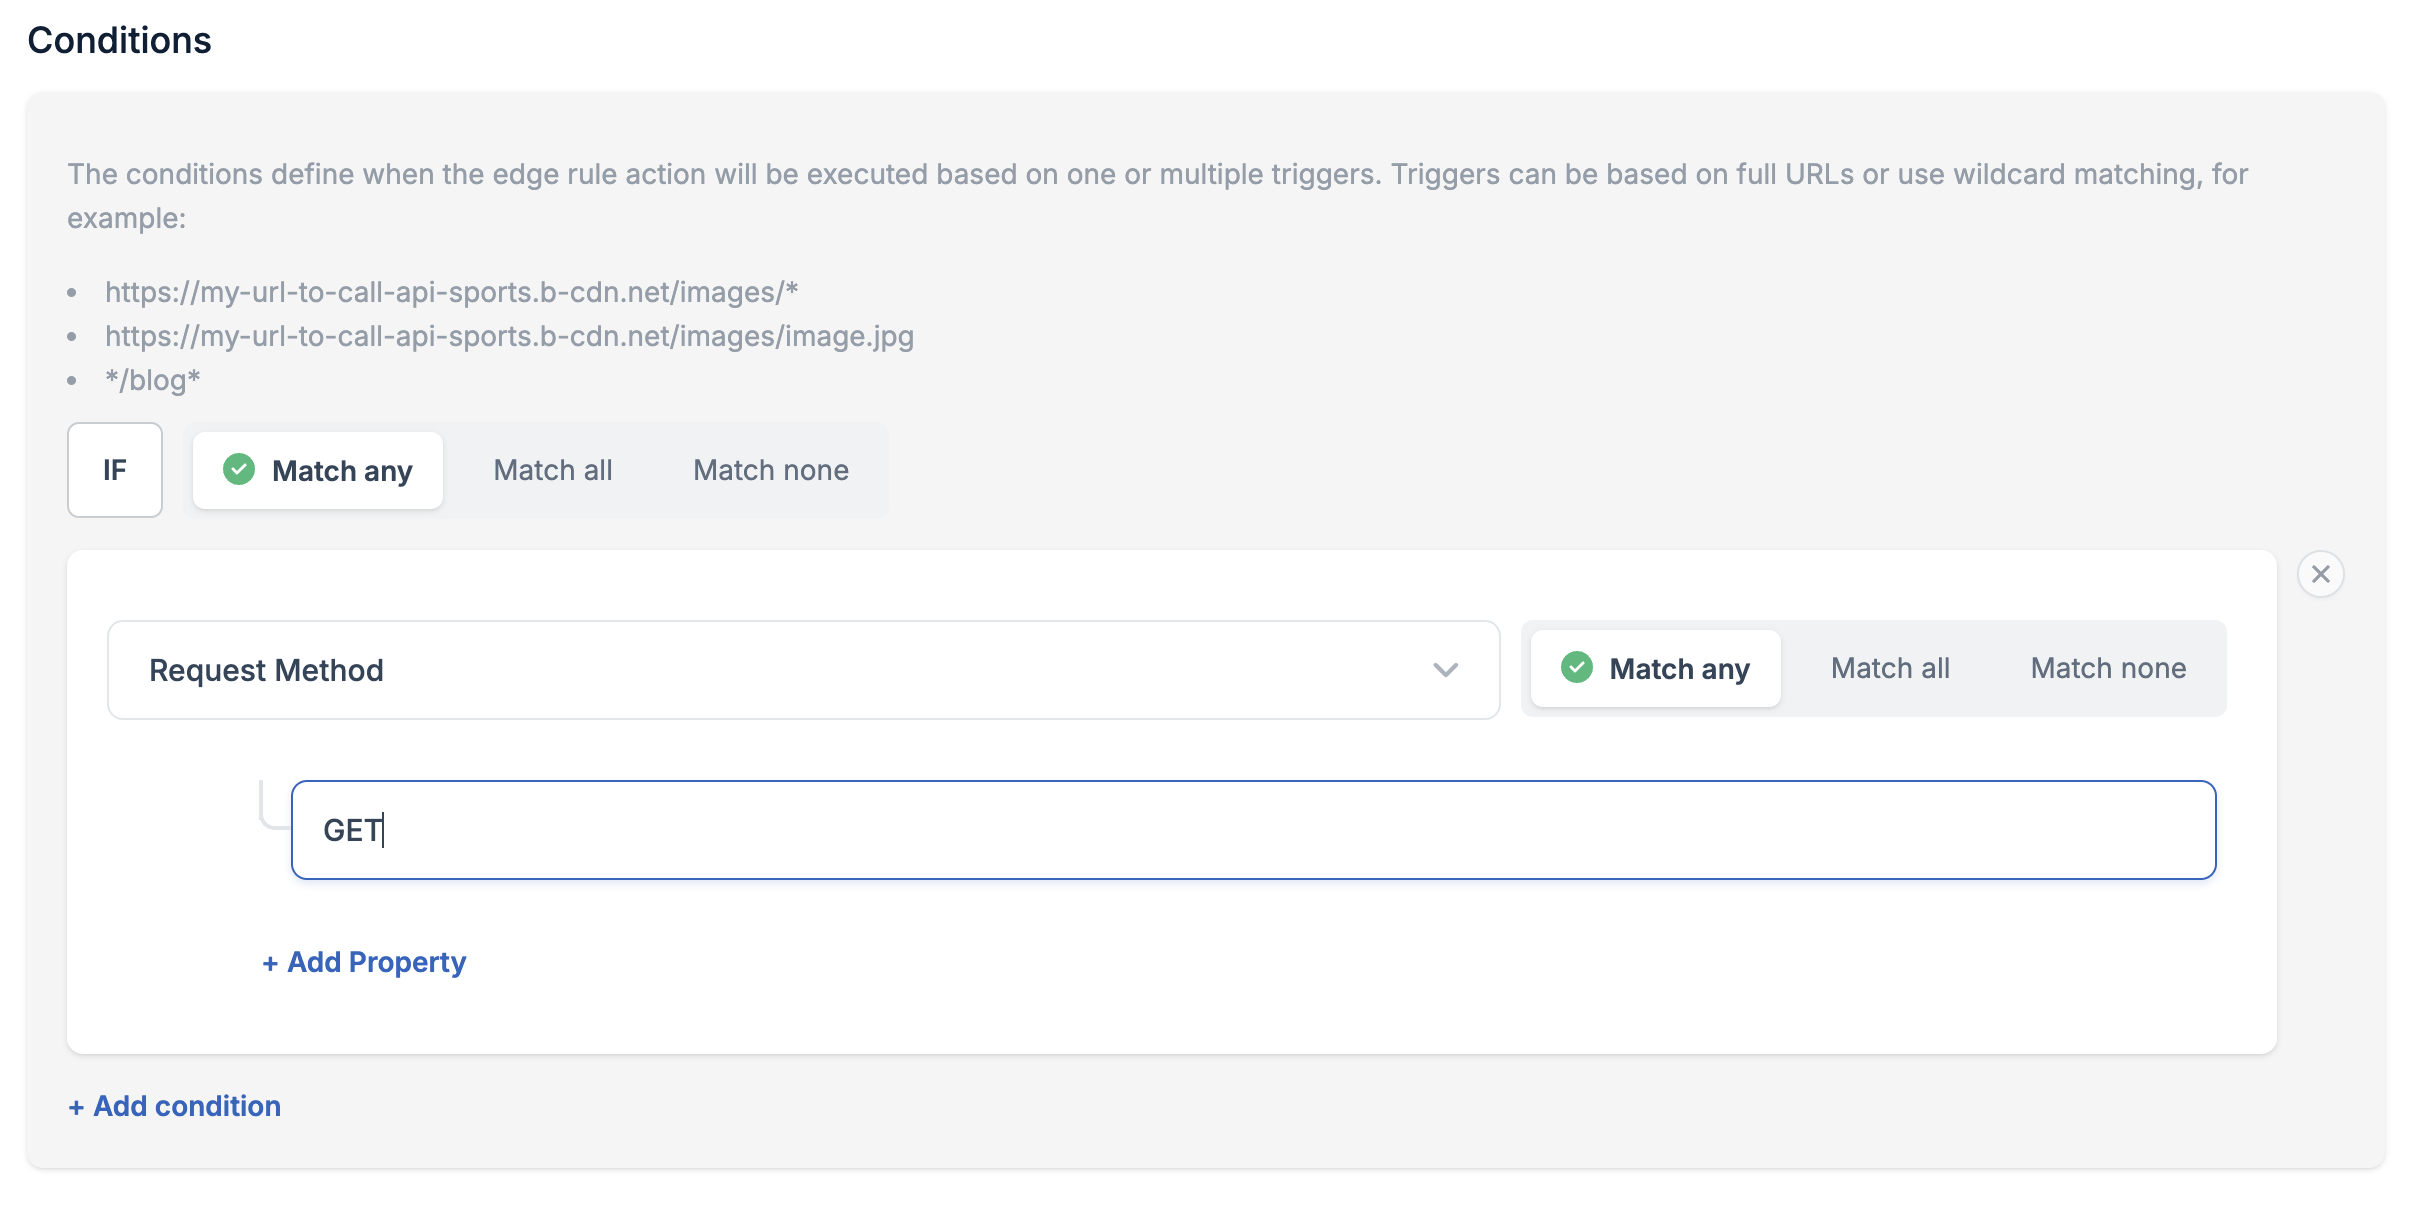
We will now add a condition to trigger this rule. To do this, click on the drop-down menu where it says request url and change the value to Request Method and add the property GET
All you have to do now is click Save Edge Rule.
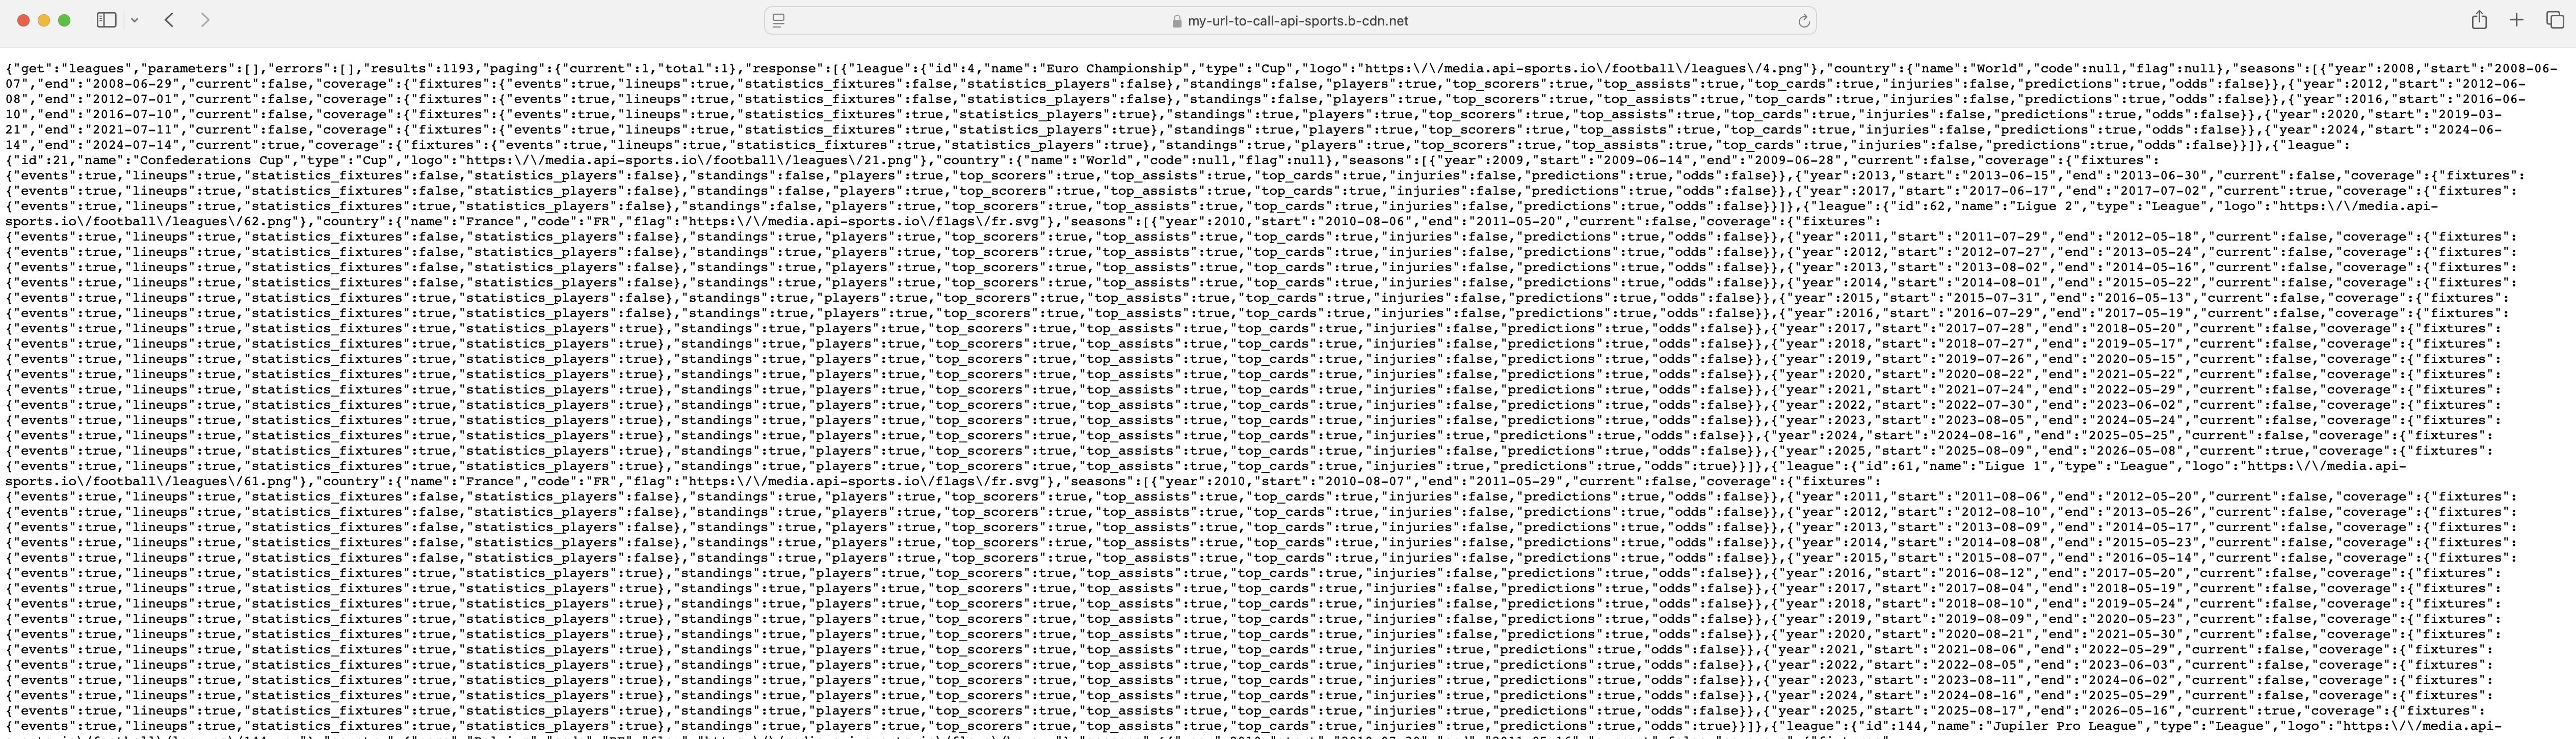
To test it quickly, you can click on the URL generated by bunnyCDN by adding an endpoint to check if the configuration is working.
As a result, I have the API data displayed directly in the browser without having to enter the API-KEY, so everything is fine.
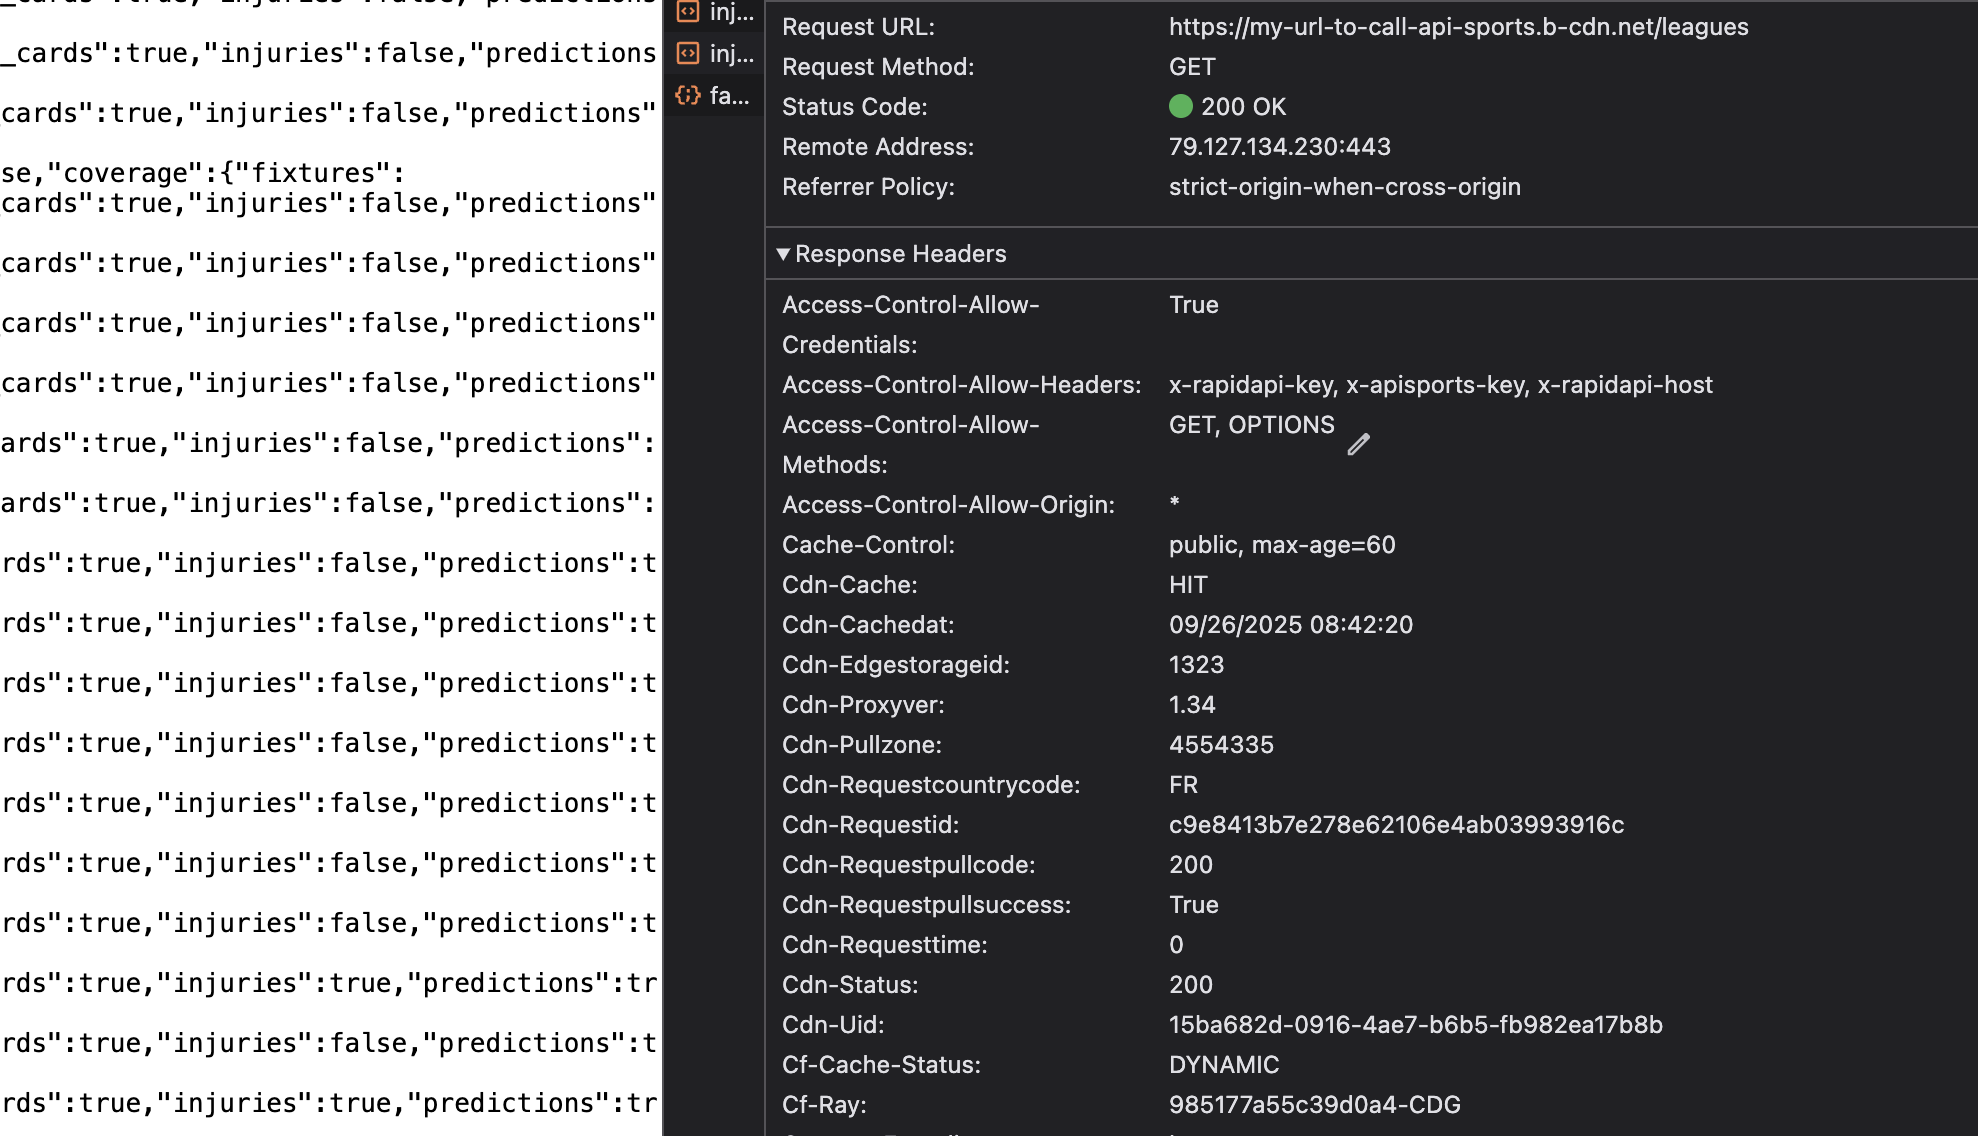
If we check what the response indicates in the browser console
Cdn-Cache : HIT (When it says HIT, it means that BunnyCDN returned the response without calling the API because it found a valid cache for this endpoint.) Cache-Control : public, max-age=60 (This took into account that we wanted the cache to last 60 seconds.)
If you wait 60 seconds and refresh the page, this time you will see Expired in Cdn-Cache because the cache was no longer valid and BunnyCDN had to call our servers to get the updated data.
With this configuration, each endpoint/parameter combination will be cached for 60 seconds, which means that if we take the endpoint “fixtures?date=2025-09-26” as an example, the first request will call the API and generate a cache on the BunnyCDN side, which will be automatically returned for 60 seconds without calling our servers and therefore without counting requests. So, if there are 500 requests made in one minute by the widgets to this specific endpoint, only the first call will be counted against your account and not the others, as they will not have reached our servers. This way, you save 499 calls on your plan.
It is possible to go much further in the configuration of BunnyCDN and define different rules depending on the endpoints, such as
- leagues: 4 hour cache
- fixtures: 30 seconds cache
- seasons: 2 days cache
Now it's time to configure our Widgets with this setup!
The configuration block must therefore be modified accordingly :
- data-key : leave the field blank
- data-football-url : enter the new URL provided by BunnyCDN in our example : https://my-url-to-call-api-sports.b-cdn.net/
<api-sports-widget data-type="config" data-sport="football" data-key="" data-url-football="https://my-url-to-call-api-sports.b-cdn.net/"
    data-refresh="20" data-logo-url="https://media.api-sports.io" data-favorite="true" data-player-trophies="true" data-standings="true"
    data-target-game="#game-content .card-body" data-target-standings="#standings-content" data-theme="grey" data-player-injuries="true"
    data-lang="en" data-show-error="true" data-show-logos="true" data-team-squad="true" data-team-statistics="true" data-tab="games"
    data-target-player="modal" data-target-league="#games-list" data-target-team="#team-content" data-player-statistics="true"
    data-game-tab="statistics">
</api-sports-widget>
With this configuration, no more API-KEY visible in your source code.
Let's now test the configuration.
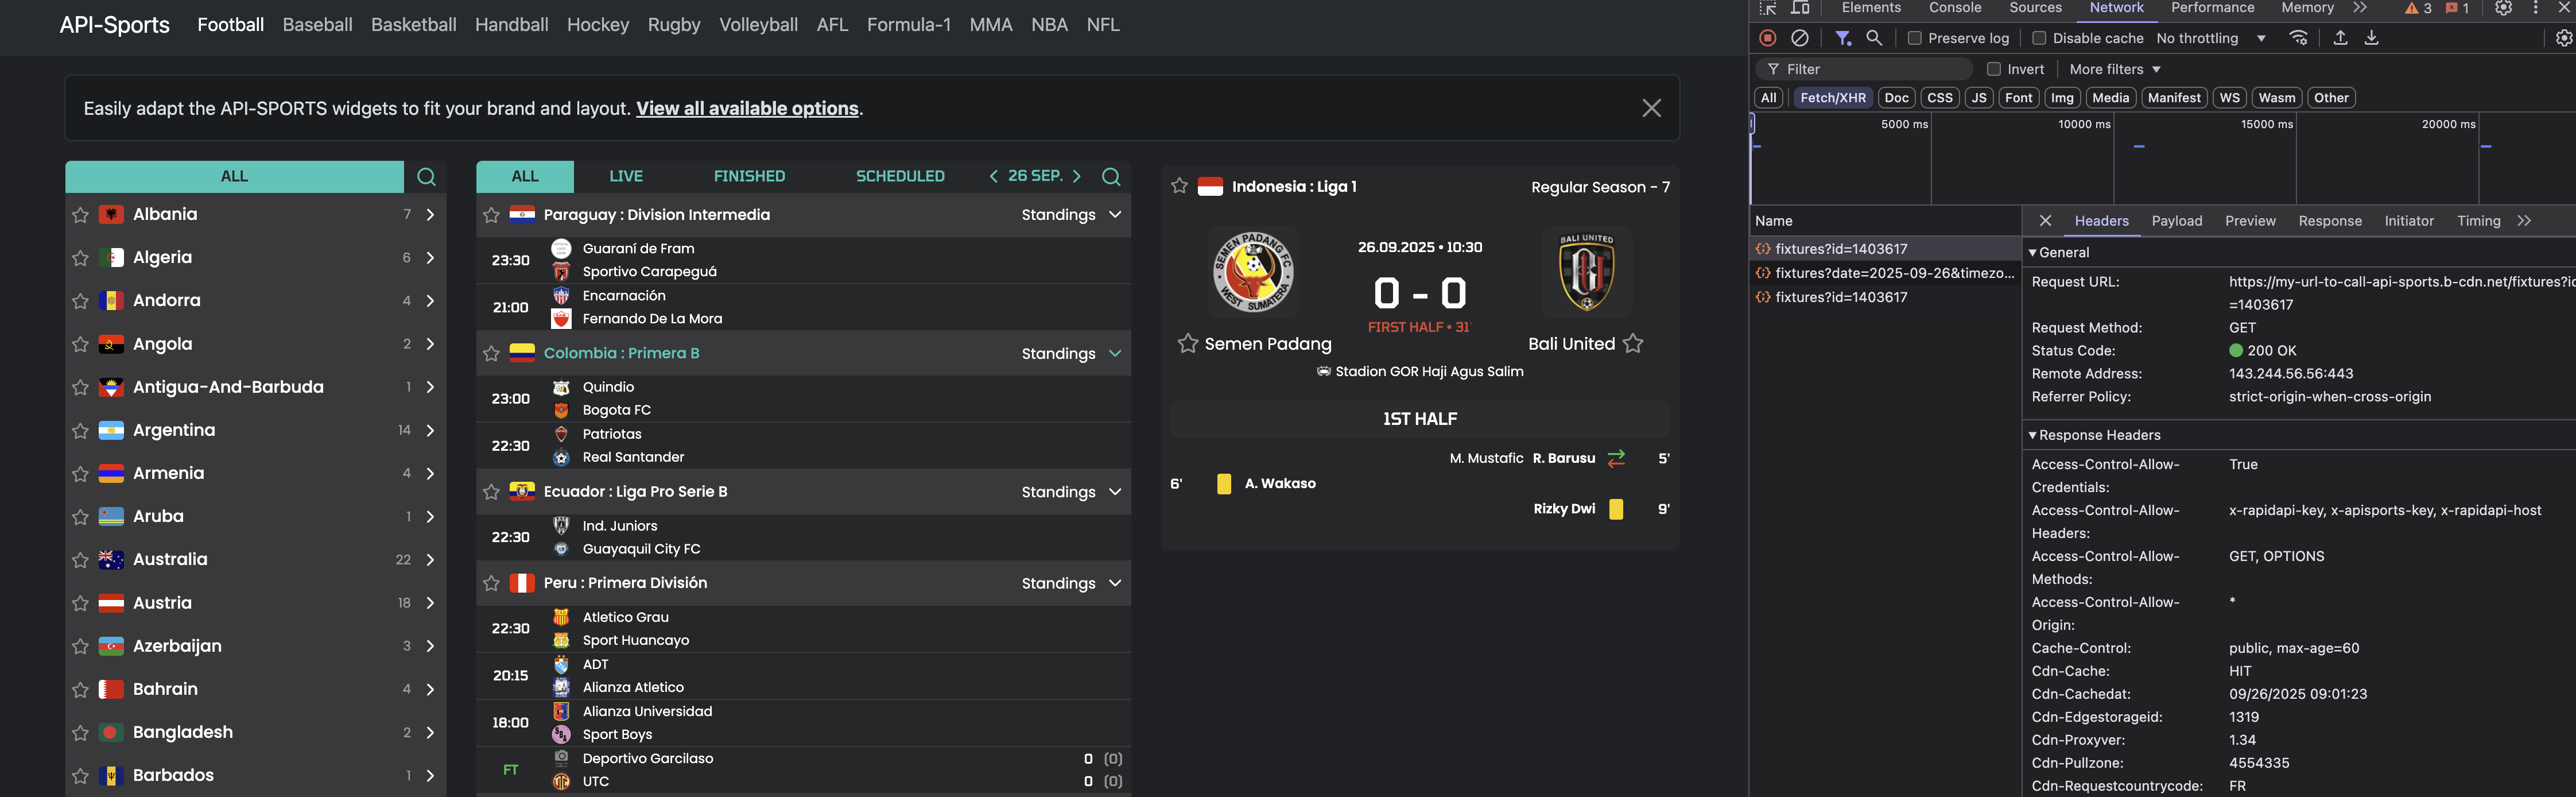
The widgets display correctly, use the new URLs and cache to display the data.
You can also do the same thing for media and the data-logo-url field. There is already a tutorial explaining how to do this here. Simply replace the default value with the new URL, and you will no longer be subject to the rate limit on image display.
Important security note
In our example, your API-KEY is automatically sent in the headers with each request made to your URL, which makes the data accessible directly from the URL. To prevent users from using your URL and exploiting your plan and API data for free, we strongly recommend that you go to the Security section and add your domain(s) in Allowed referrers.
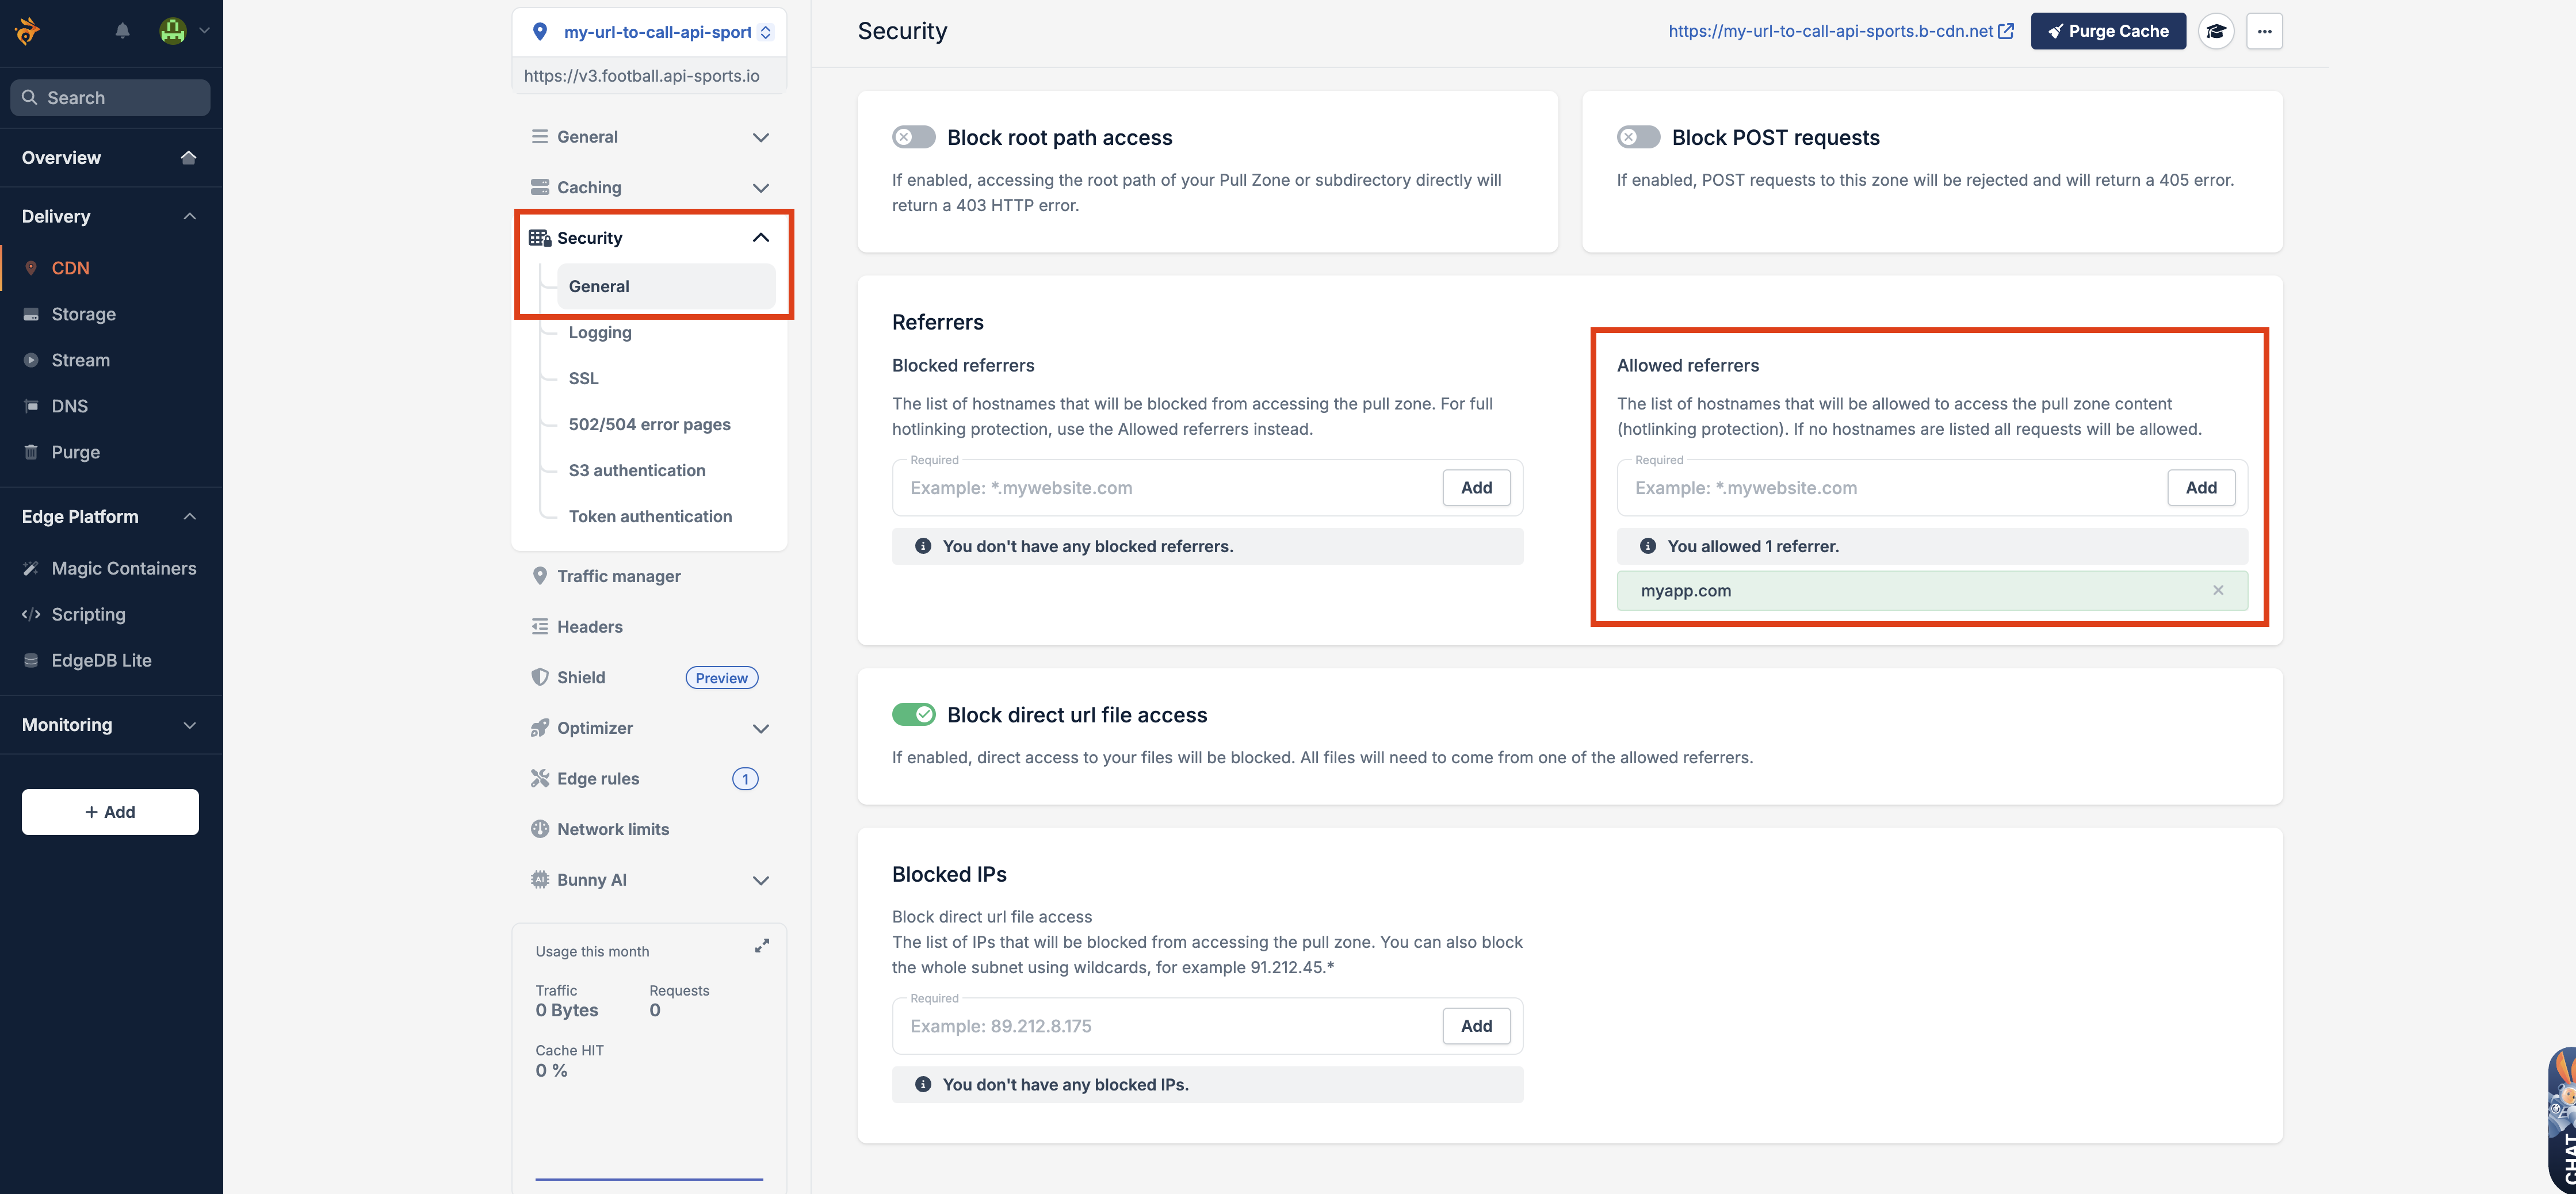
This way, if your domain is myapp.com, only this domain will be able to call your URL, and any other origin will be blocked by a 403 error. Like this
