 API-FOOTBALL
In this tutorial, I will guide you through the process of building a dynamic NFL live scores WordPress website by integrating API data import from api-football.com. You will learn how to fetch and display real-time NFL scores, providing your audience with up-to-date information on their favorite teams and players.
Table of Contents
- Hosting
- WordPress Plugins
- Data Provider – api-football.com
- API Import Setup
- API Leagues
- Schedule Automatic Updates
- Live Data
- Install WordPress Theme
- Test Your Website
- What Next
- Useful Links
1) Hosting :
If you’re planning to create a website, one of the most important decisions you’ll need to make is choosing the right hosting service.
In my experience, using a control panel like RunCloud paired with a reliable VPS server such as Vultr, Digital Ocean, or UpCloud is an excellent option. Of course, it’s much better to set up and manage your server without any control panel. However, it requires advanced technical skills.
It’s important to note that RunCloud is not a hosting service but rather a control panel. You’ll need to purchase a VPS separately and then connect it to RunCloud. However, RunCloud offers excellent tutorials that guide users through the process of installing WordPress, making it an ideal choice for those who are new to website creation or want a hassle-free experience.
There are also PAAS-type hosting solutions that take care of all the management of the resources you rent on their platform to run your website. These solutions are ideal if you don't want to deal with server management, maintenance and updates. Among the popular ones where Wordpress is supported you have Heroku, Scalingo, Clever-cloud, Plateform.sh and many more.
From this list, the simplest is Scalingo, as it offers a one click install option to install Wordpress directly. Tutoriel here : https://doc.scalingo.com/platform/getting-started/getting-started-with-wordpress
2) WordPress Plugins :
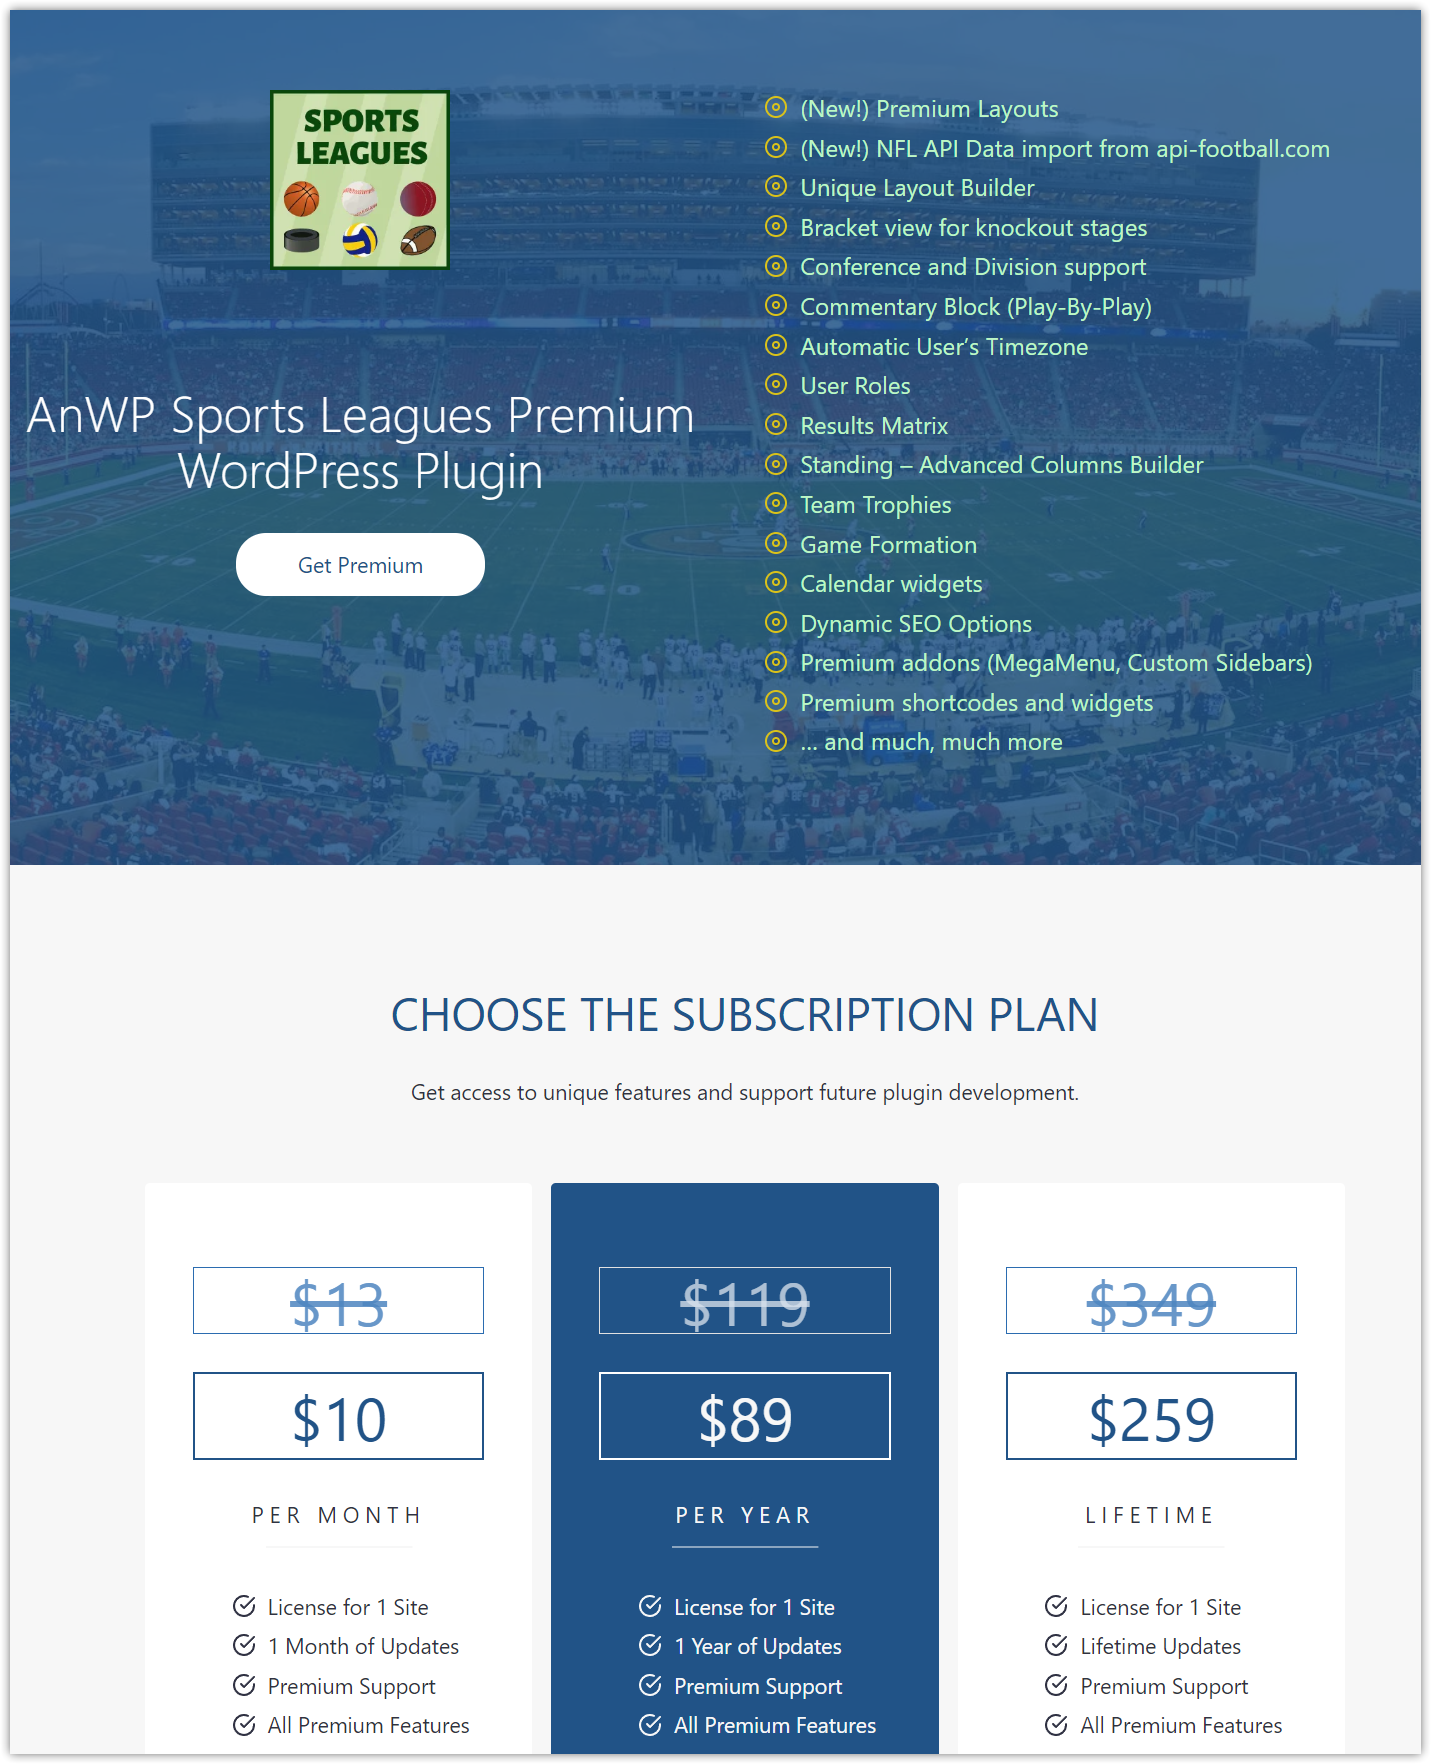
Install the AnWP Sports Leagues plugin from the WordPress repository.
Then, purchase the premium version using the appropriate subscription. After the purchase, you will receive a downloadable link via email. Download and install it. Use the license key from the email to activate it.
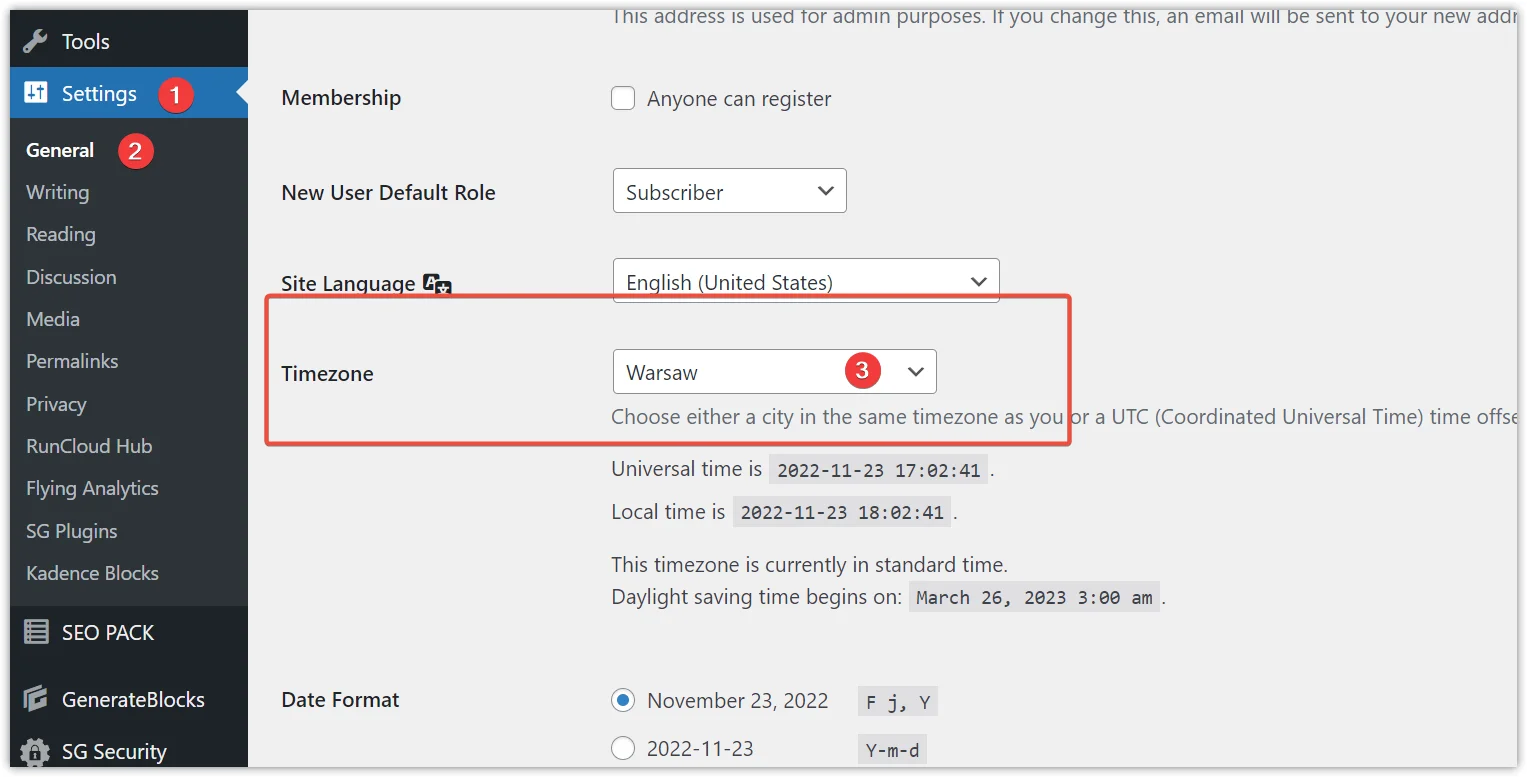
Before importing data from the API, ensure that the website timezone is set correctly. To do so, navigate to Settings -> General and choose your timezone from the dropdown menu.
3) Data Provider – api-football.com :
You will need an API key to import data. Follow these steps:
- Go to the API-football Dashboard.
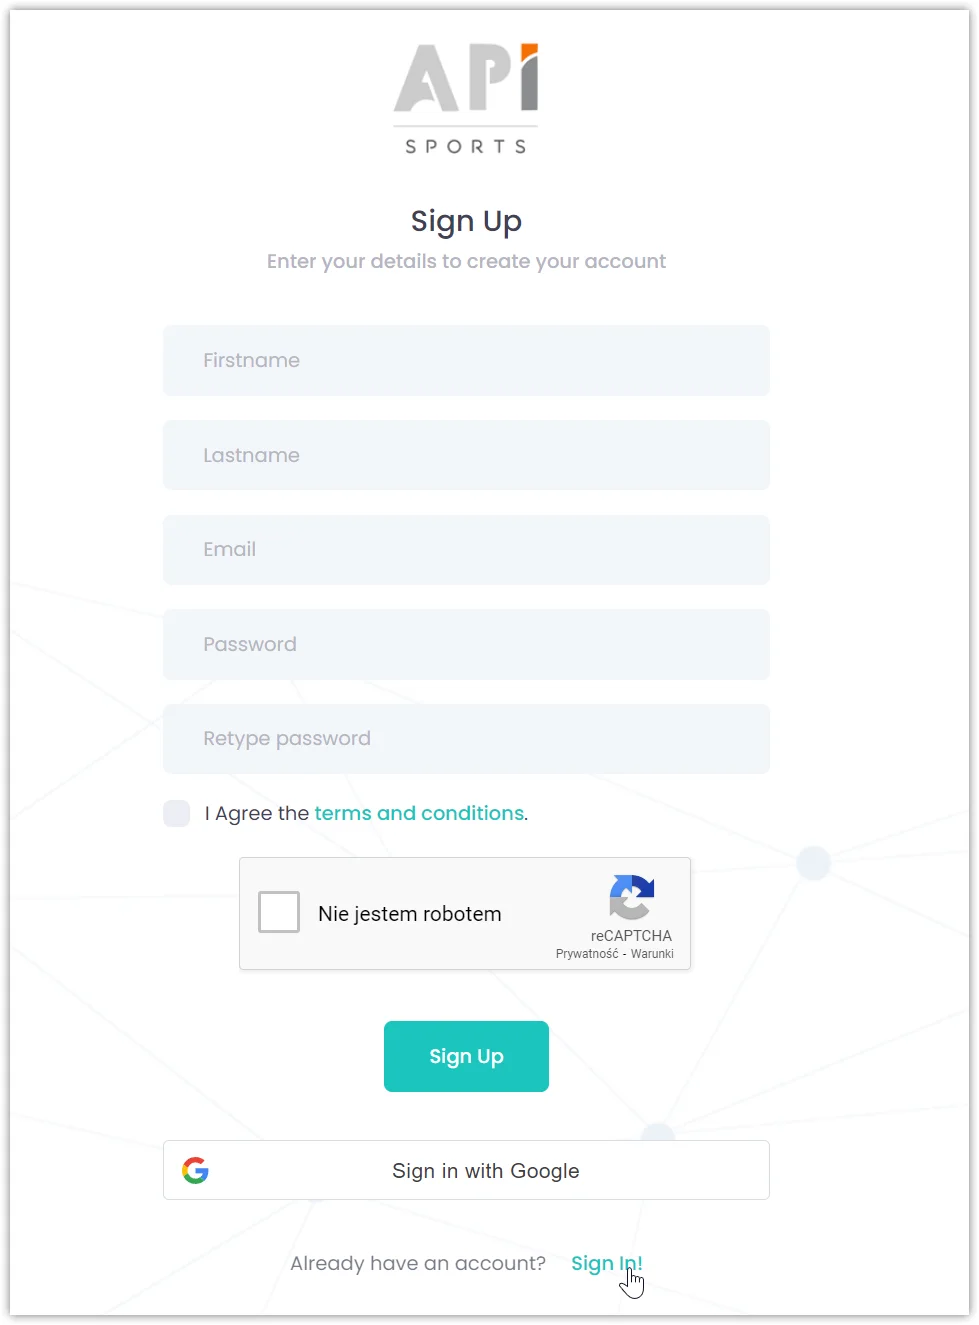
- Sign up if you don’t have an account, or sign in if you already have one.
- Once signed in, click
Subscriptionand selectAPI NFL. - Choose a PRO plan, which should be sufficient for a start.

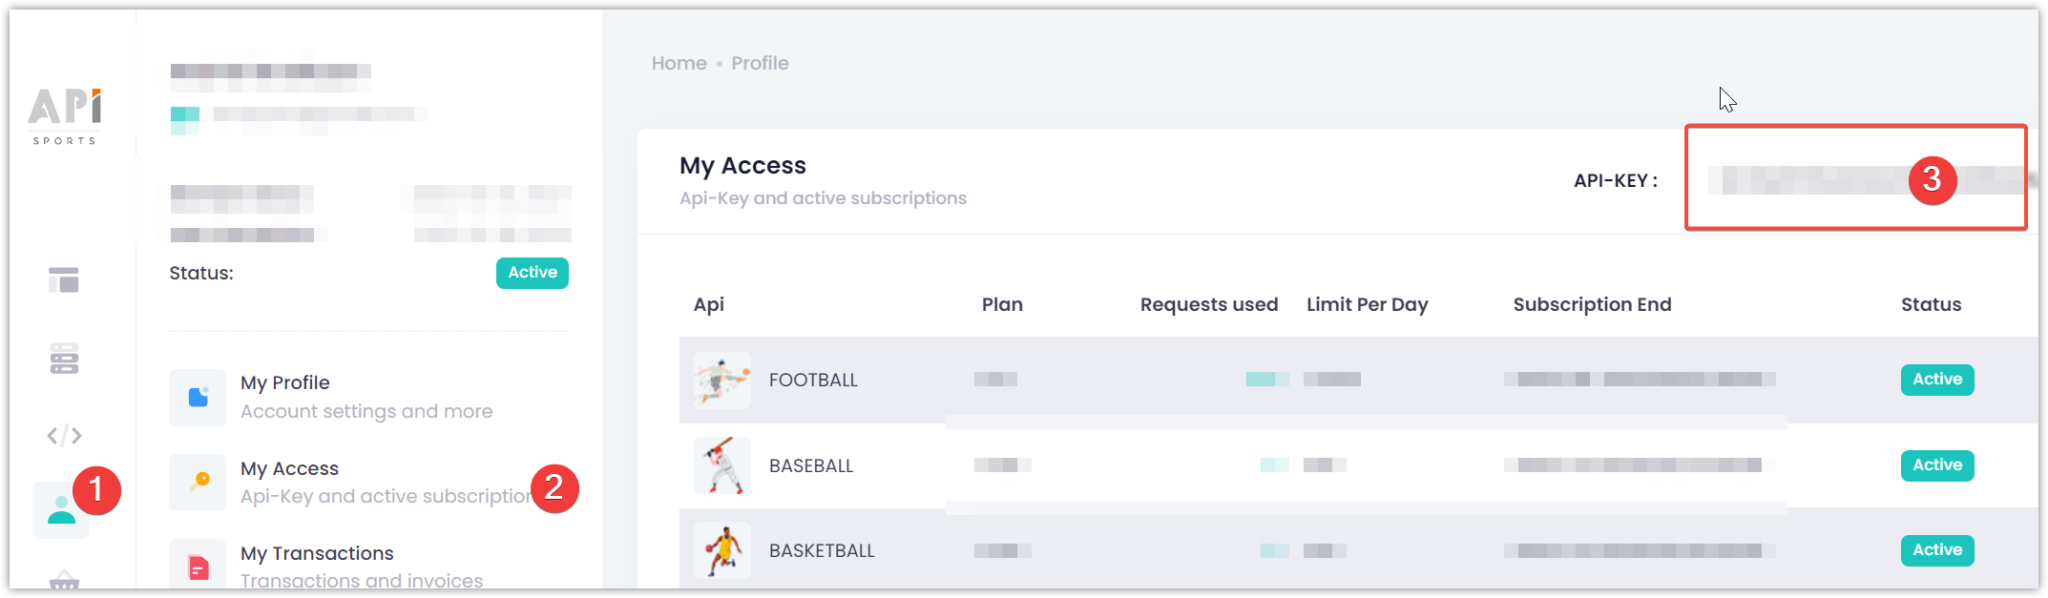
In the API Dashboard, navigate to Account (1) -> My Access (2) and copy your API Key (3).
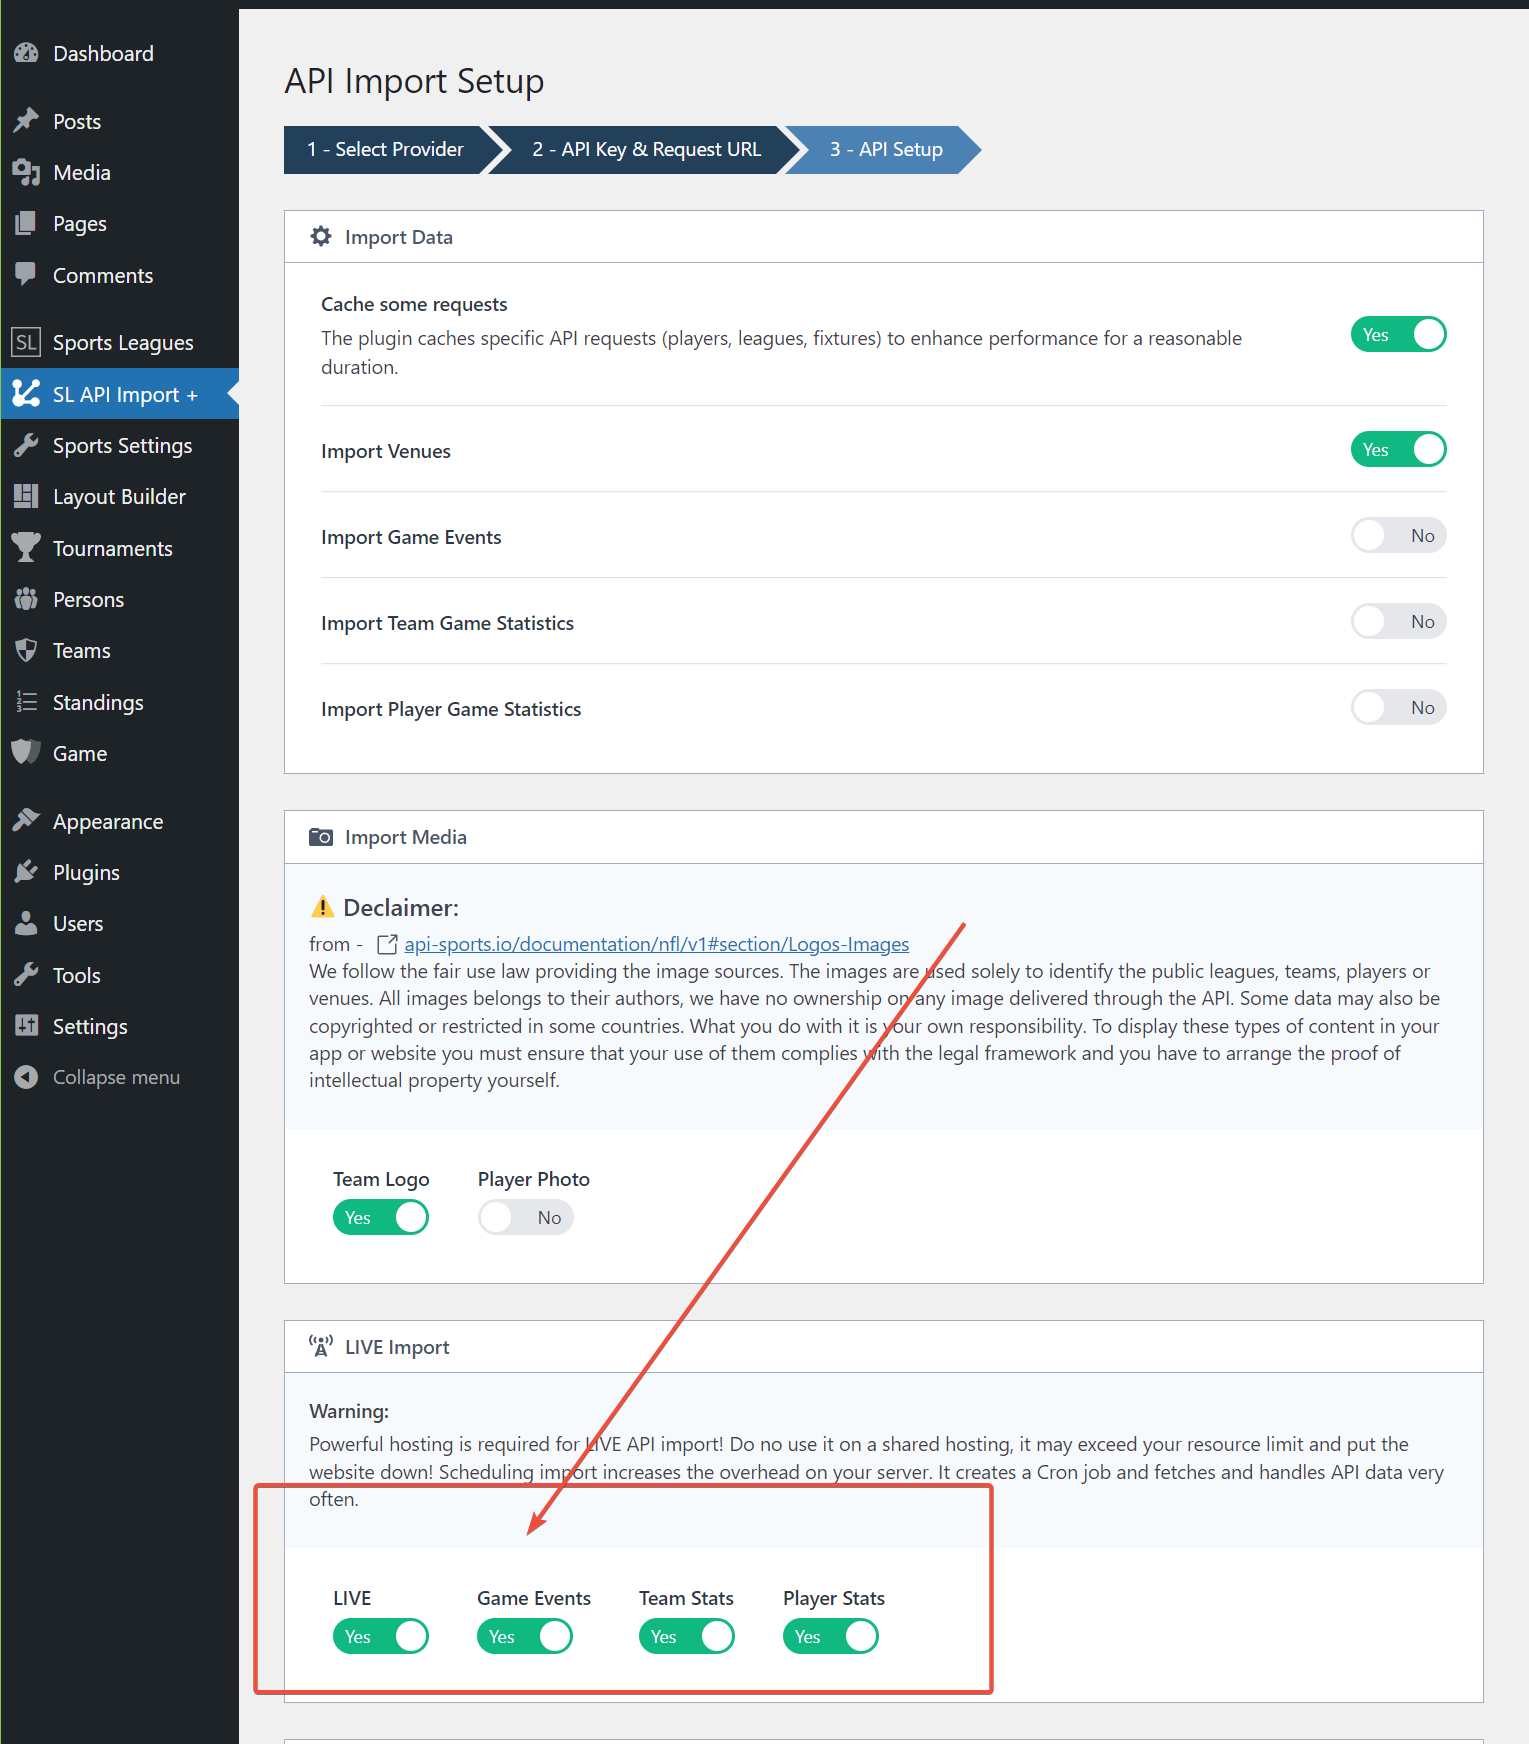
4) API Import Setup :
I assume you have successfully installed all the required plugins, copied an API key, and are ready to proceed with the following steps.
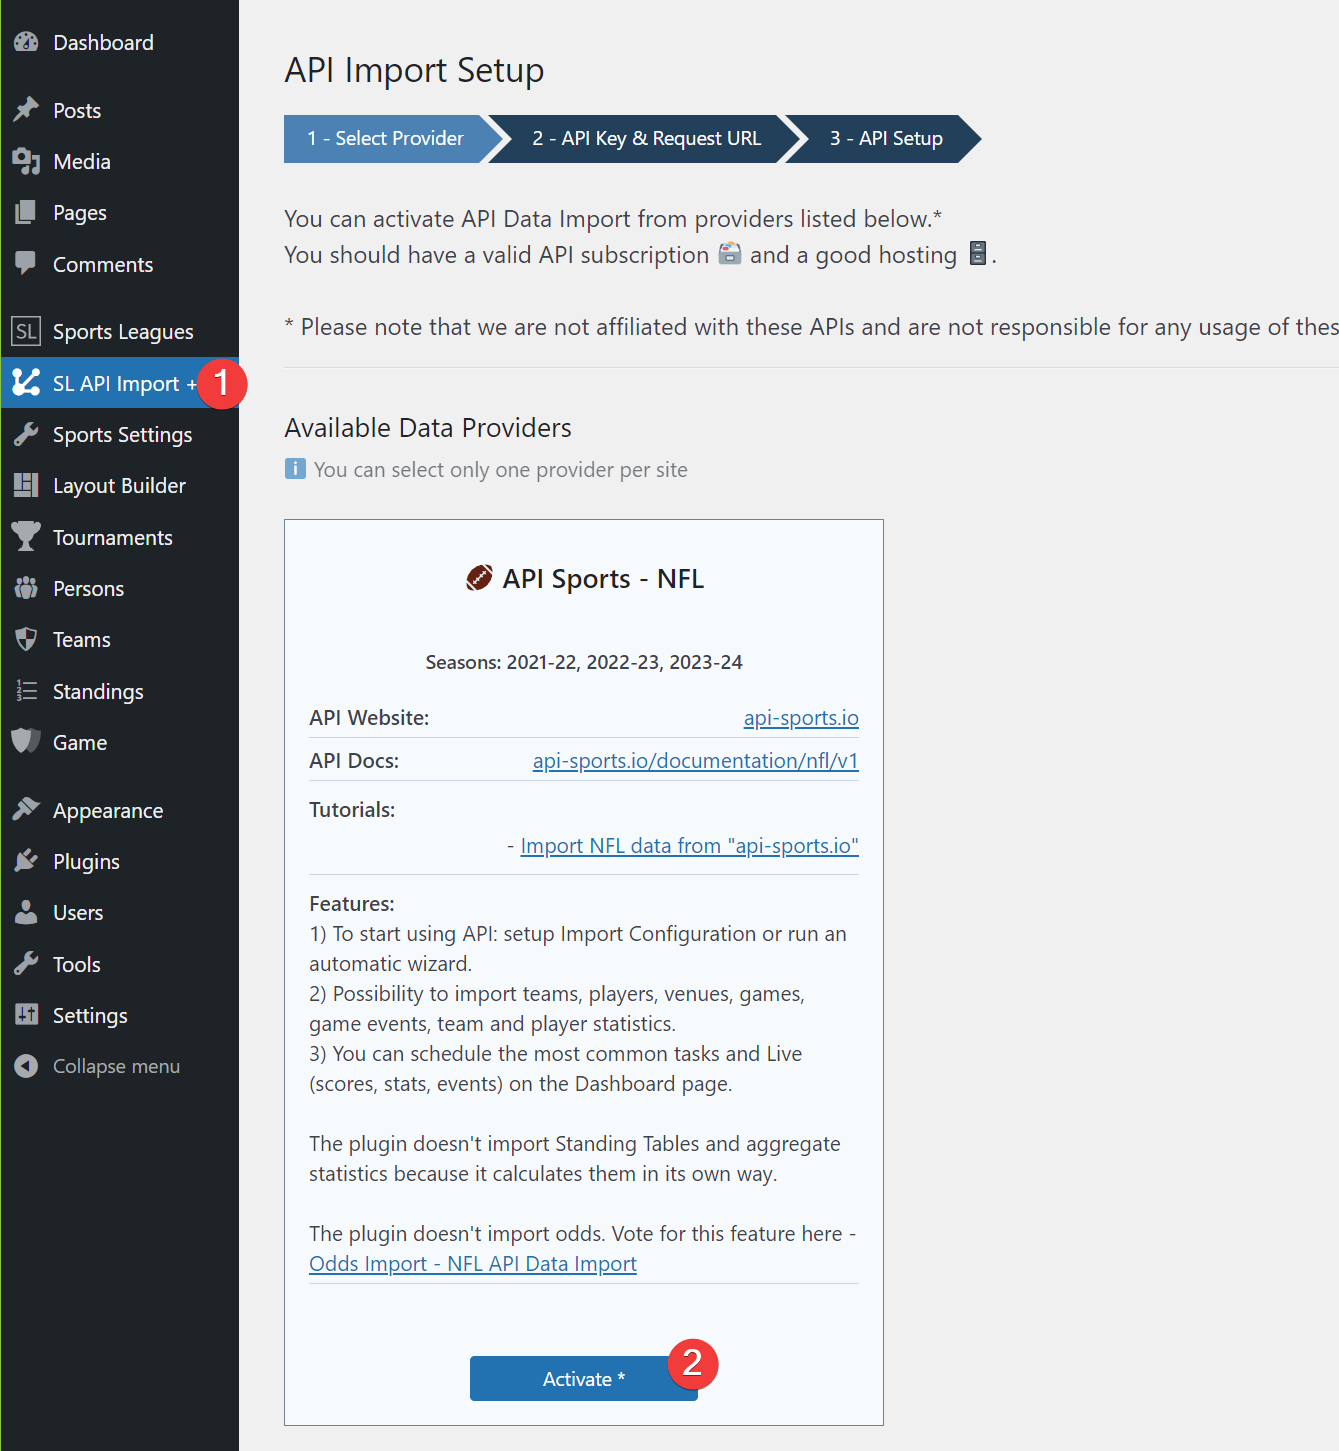
In your WordPress admin, go to the SL API Import +(1) and click Activate(2) under API Sports – NFL (see screenshot).
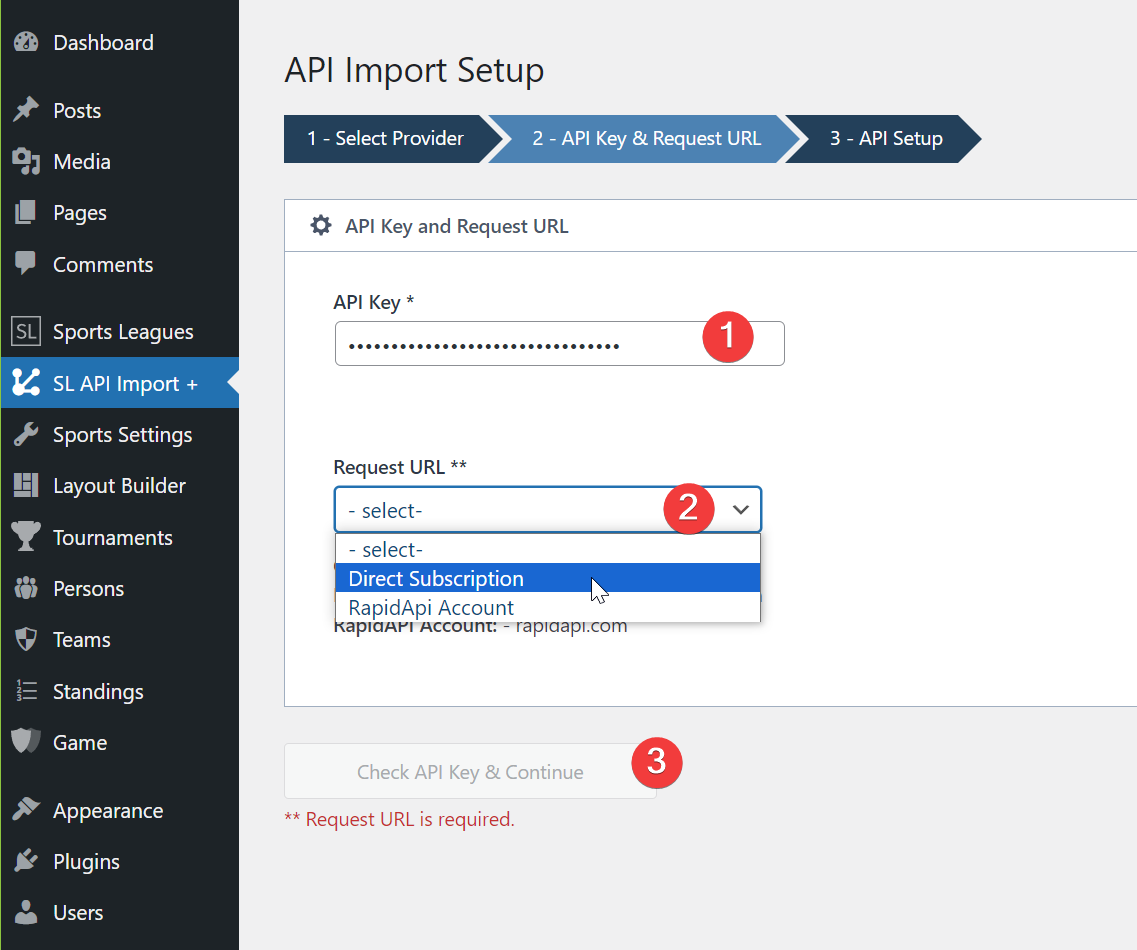
In Step 2, paste your API Key (copied from the API Dashboard) and select your Request URL (Direct Subscription in our case).
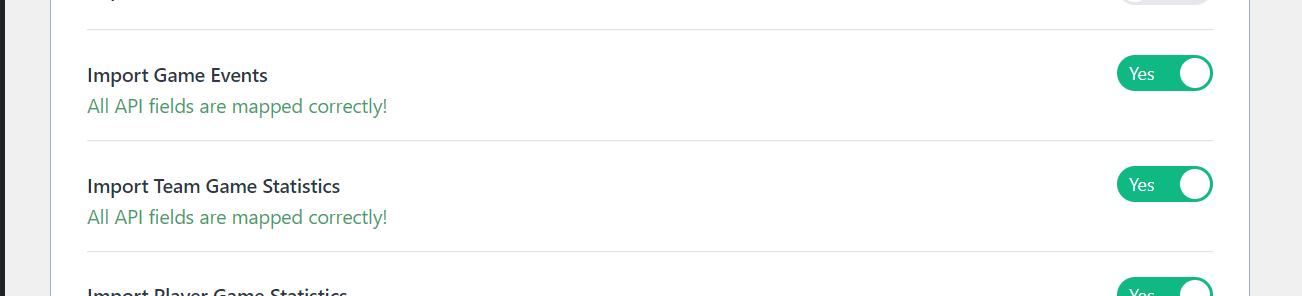
Choose what data you want to import and click the Save button.
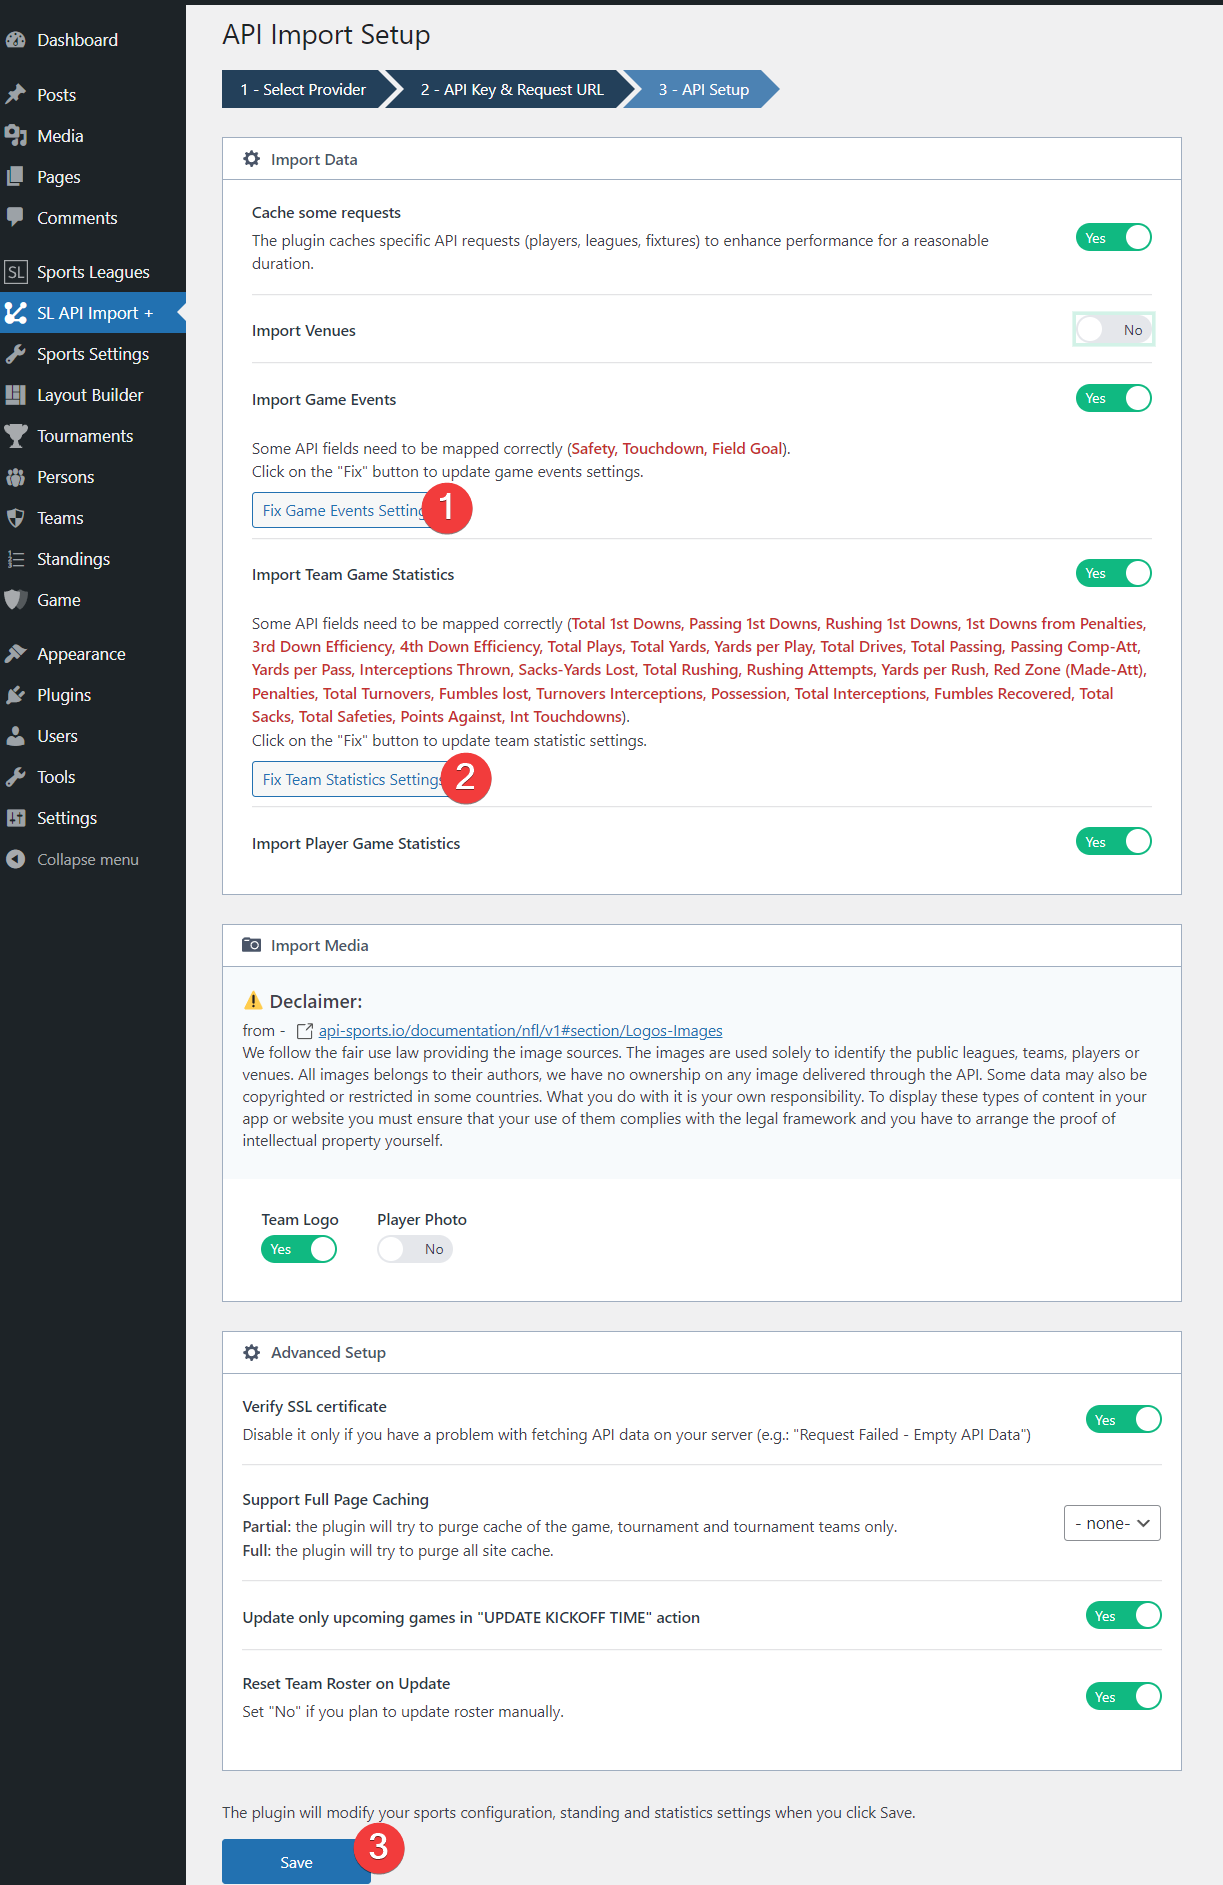
If you plan to import Game Events or Statistics, click the fix button to update the plugin settings.
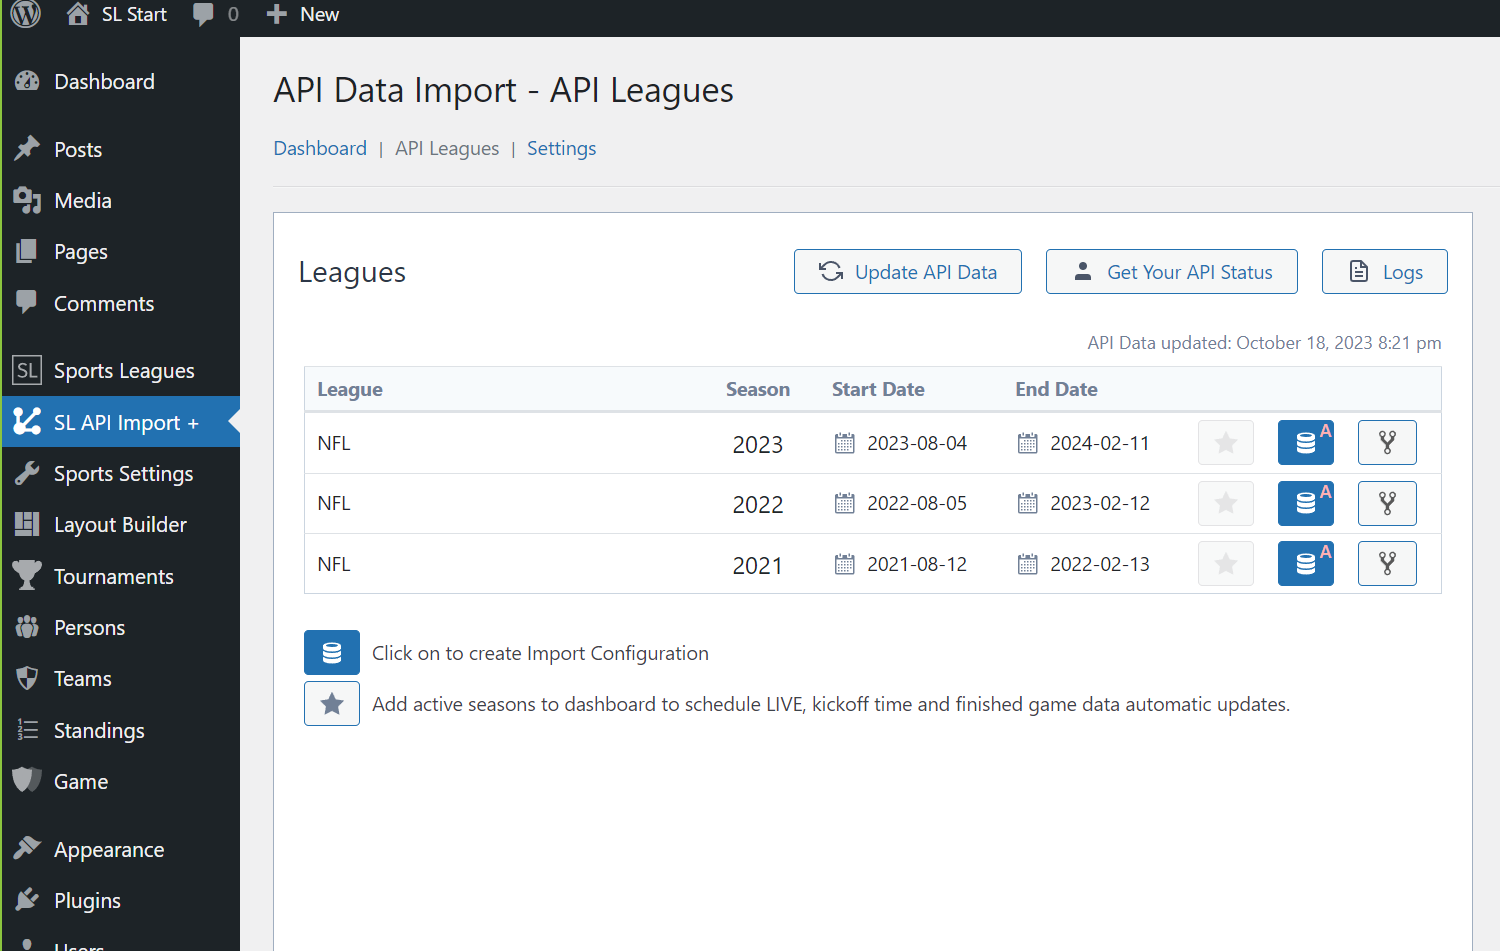
5) API Leagues :
As of now, the plugin does not support all the data provided by the API. Sports Leagues only allows you to import data for the last three NFL seasons automatically. If you intend to fetch data for the earlier seasons or want to import NCAA data, we recommend that you create a feature request (idea) in the Support Forum. Our team will take note of your request and try to implement it in future updates.
Once you are redirected to the API Leagues page, it indicates that you have successfully set up the necessary configurations to begin importing data from the API. Congratulations on reaching this stage!
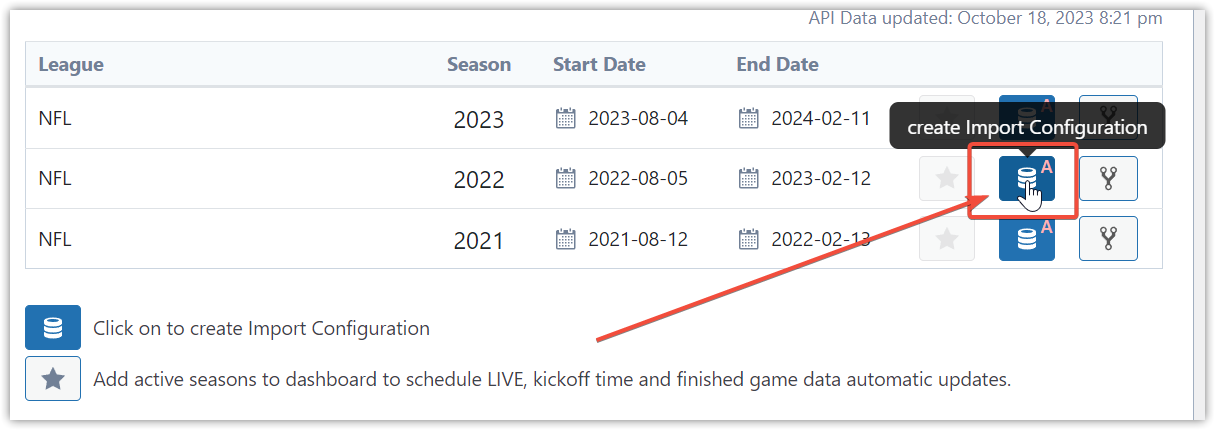
Click on the Database icon to create an import configuration.
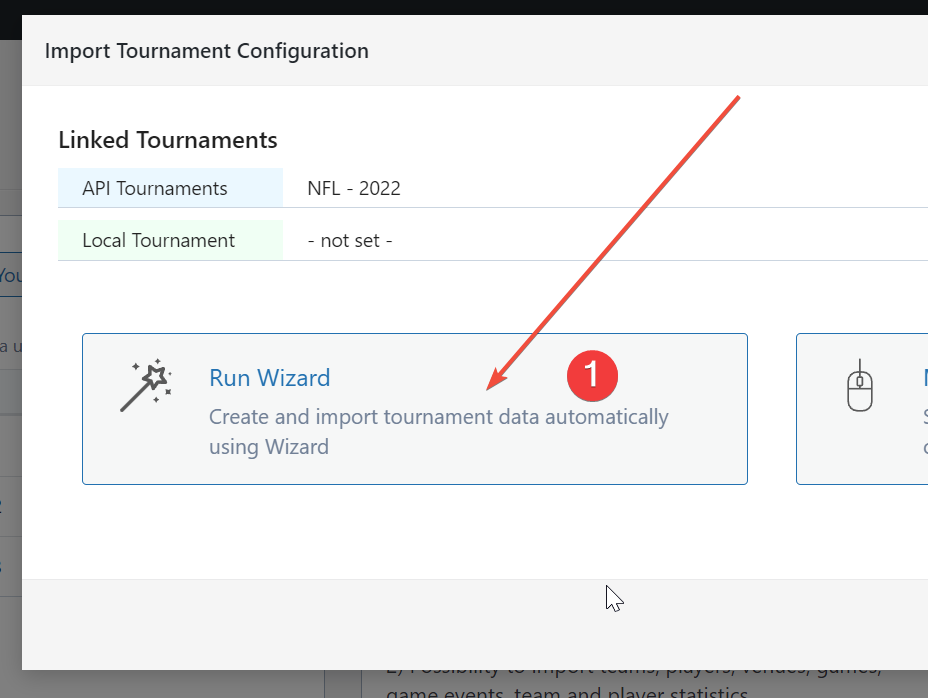
Choose Run Wizard on the next step.
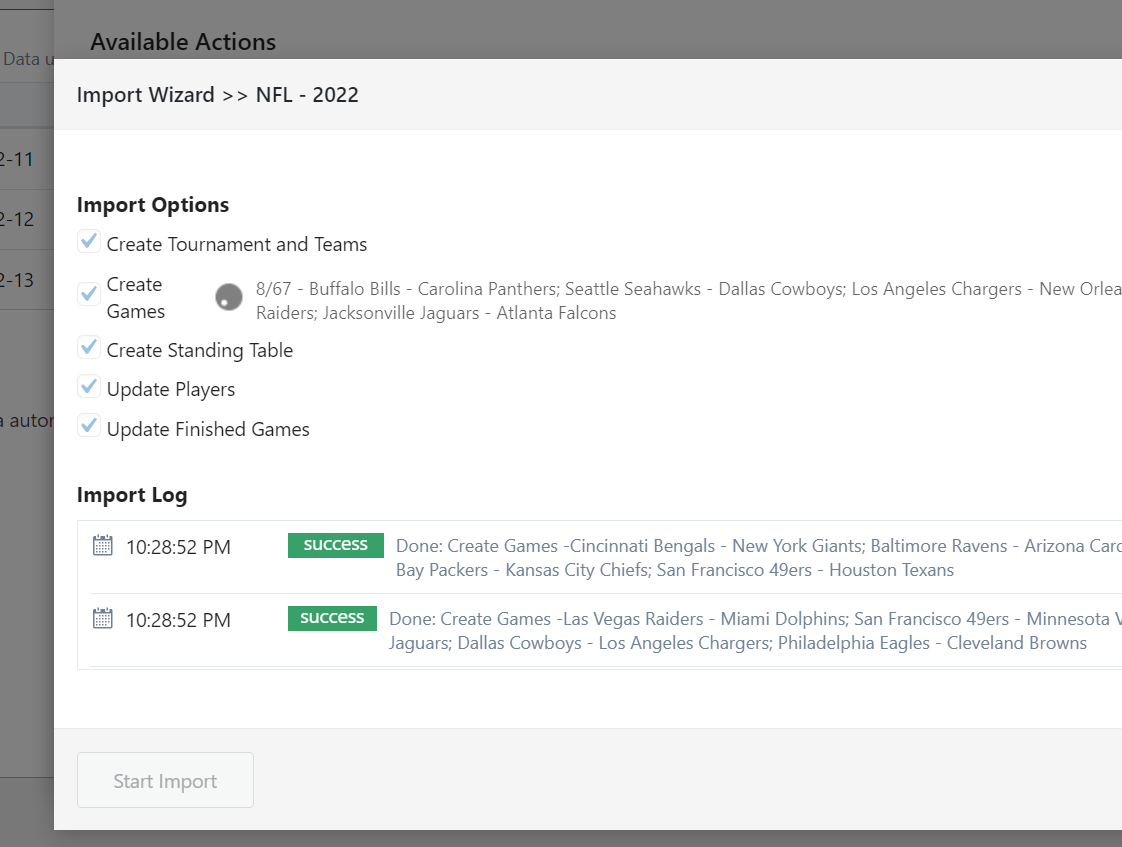
Then run Start Import.
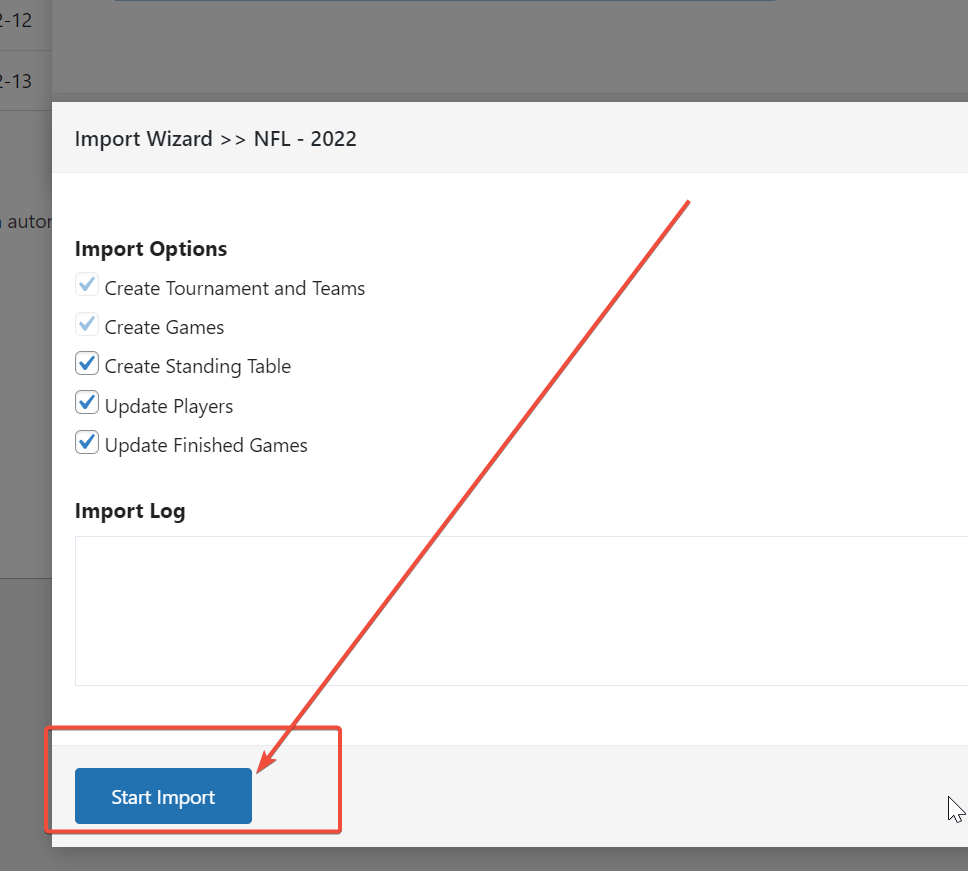
It will take some time. Do not close this window!
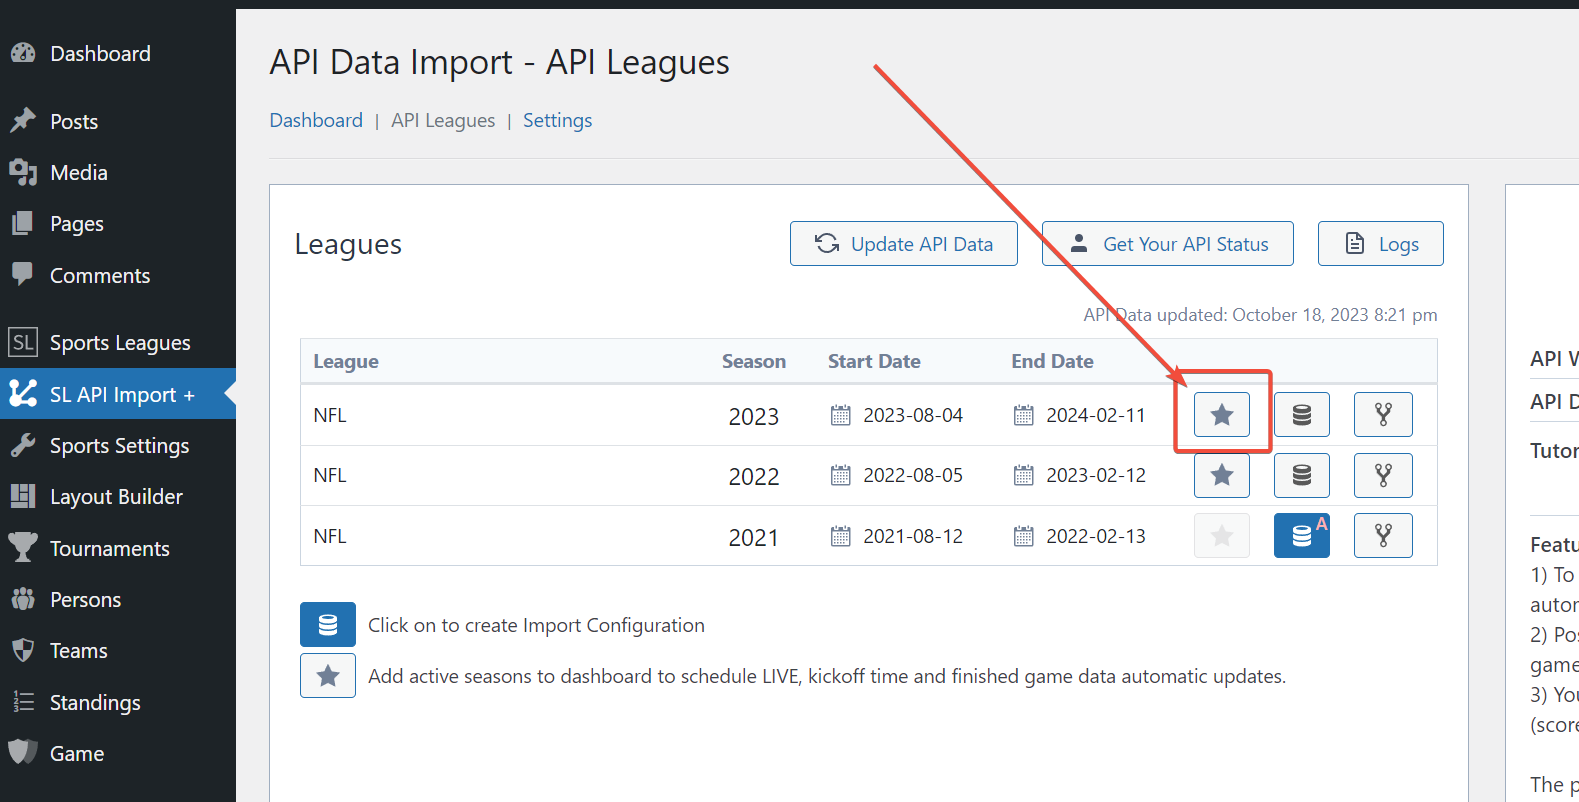
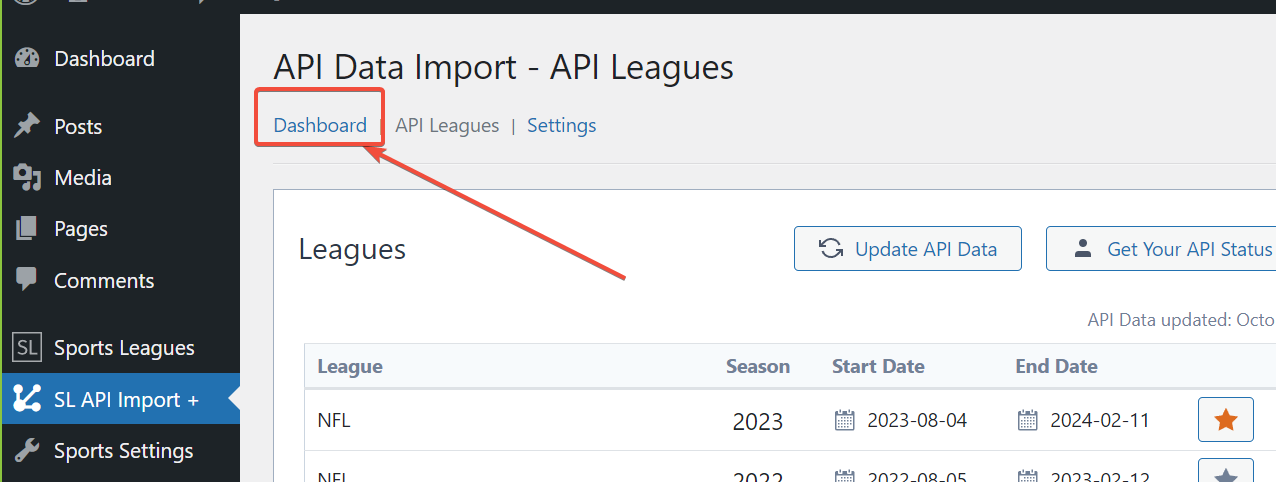
Click the Star icon on the active season to make it available in the Dashboard.
Switch to the Dashboard.
6) Schedule Automatic Updates :
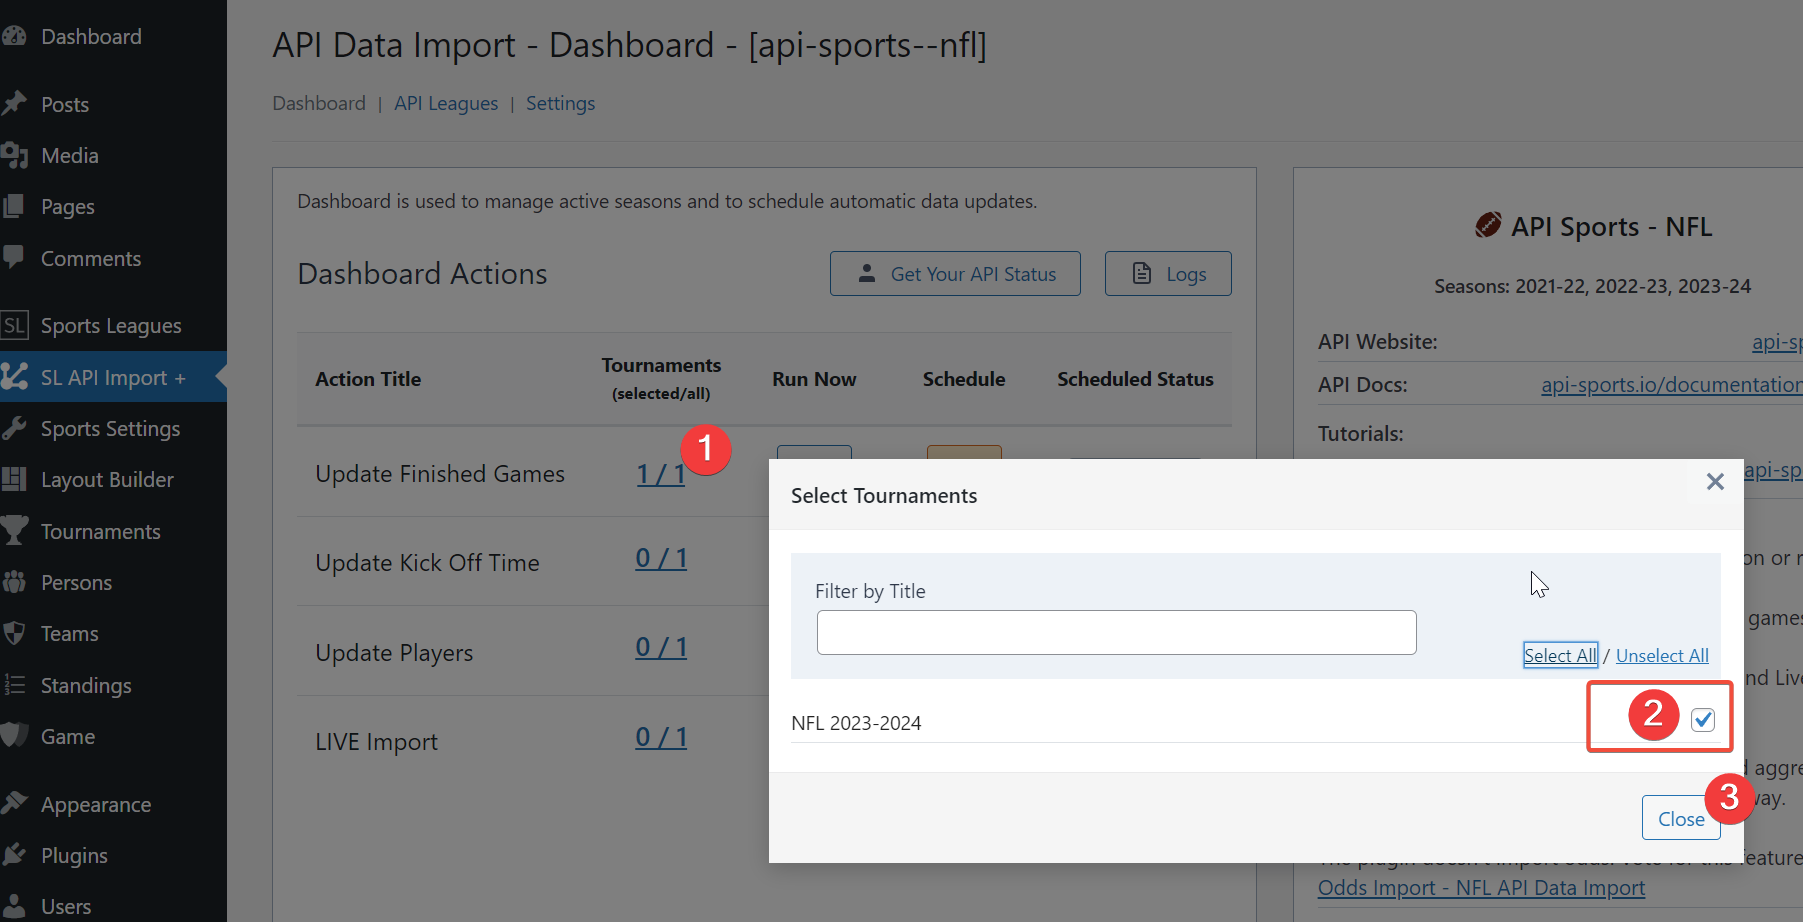
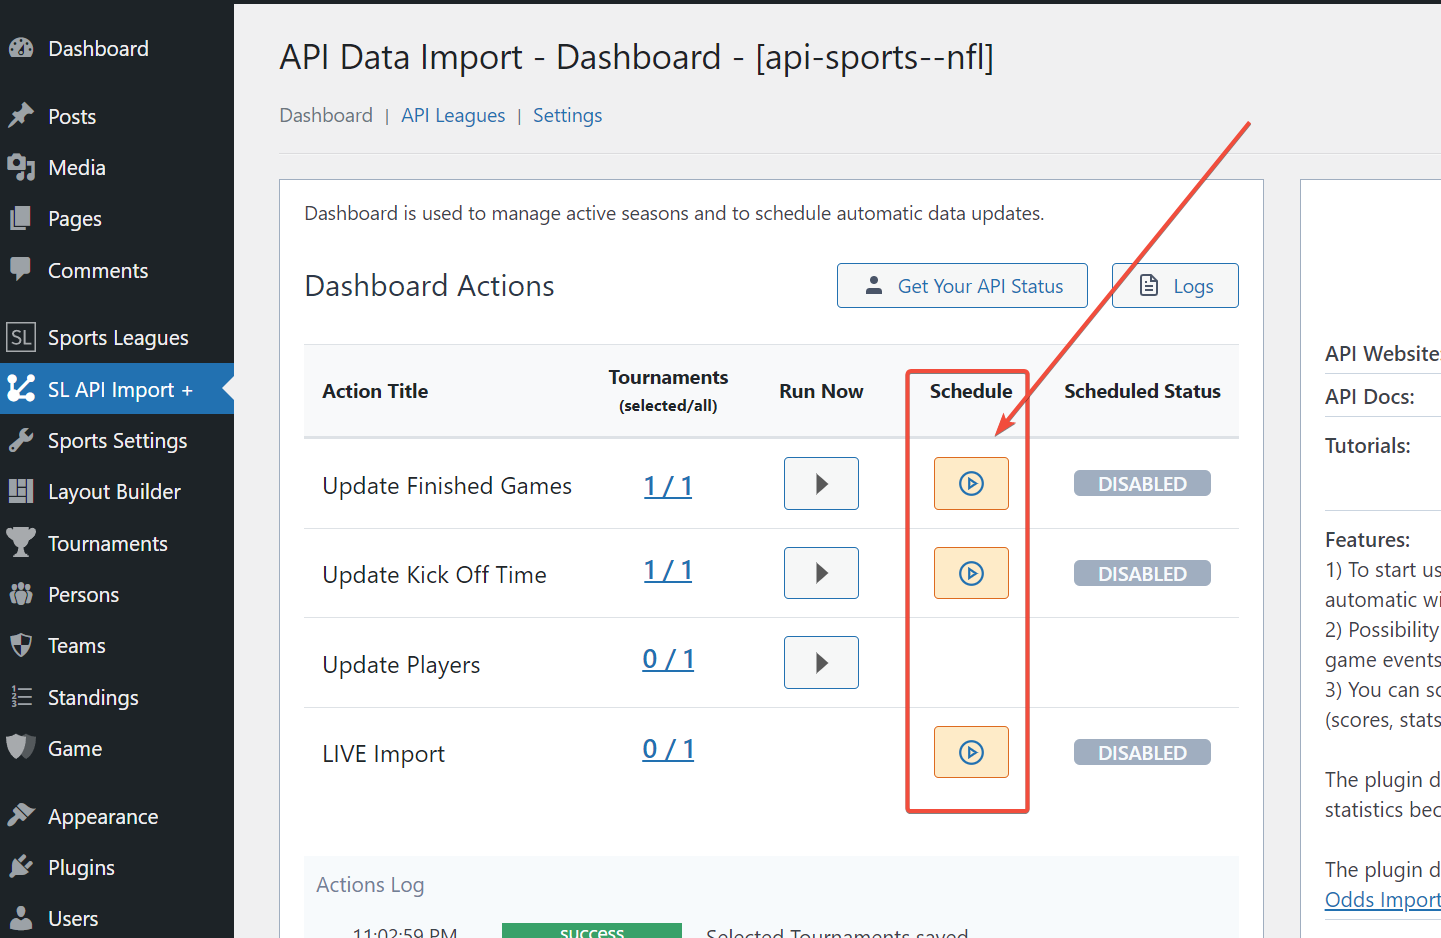
The plugin allows you to schedule common tasks like Update Finished Games or Update Kickoff Time. Simply select tournaments and click Schedule to activate automatic updates.
7) Live Data :
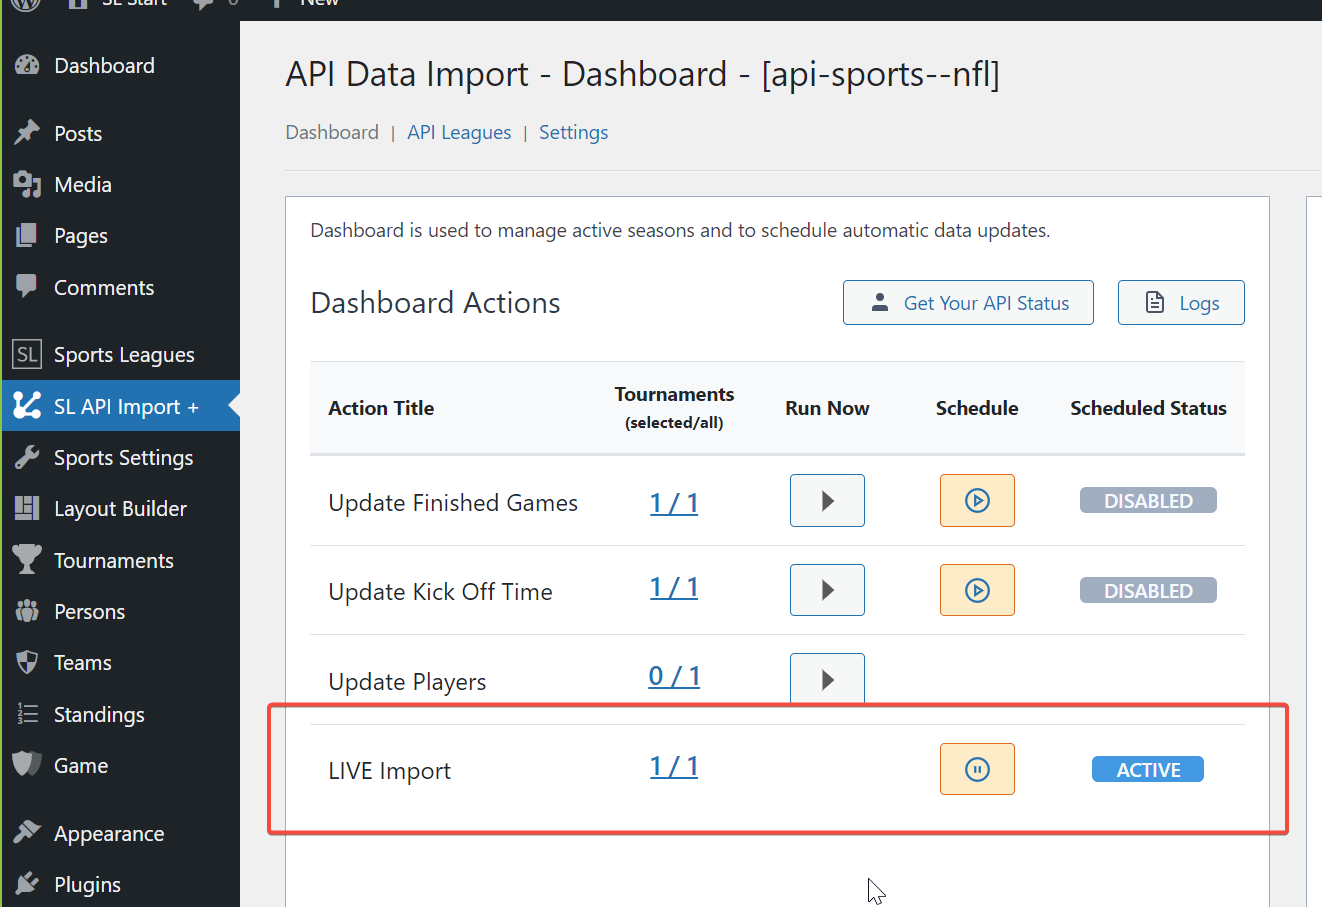
If you intend to import real-time data, you can easily schedule it with the plugin, which will handle all the necessary processes for you.
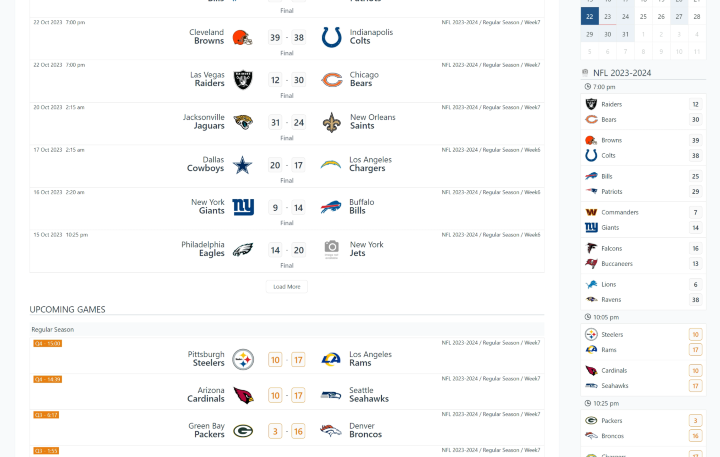
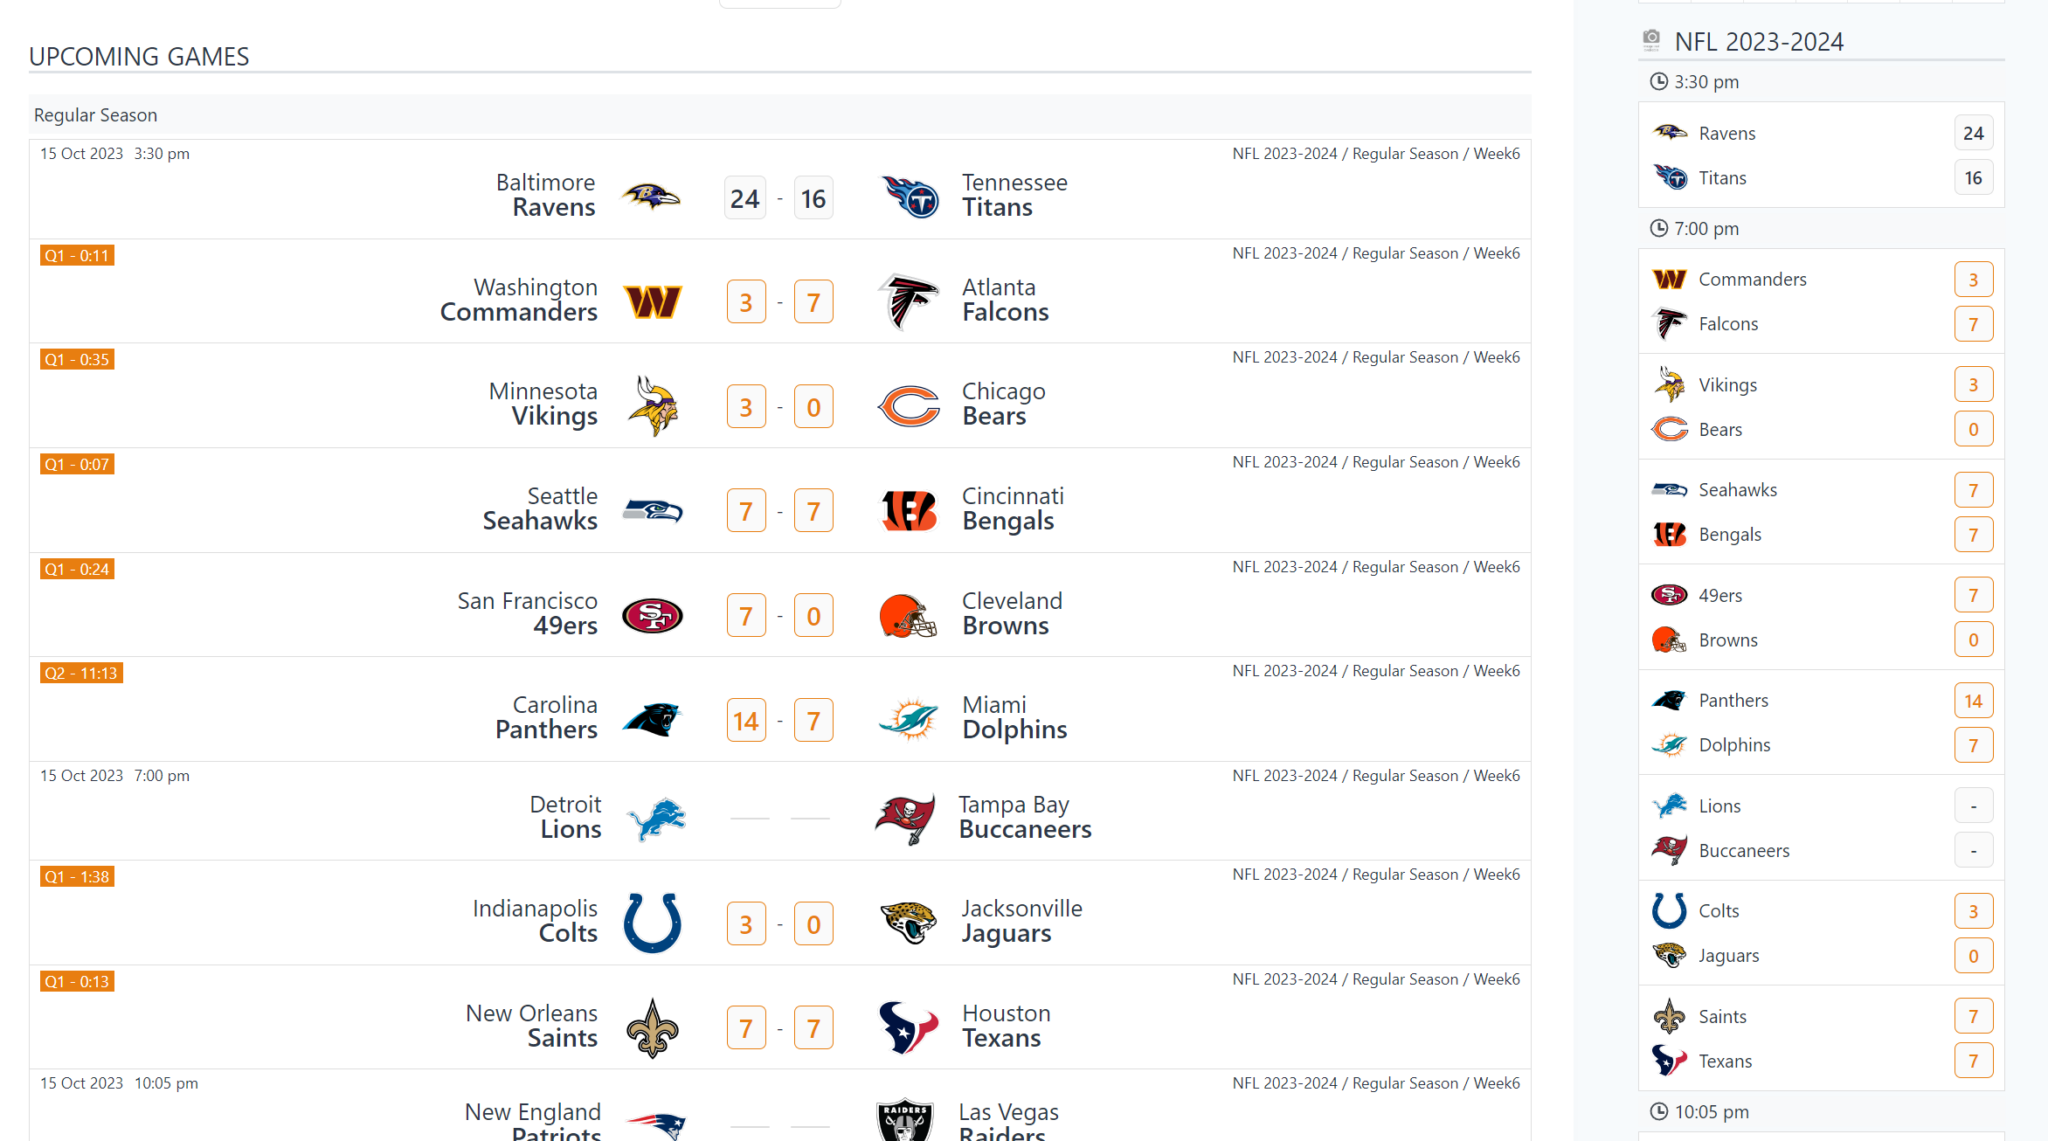
The plugin will display real-time data on each page containing the games (as shown in the screenshot). However, there may be a slight delay of a few minutes before the data will start loading for the first time.
With the Sports League plugin, you have the ability to display a particular LIVE layout on a single game page. You can choose the Live data you wish to retrieve from the API by accessing the Settings page.
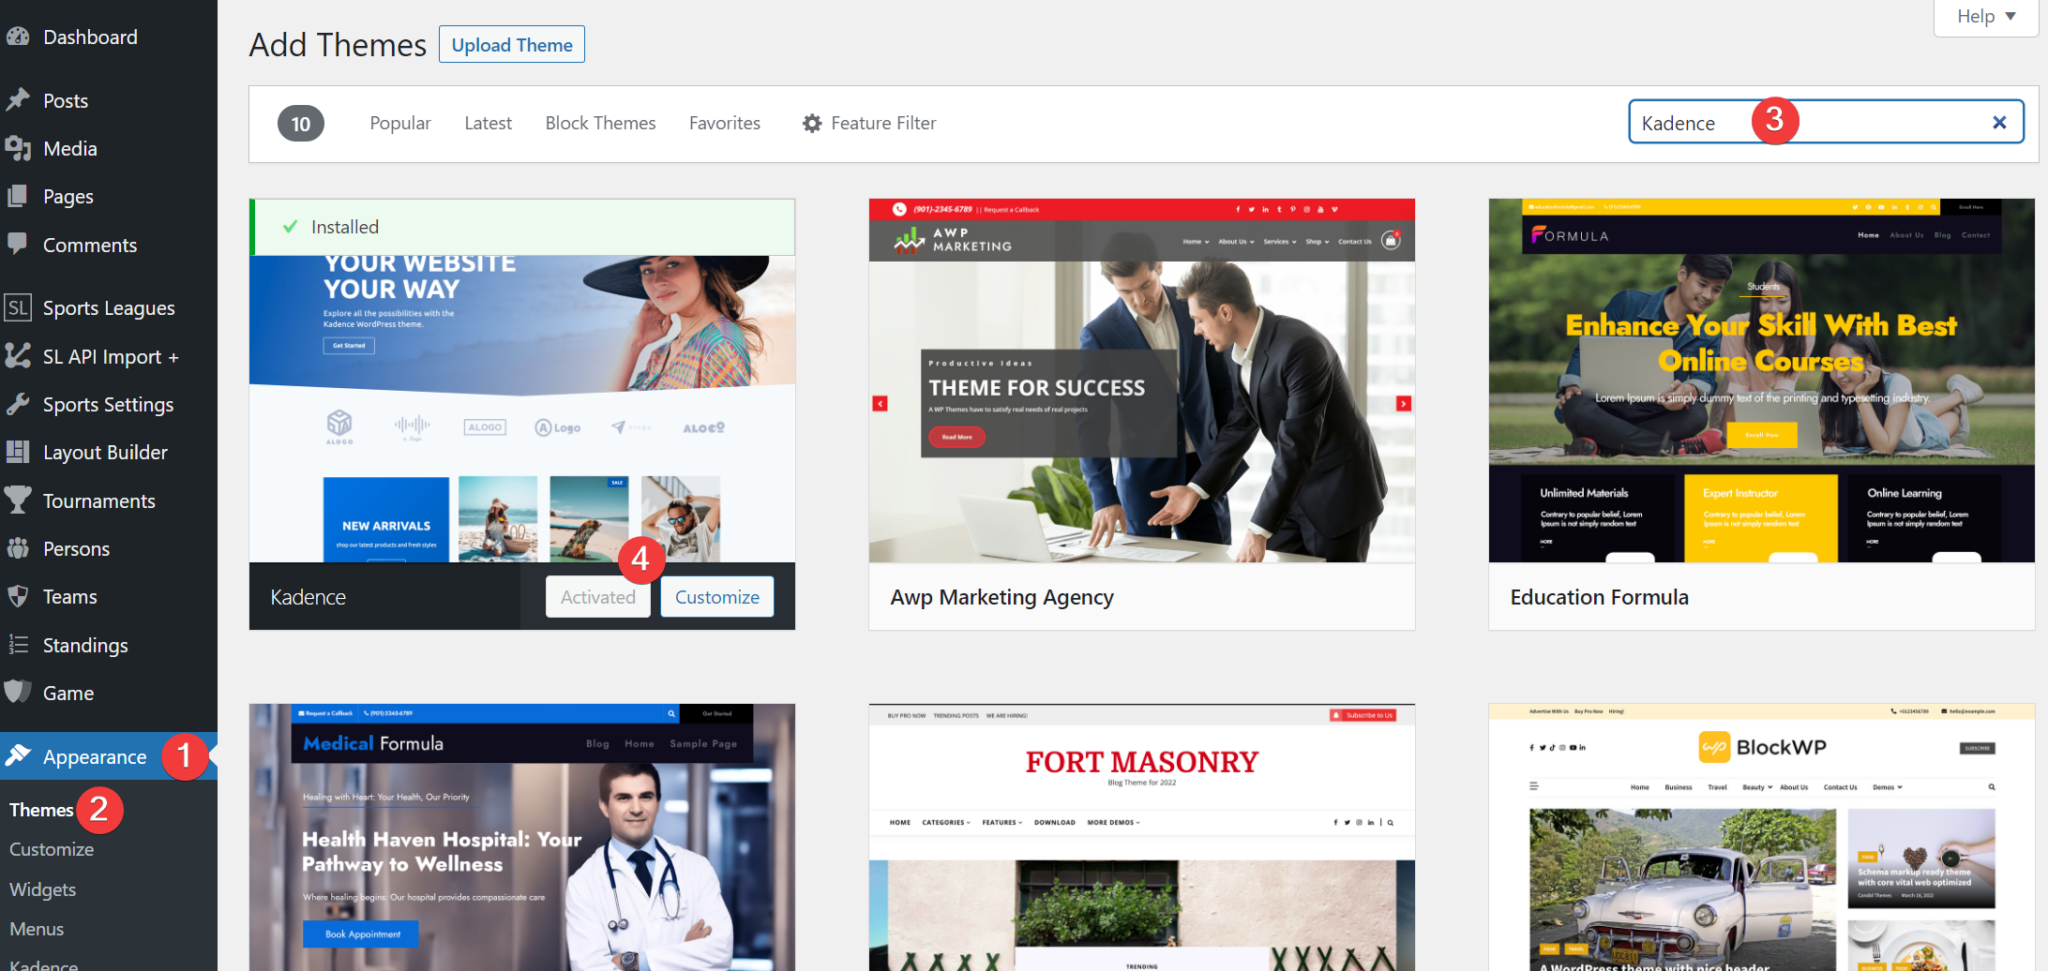
8) Install WordPress Theme :
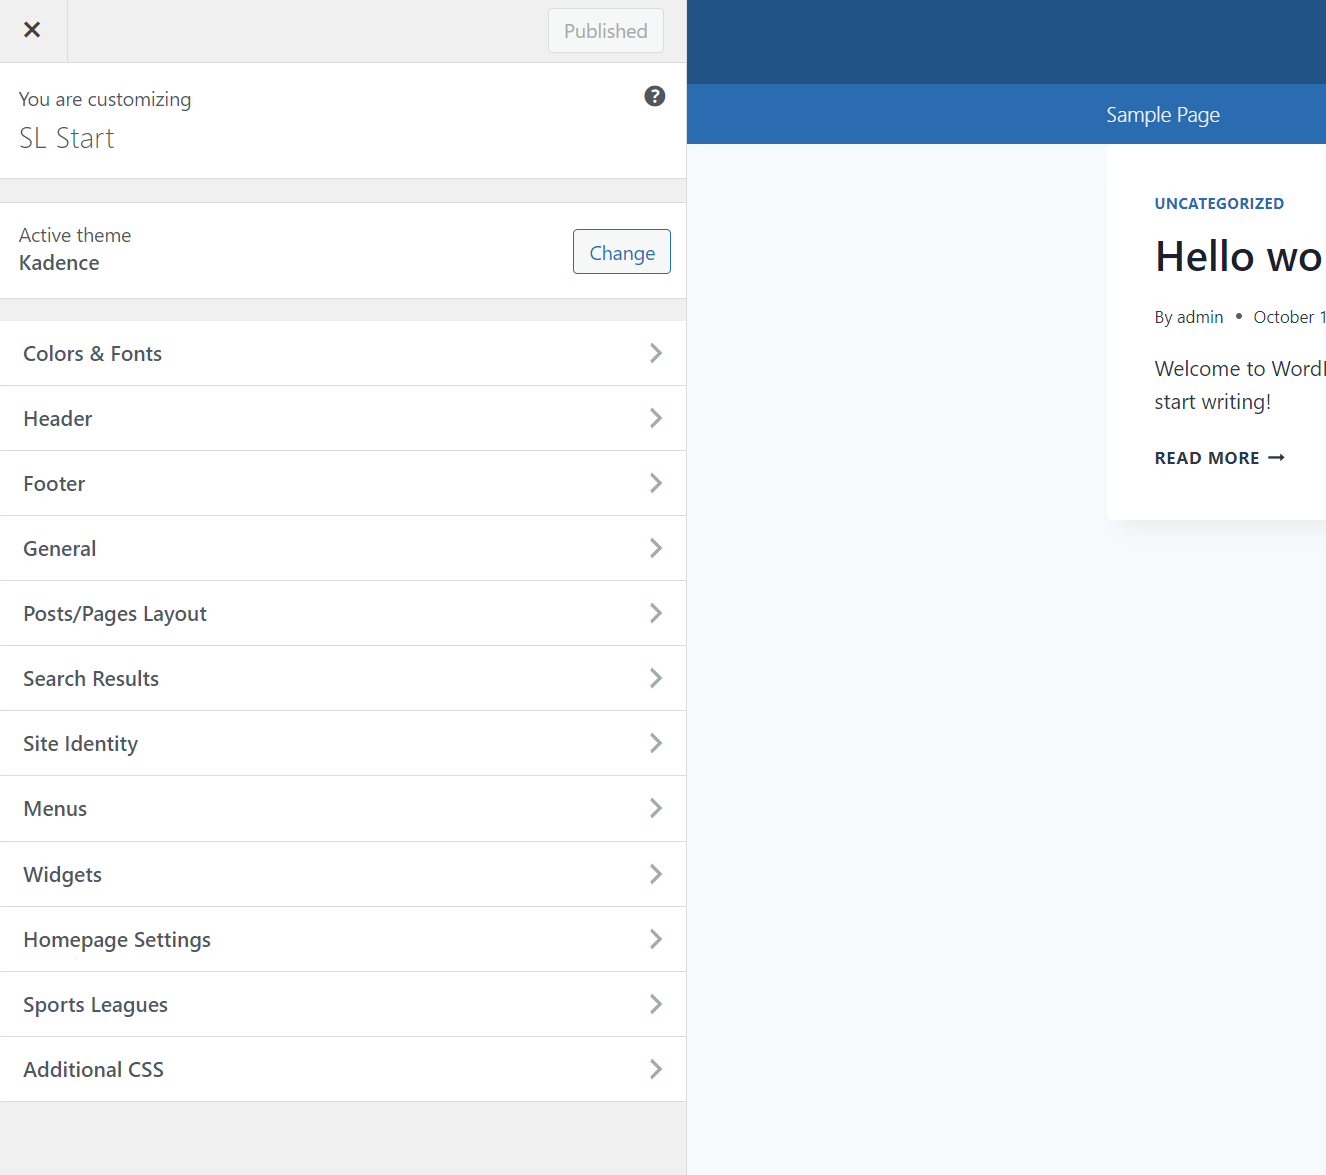
AnWP Sports Leagues is compatible with almost all classic WordPress themes. However, for the best user experience, I highly recommend using the Kadence theme, which we also use in our tutorial. Its free version is lightweight, fast, and has tons of useful options.
Go to the Appearance -> Themes. Search for Kadence and click Install. Activate it.
You can optionally install Customizer settings for the Kadence theme from the demo site – https://slpro-football.anwp.pro/
Of course, if you like it.
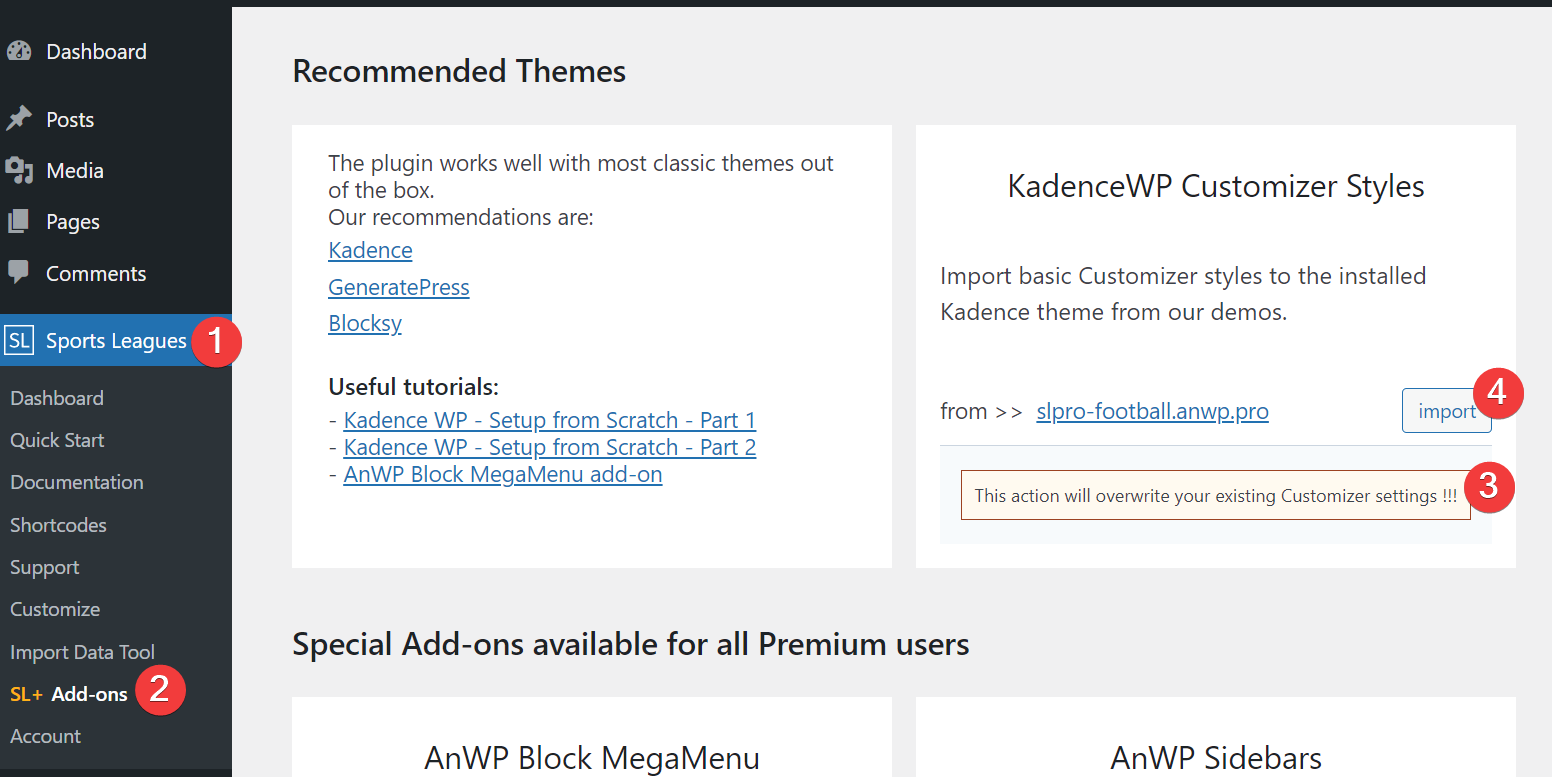
In addition, I have a collection of step-by-step tutorials that guide you in configuring the Kadence theme like an expert.
- Kadence WP – Setup from Scratch for Football Website – Part 1
- Kadence WP – Setup from Scratch for Football Website – Part 2
- AnWP Block MegaMenu add-on
9) Test Your Website :
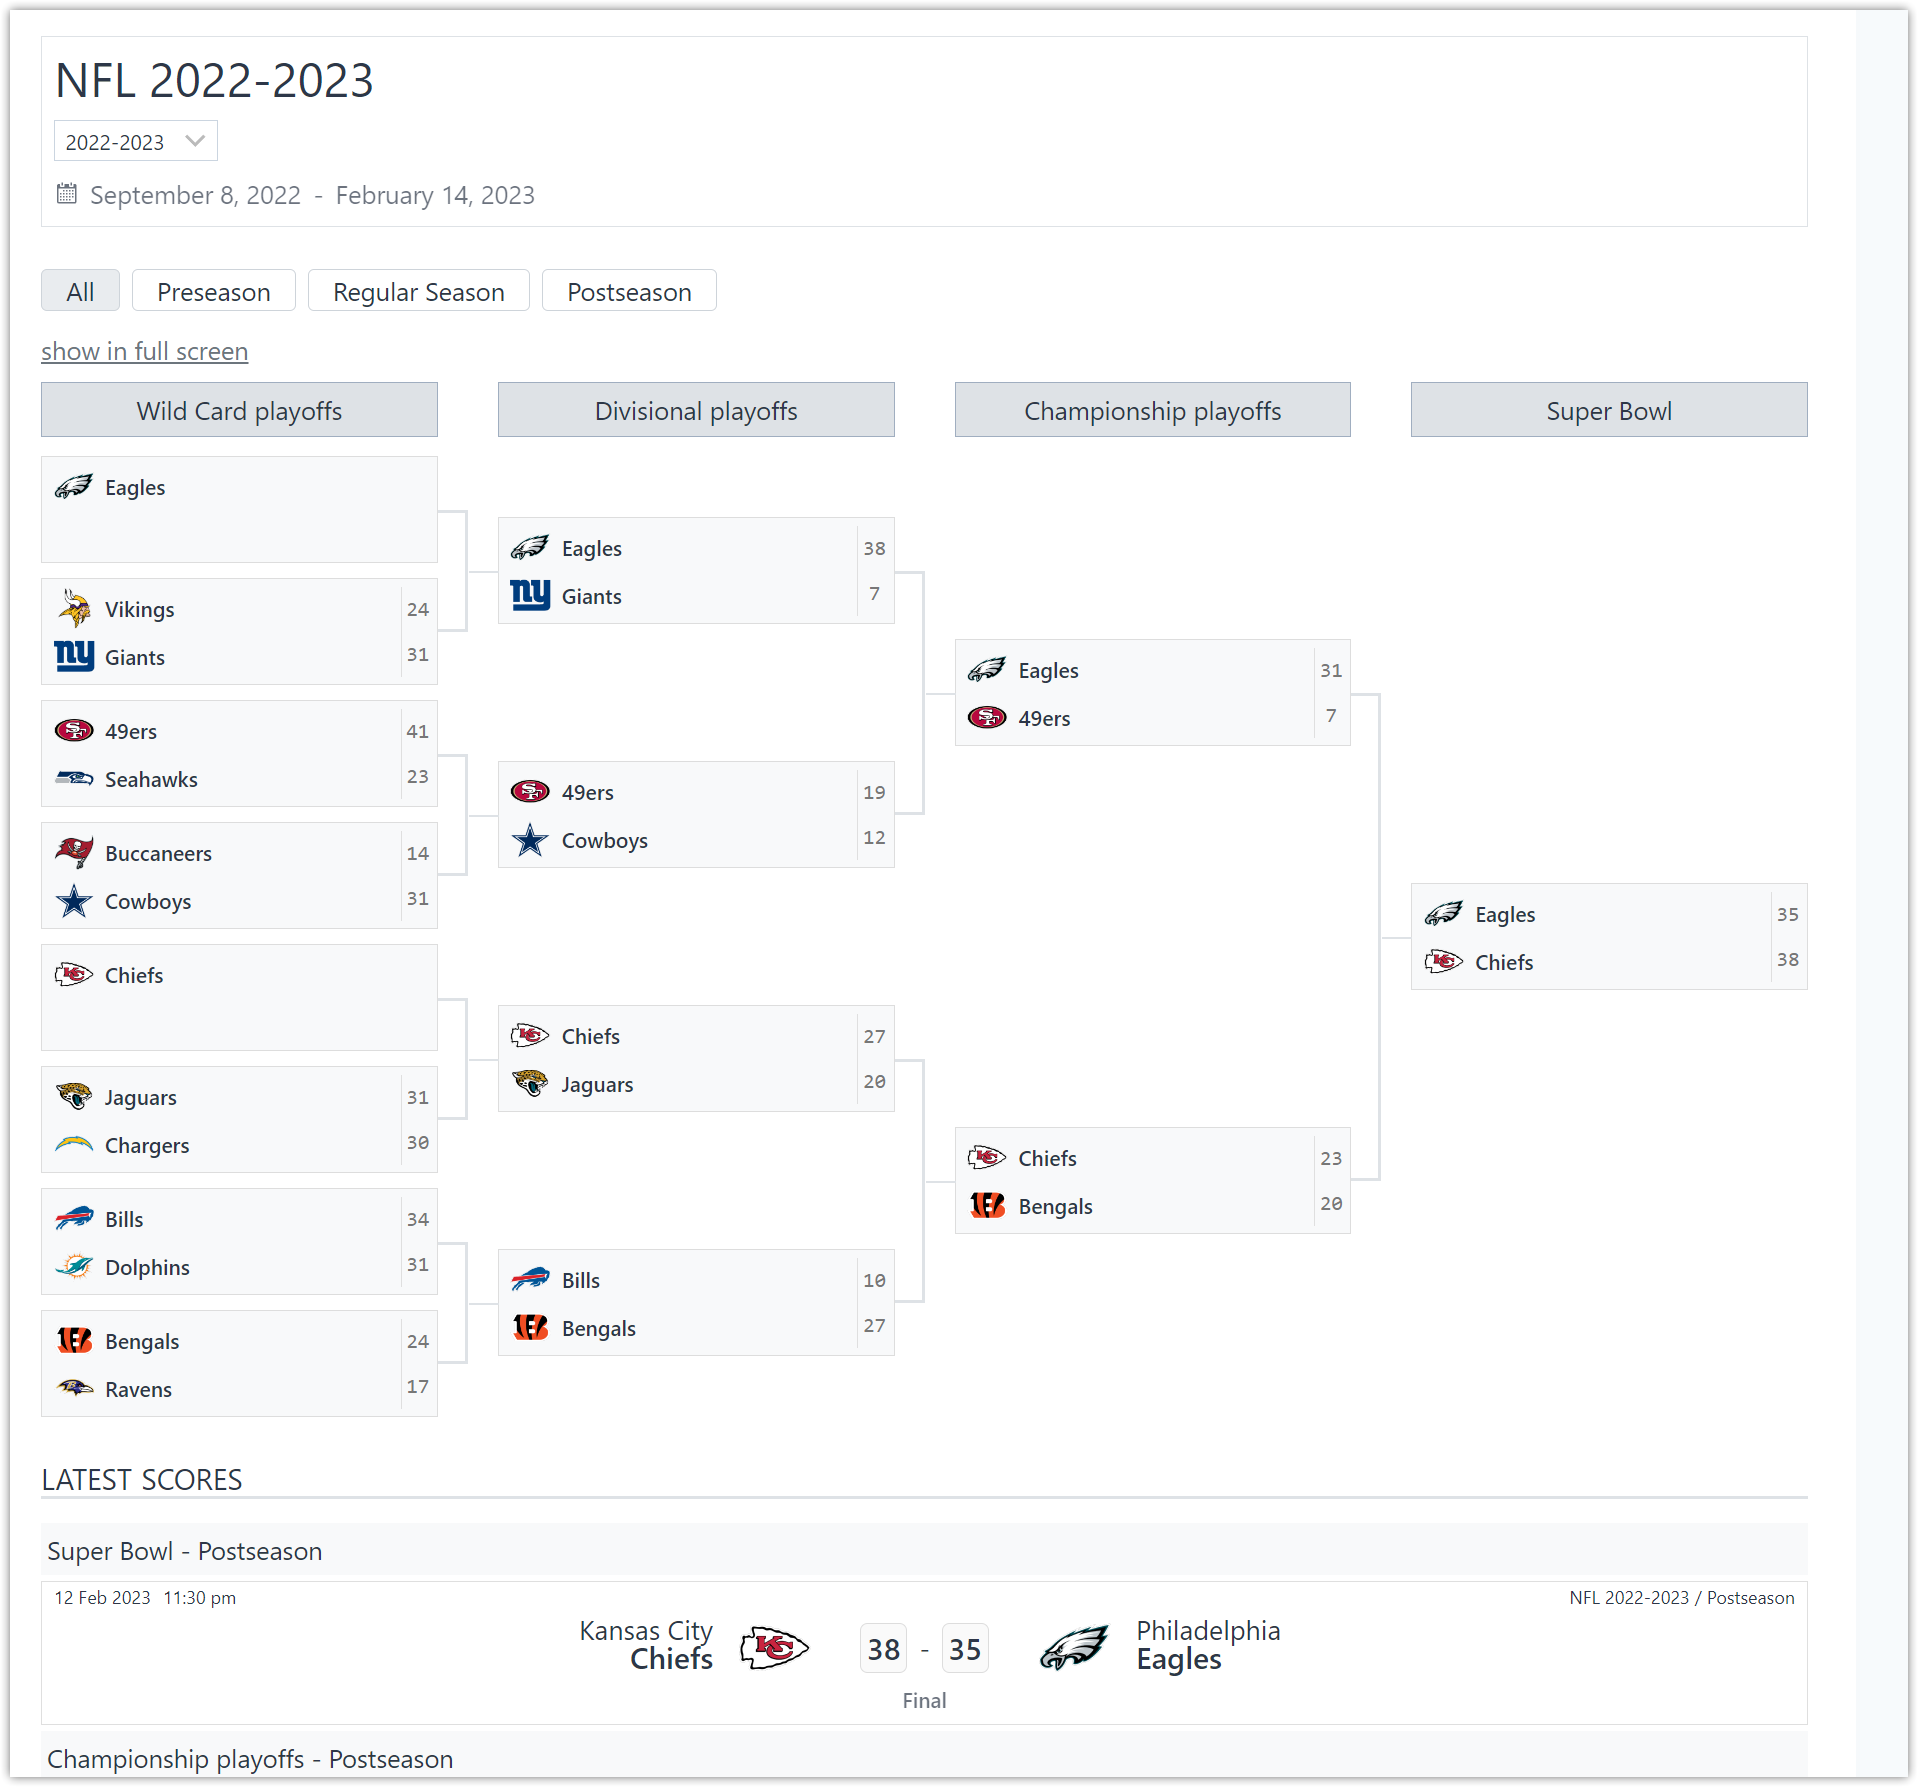
Check your website to see if everything works as intended.
Go to Tournaments -> and click on the View link after any competition.
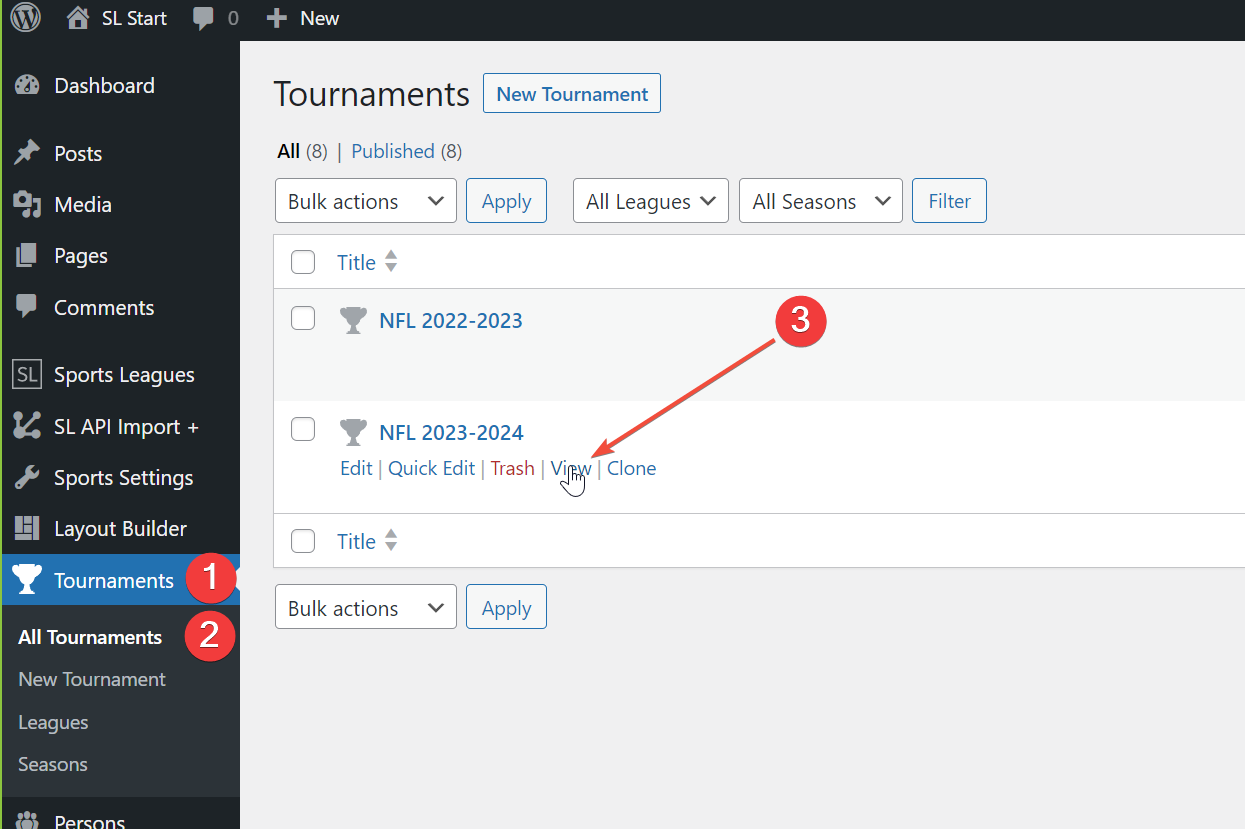
Check also the Tournament, Team, Game, and Player pages.
10) What Next :
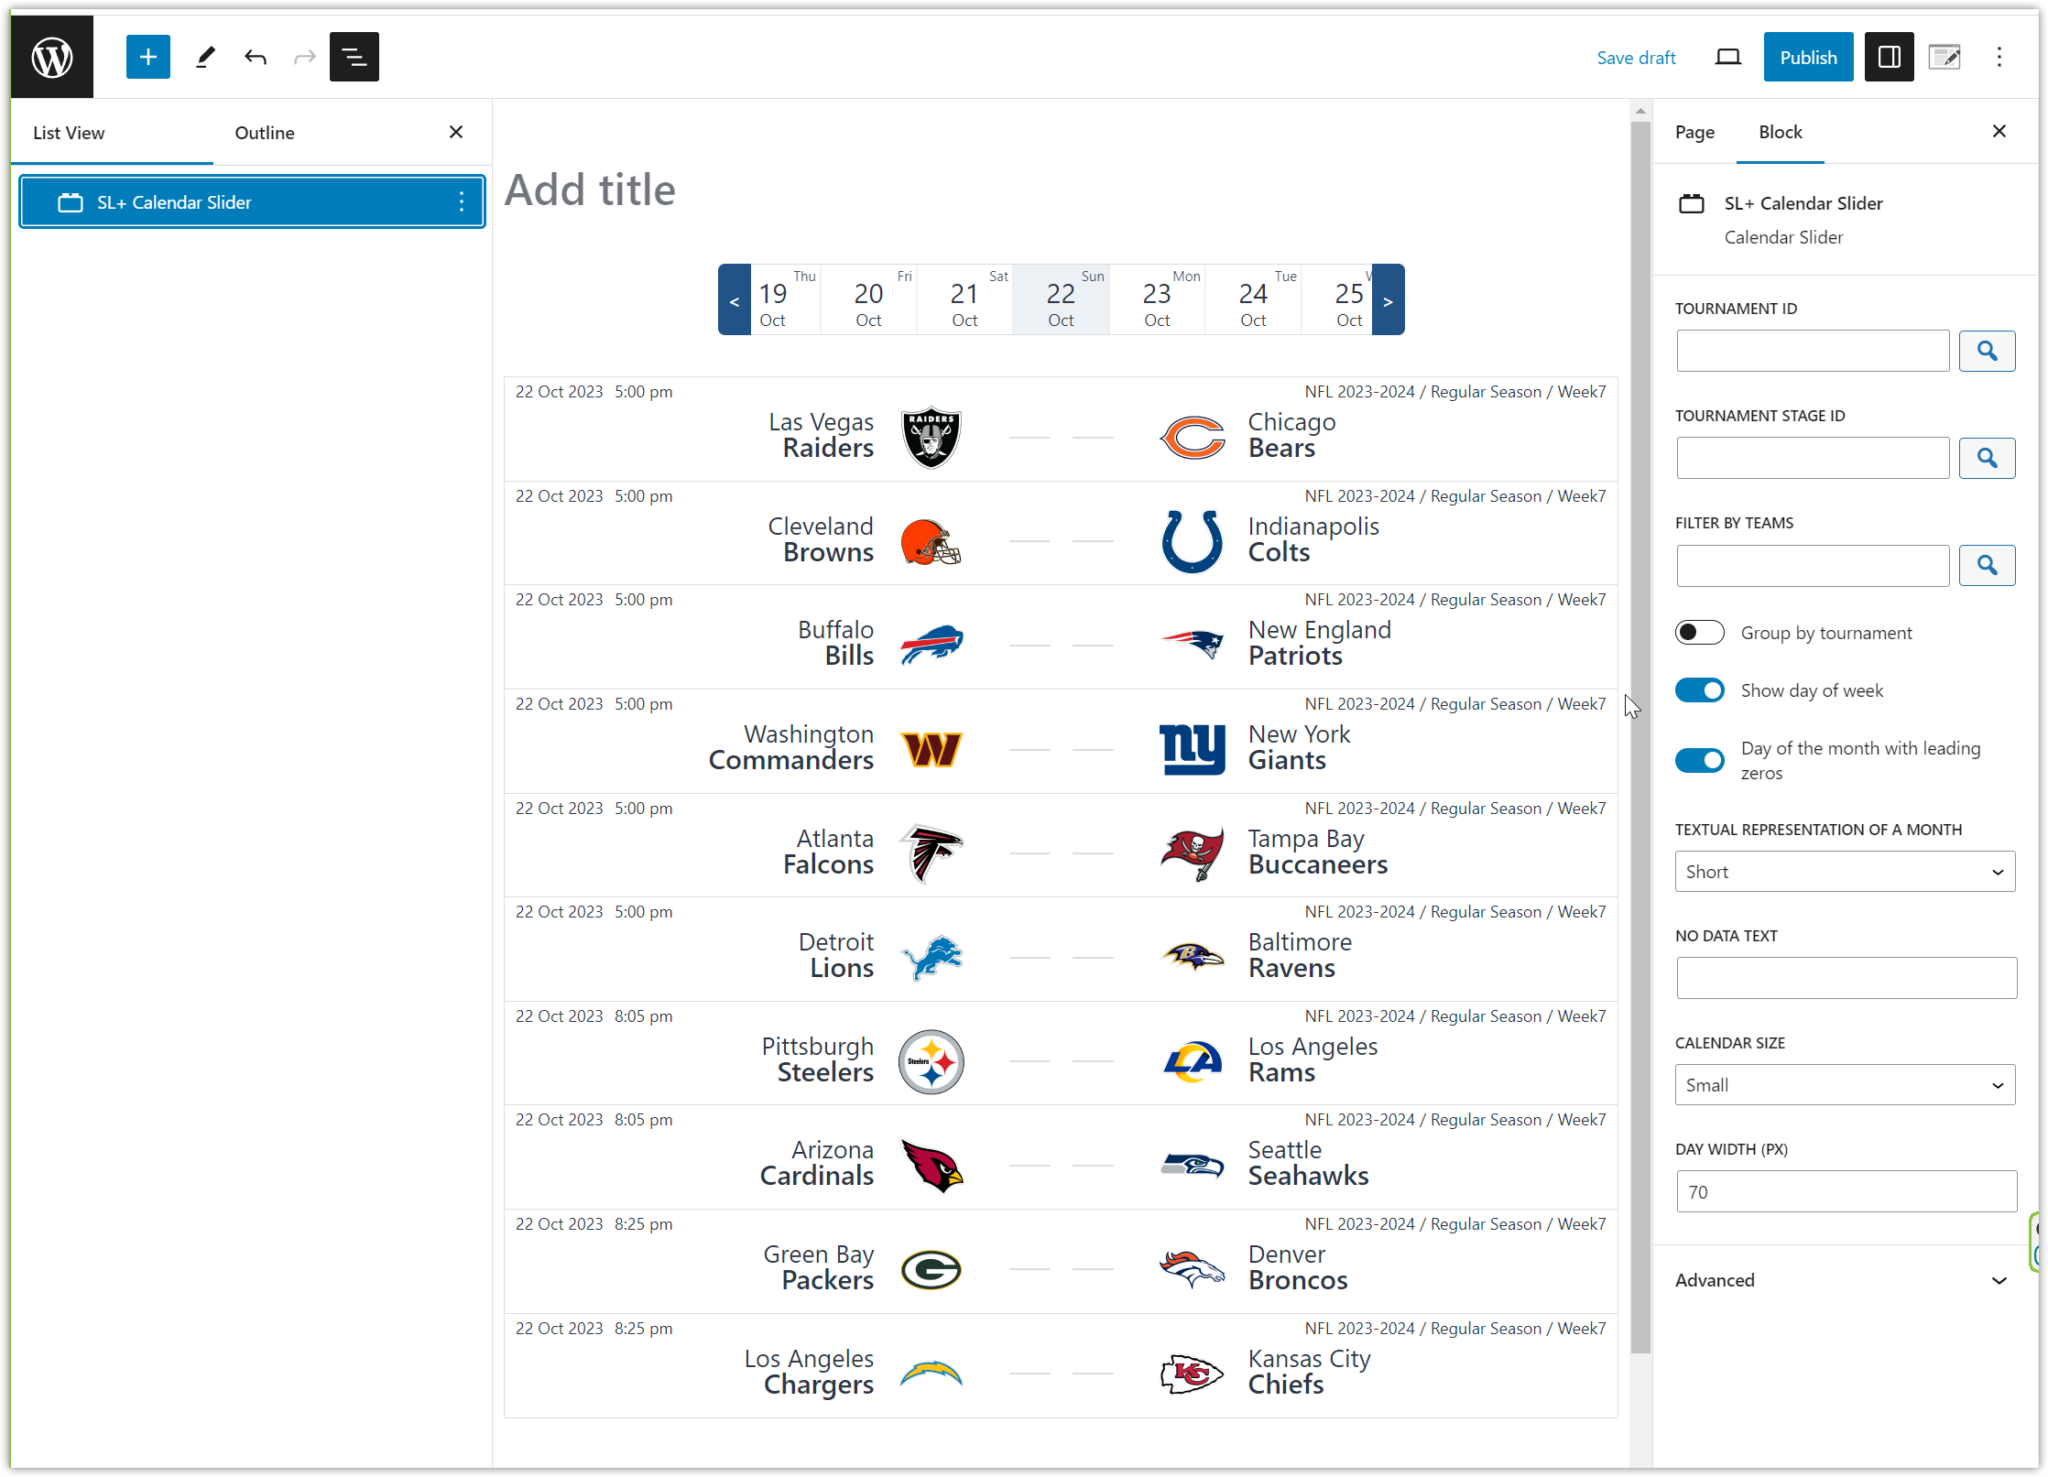
Create a Home page and Sidebars using Gutenberg blocks provided by the AnWP Sports Leagues plugin.
Adding a Calendar Slider to the homepage would be a fantastic idea.
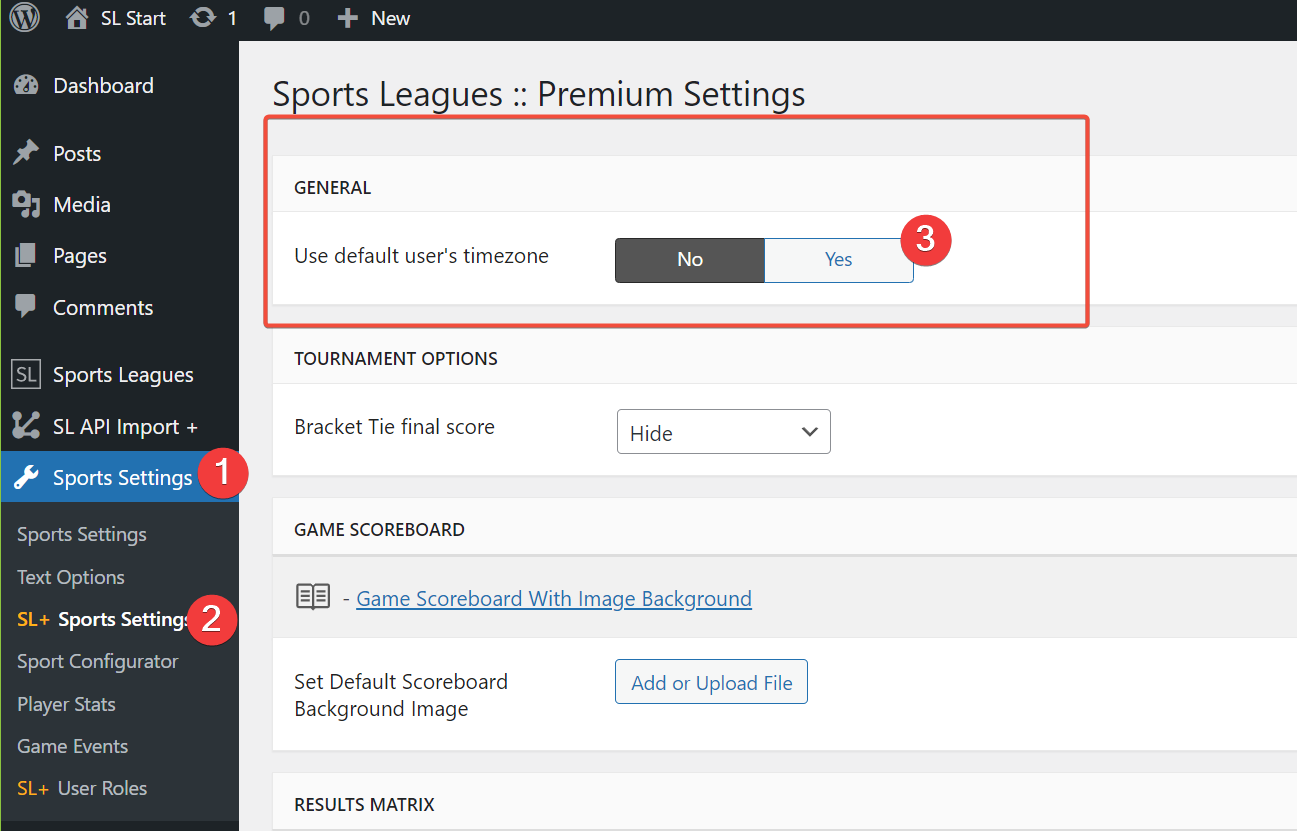
To ensure an accurate game time display, navigate to the SL+ Sports Settings and enable the Use default user’s timezone option. This feature automatically adjusts the displayed time according to the user’s timezone, making it easier to track events and schedules.
Go to the Customizer and set up your header and footer. The listed tutorials can help you with it.
- Kadence WP – Setup from Scratch for Football Website – Part 1
- Kadence WP – Setup from Scratch for Football Website – Part 2
- AnWP Block MegaMenu add-on
11) Useful Links :
- API Football Rest Data – All Sports
- AnWP Sports Leagues Core in WordPress.org
- AnWP Sports Leagues Premium
- Changelog – Core Version
- Changelog – Premium Version
- Community Portal & Documentation
- Demo Site – American Football
Tutorial written by Andrei Strekozov.