 API-FOOTBALL
Introduction: In this digital era, where visual content plays a crucial role in attracting visitors to websites, integrating high-quality images is essential. If you manage a football-oriented website, whether it's a blog, a news site, or a sports betting platform, you understand how important team images are in generating enthusiasm among football enthusiasts. In this article, we will demonstrate how to leverage the API of API-Football to retrieve these images and store them efficiently in the rapid cache system of BunnyCDN.
In the competitive landscape of Content Delivery Networks (CDNs), Bunny CDN emerges as a powerful ally in optimizing website performance. This robust service stands out by strategically placing servers worldwide, ensuring swift and efficient delivery of static content.
Bunny CDN's key features are designed to elevate user experiences:
Global Delivery Excellence: With an extensive network of servers, Bunny CDN promises rapid and reliable content delivery globally, catering to users across diverse locations.
Intelligent Image Optimization: Employing smart image compression tools, Bunny CDN enhances page loading speeds by reducing file sizes, contributing to a seamless user experience.
Sophisticated Caching Mechanisms: Smart caching minimizes latency by delivering content from nearby servers, maximizing the efficiency of content distribution.
Advanced Security Measures: Bunny CDN integrates robust security features, fortifying its infrastructure against potential threats and ensuring a secure content delivery environment.
We will explore setting up BunnyCDN without the need for prior media downloads. This approach not only provides your users with faster response times for media, thanks to the various geographical zones provided by BunnyCDN, but also ensures seamless performance without being affected by rate-limiting.
Please follow this link to initiate the account creation process.
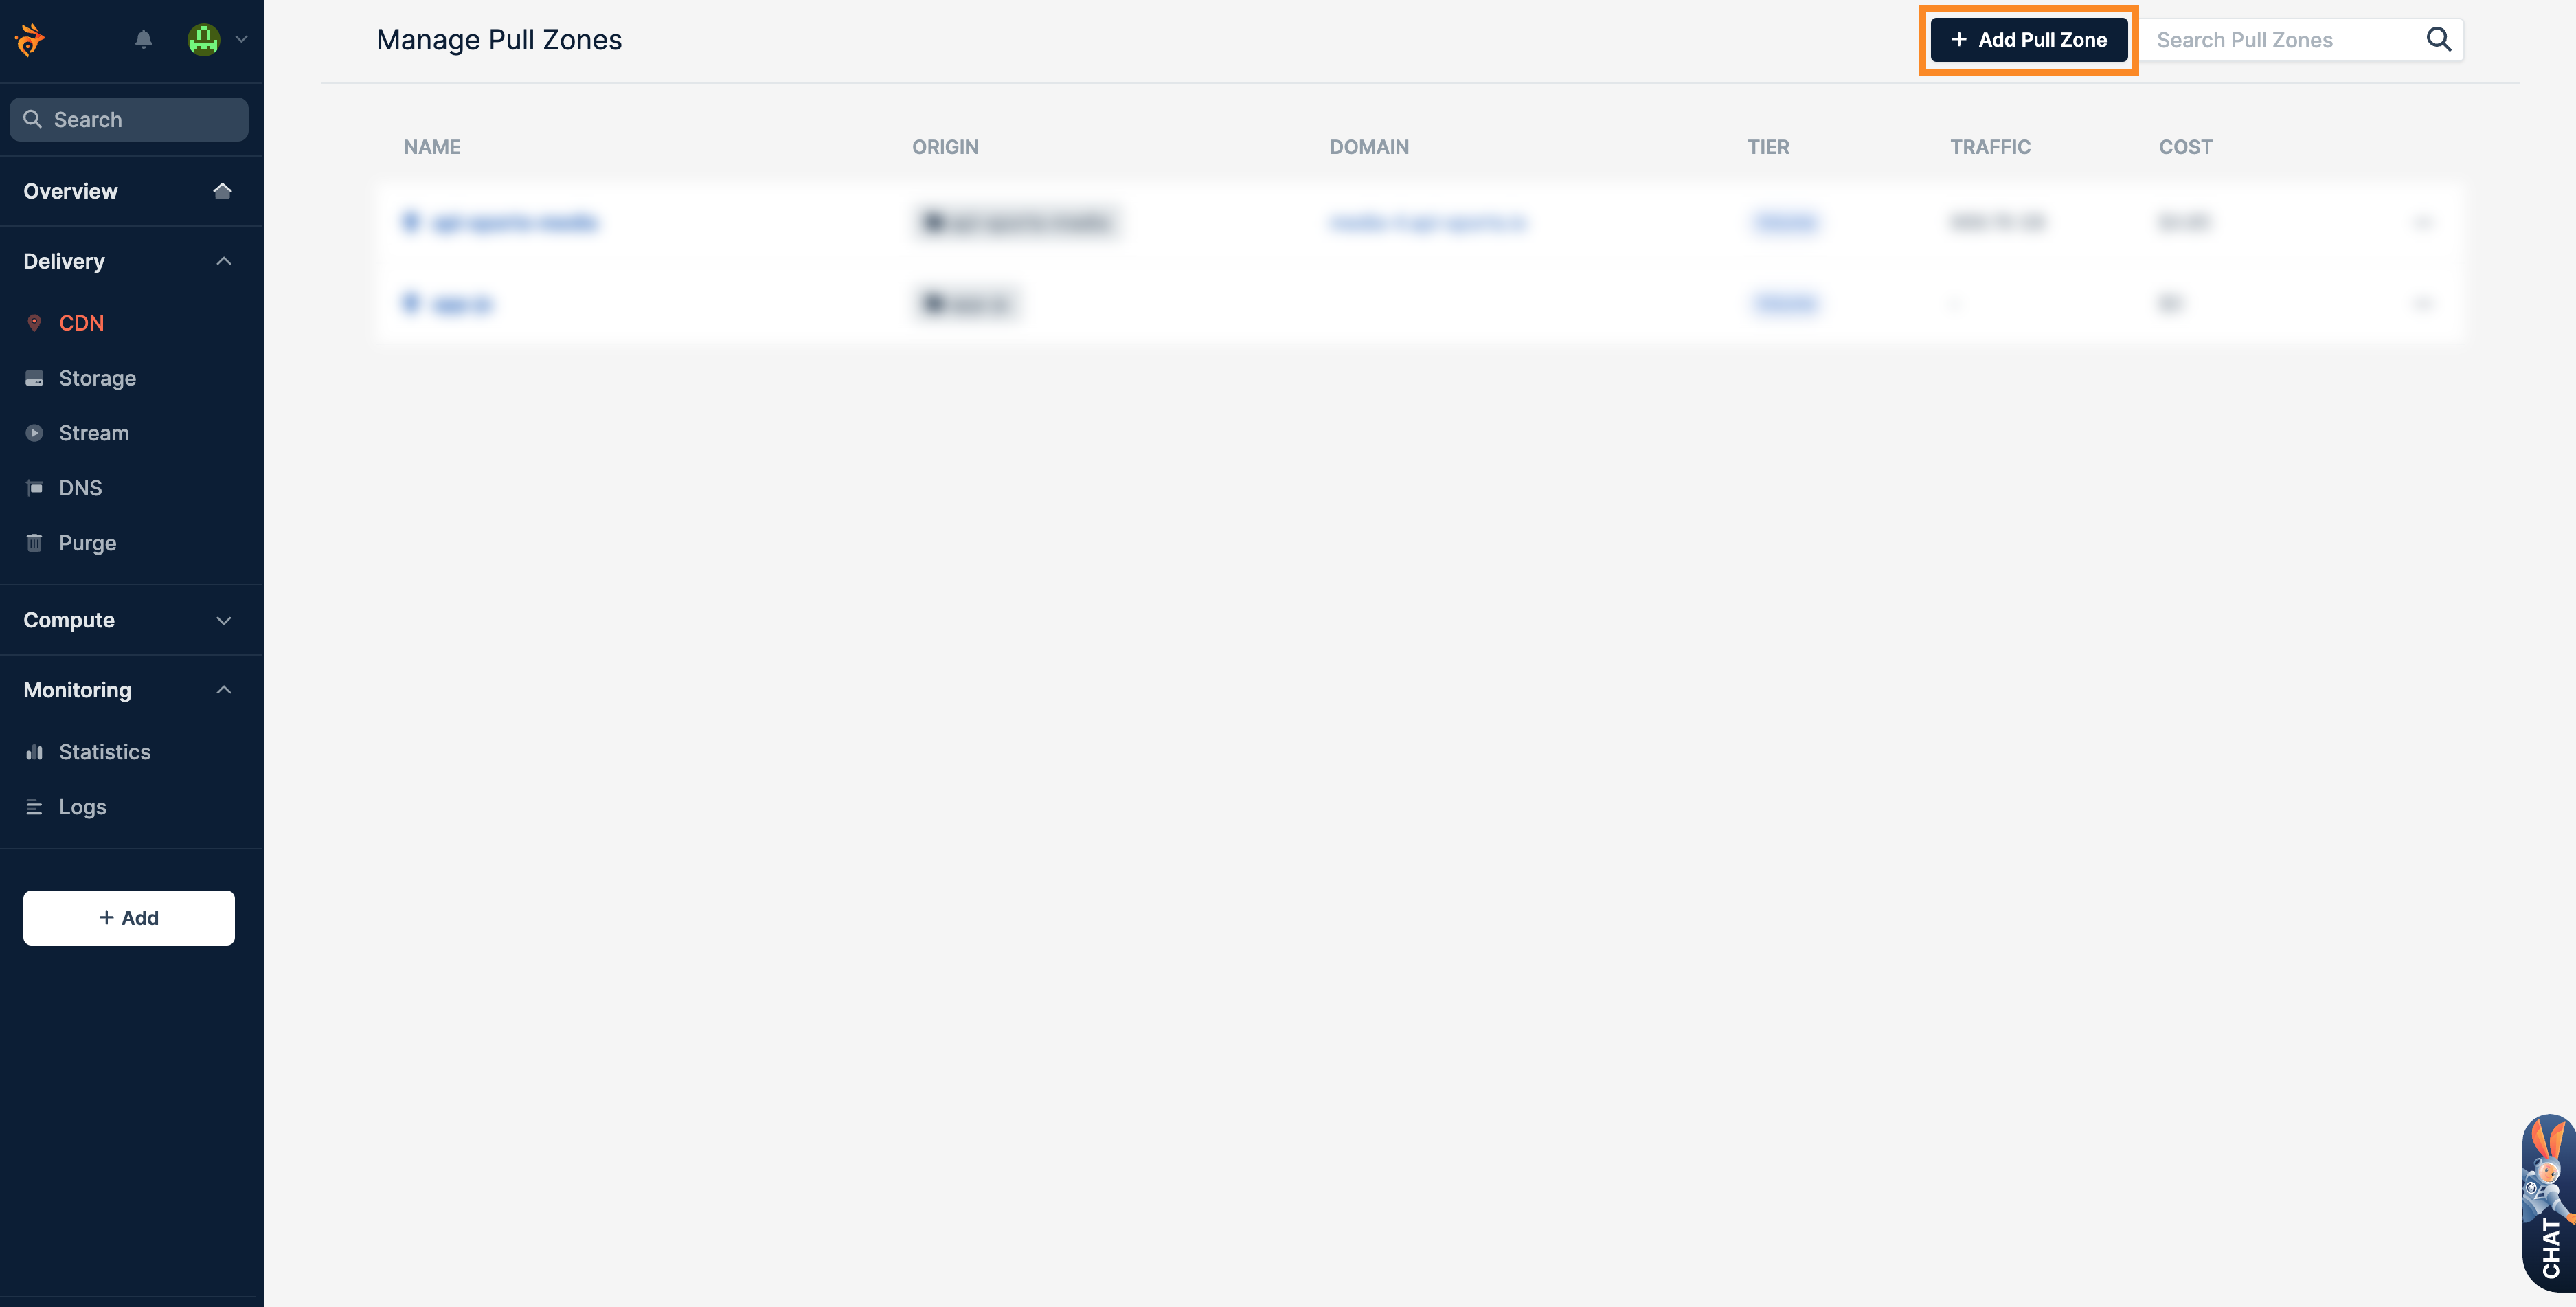
After creating your account, proceed to the dashboard and click on CDN.

In the CDN section, proceed by selecting Add Pull Zone.
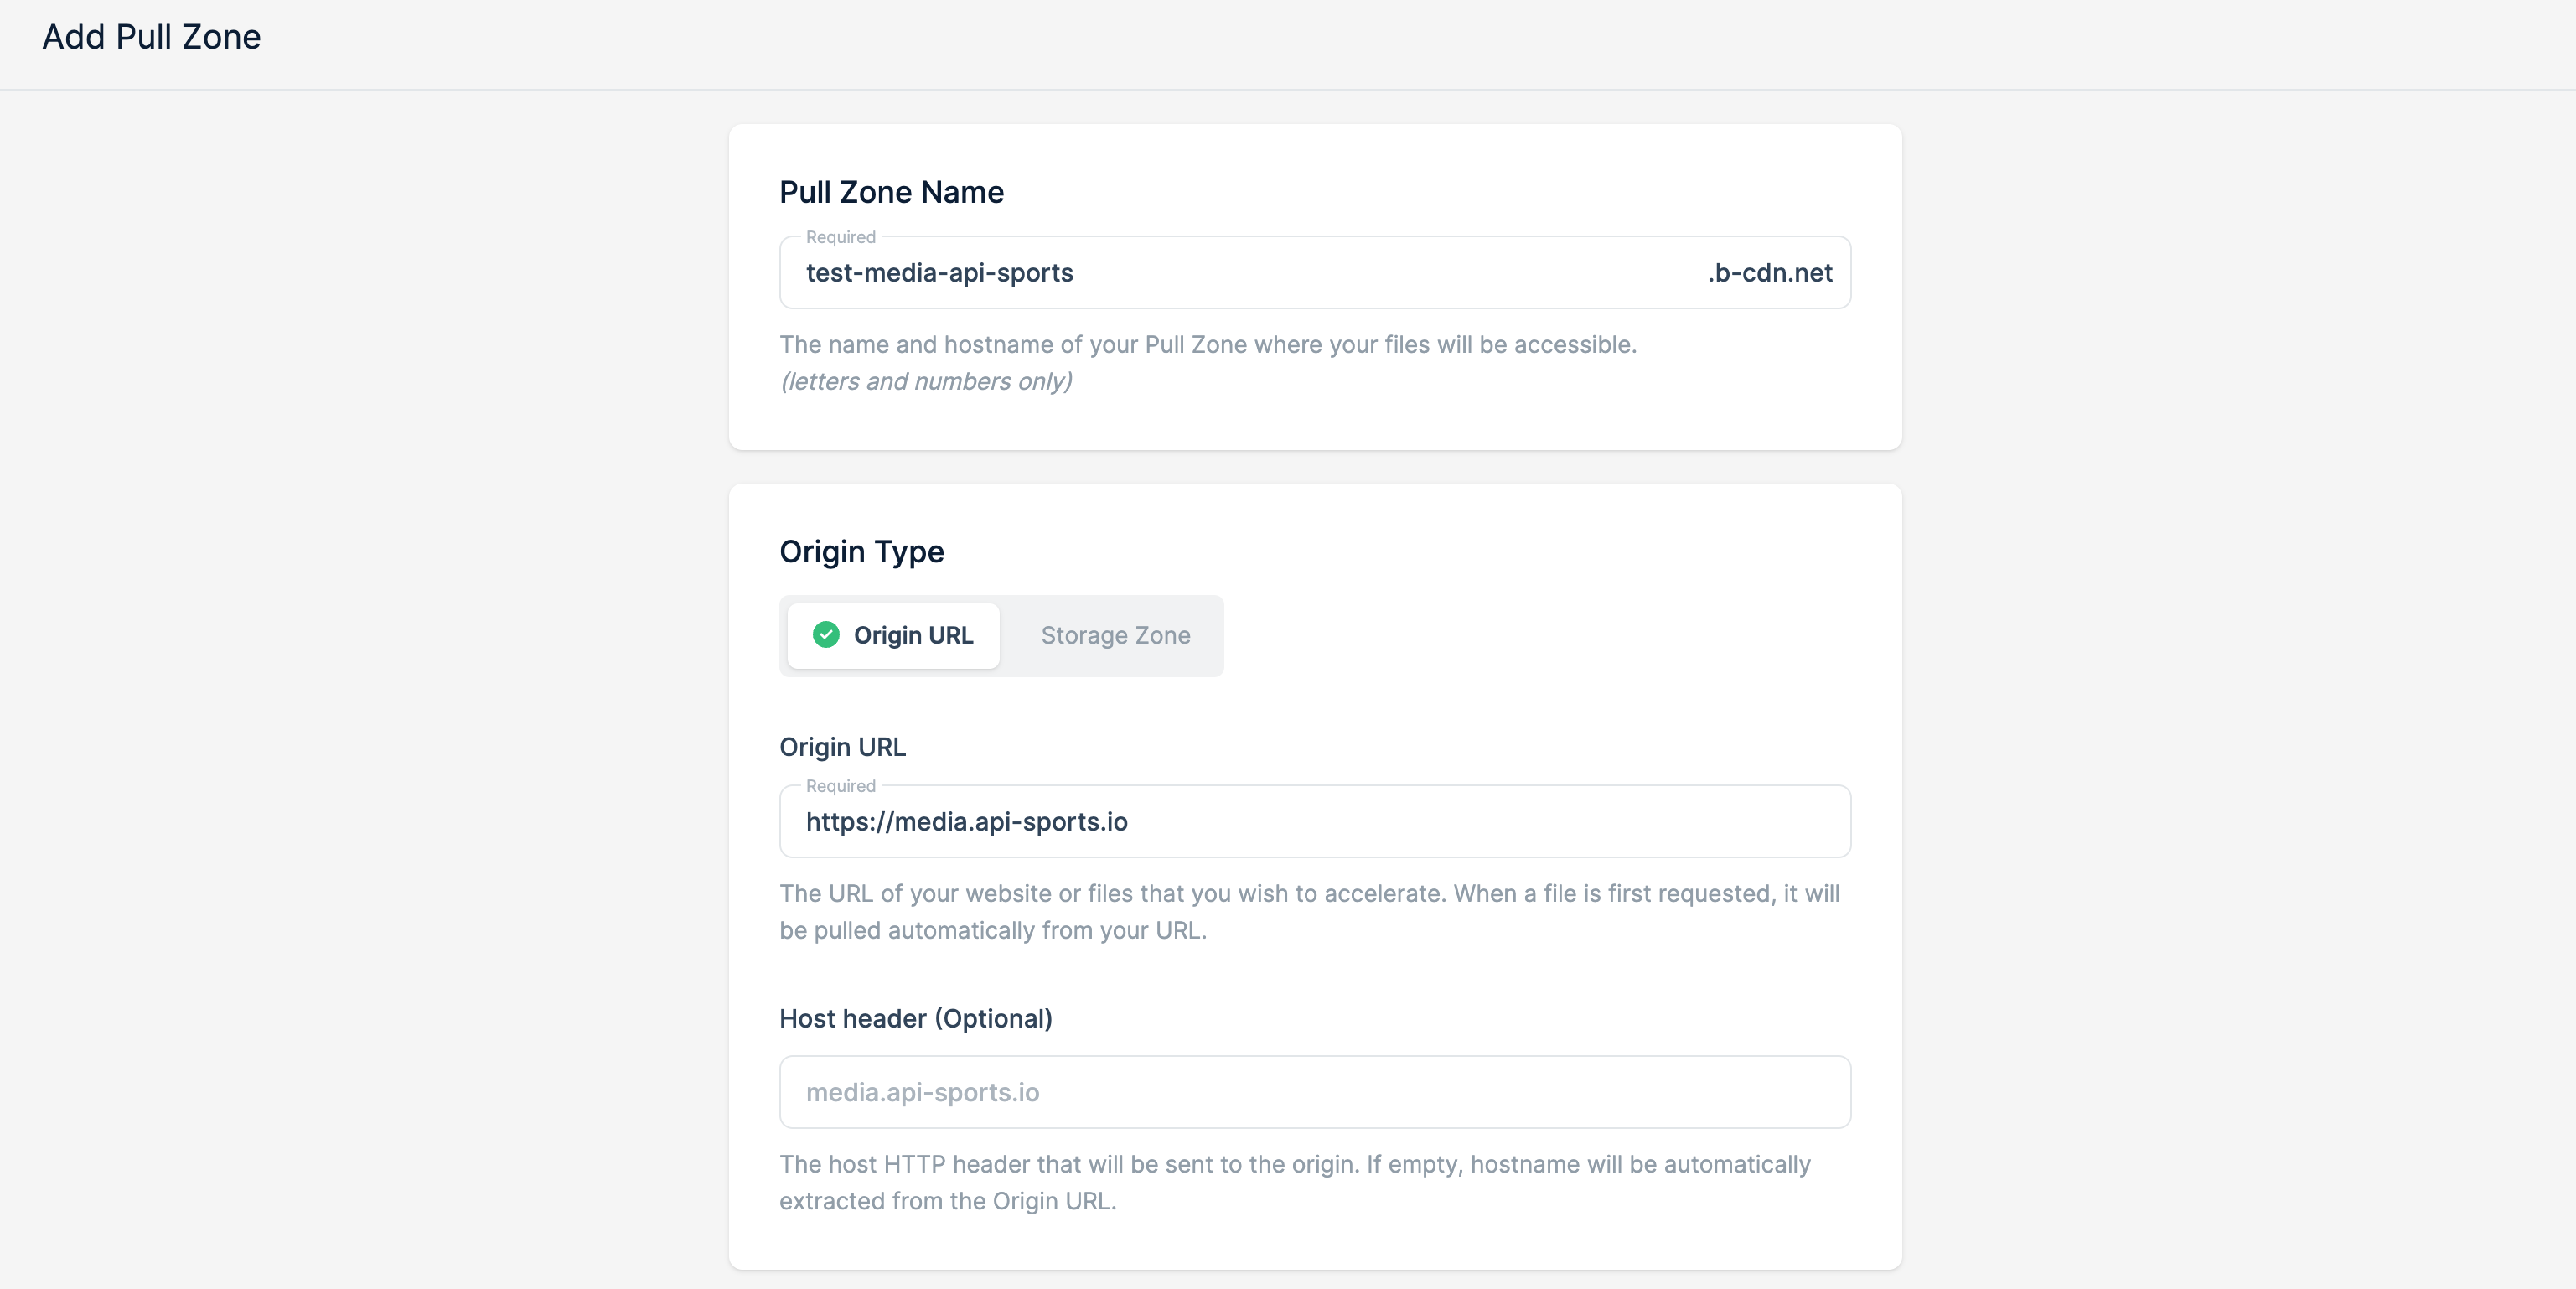
In the first segment of the form, you are required to assign a name to your pull zone, thereby setting the default URL for media accessibility (with the option to configure your custom domain at a later stage). To illustrate, let's designate it as test-media-api-sports, resulting in the assigned URL http://test-media-api-sports.b-cdn.net. This designation serves as the default link through which media content will be made accessible, and users can further personalize it with their chosen domain names.
In the next section of the form, you'll be prompted to define the origin URL. Here, you can effortlessly input https://media.api-sports.io/ into the designated field. As a result, any requests directed towards test-media-api-sports.b-cdn.net will seamlessly traverse to https://media.api-sports.io. Essentially, your pull zone functions as a proficient proxy, efficiently facilitating the transmission of requests to the specified origin URL. This streamlined configuration enhances the overall performance and accessibility of your media content through the designated pull zone.
In the third section, you'll encounter the pricing plans, offering you a choice between two distinct options:
- Standard Tier: Pricing fluctuates based on regions, providing the flexibility to enable or disable specific regions, ensuring swifter response times.
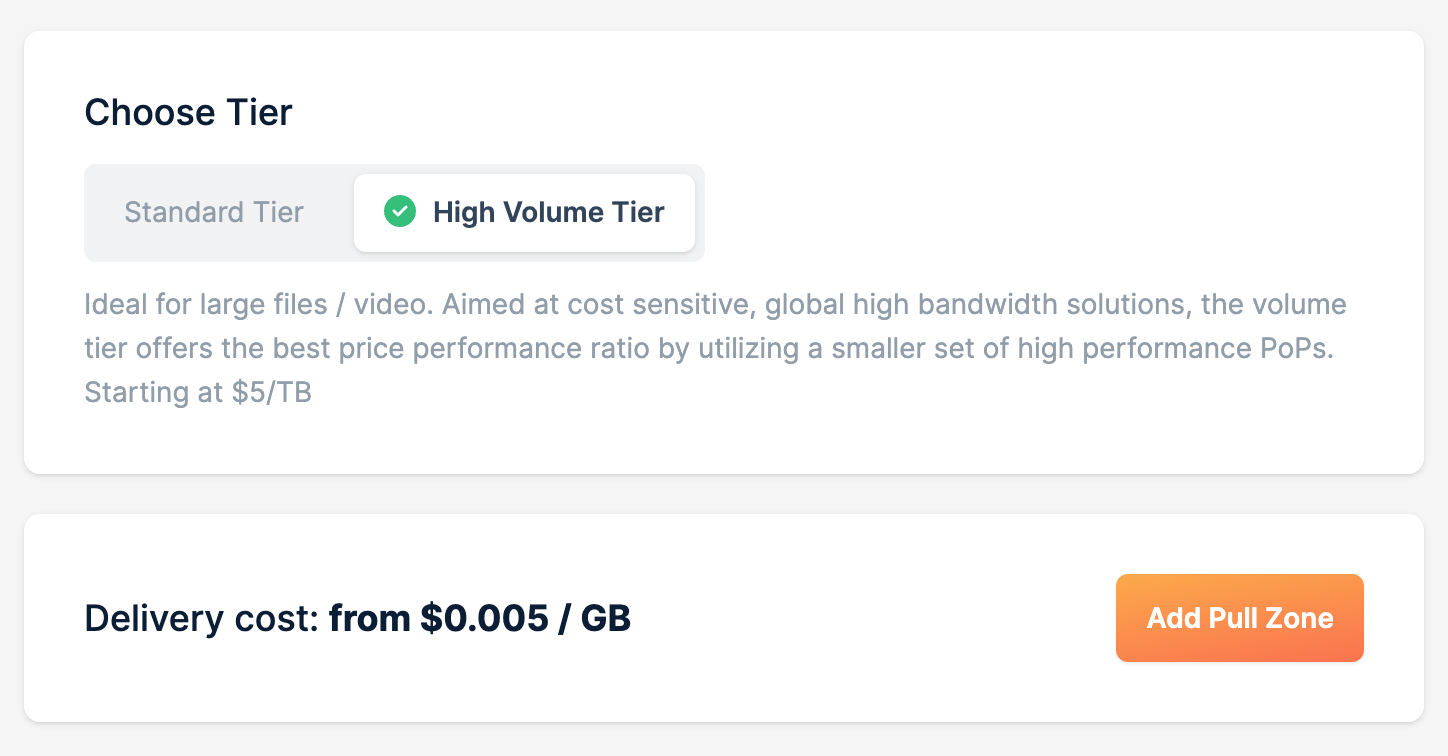
- High Volume Tier: A fixed pricing model, remarkably more cost-effective than the Standard Tier, with no option to select specific regions. Tailored to accommodate substantial data volumes, this tier is designed for high-capacity requirements.
Standard Tier :
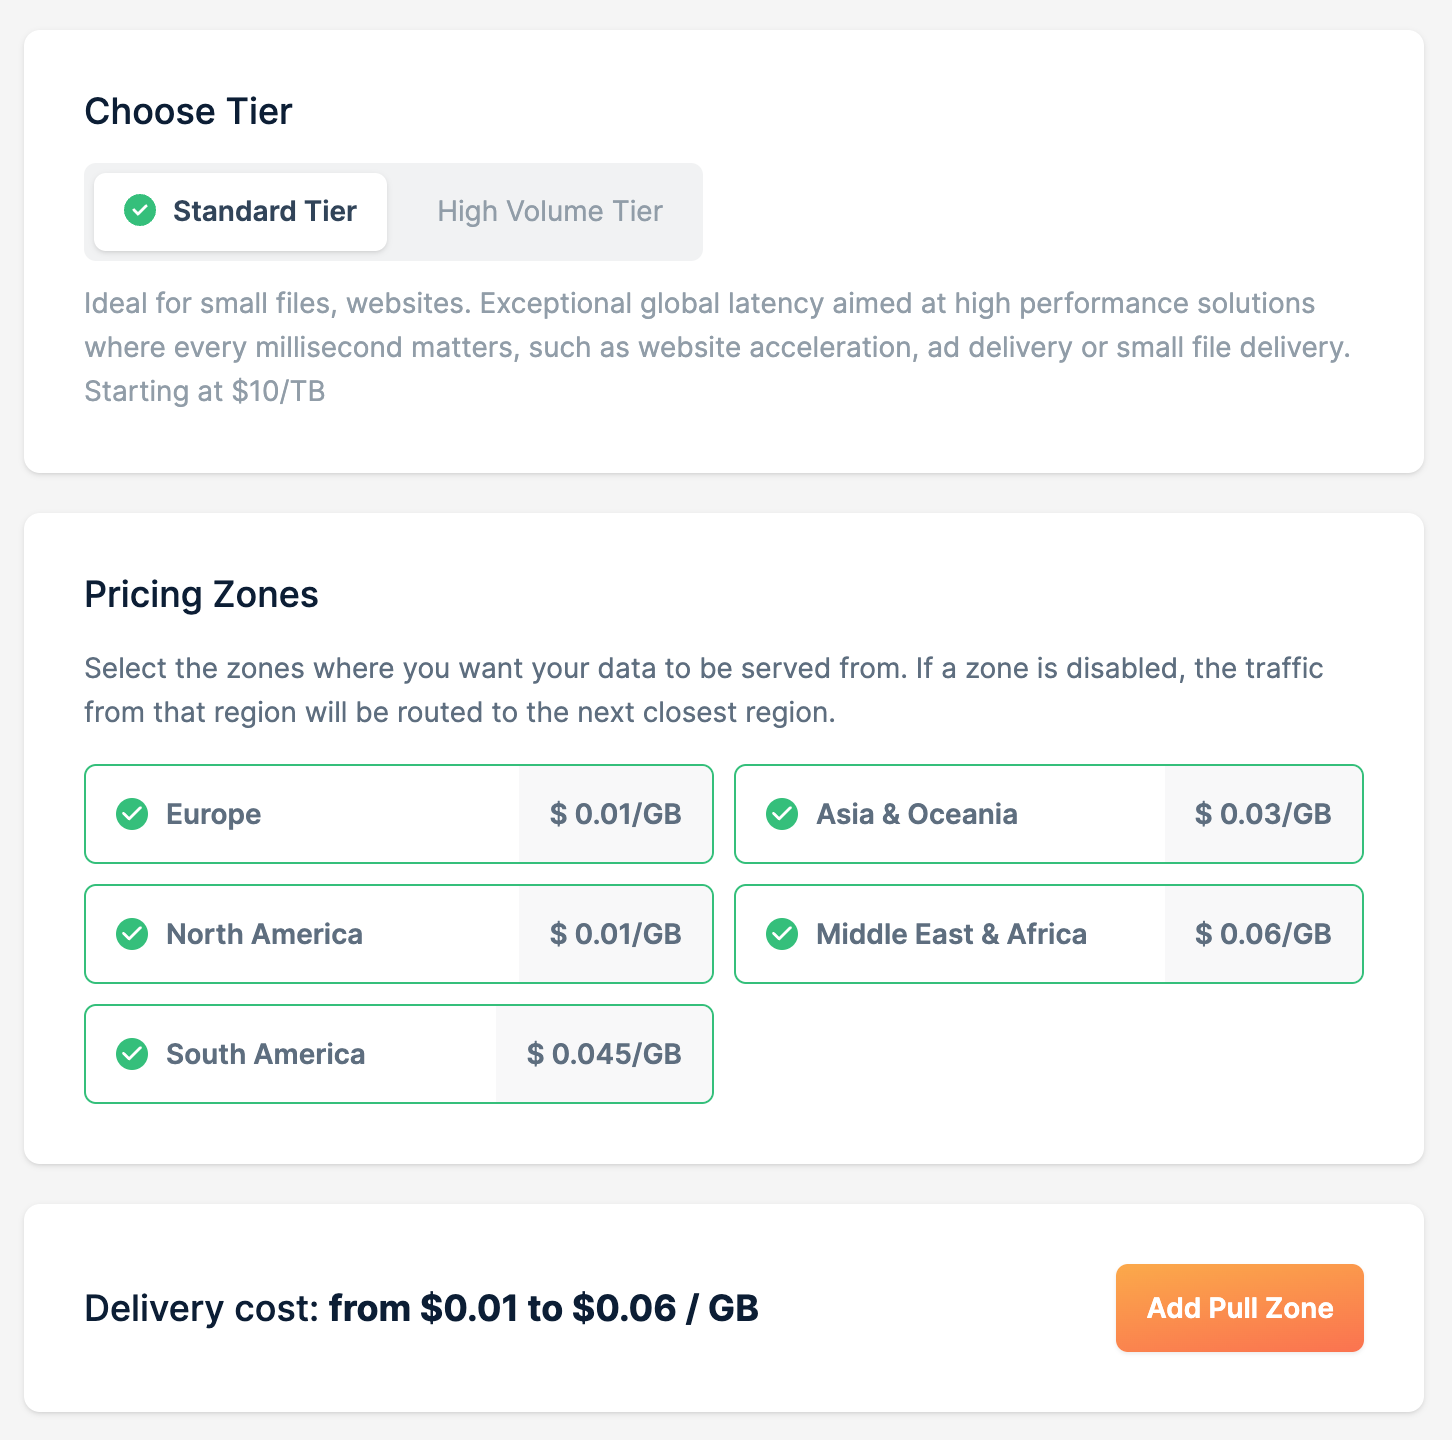
High Volume Tier:
The decision is yours to make as you choose the plan aligning perfectly with your requirements. For a deeper understanding of the available plans, feel free to explore BunnyCDN Pricing. Keep in mind that this decision is not set in stone, and you can modify your plan at any subsequent point.
Moving forward, click on Add Pull Zone.
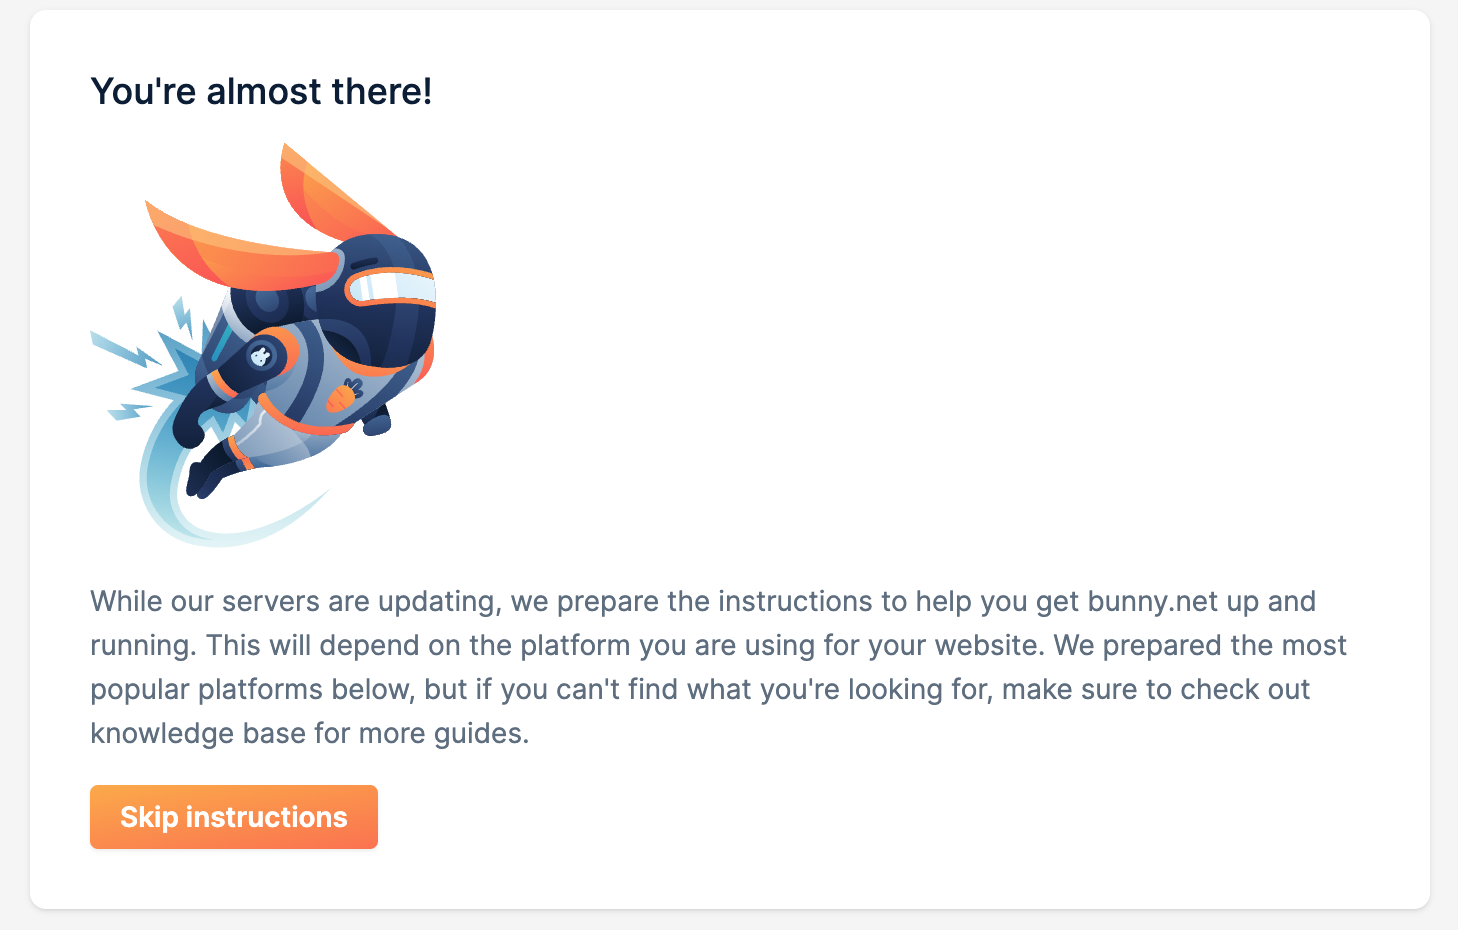
Upon doing so, you will be directed to an informative page outlining the setup process. In our scenario, you have the option to bypass instructions by clicking on Skip Instruction as it is not a compulsory step.
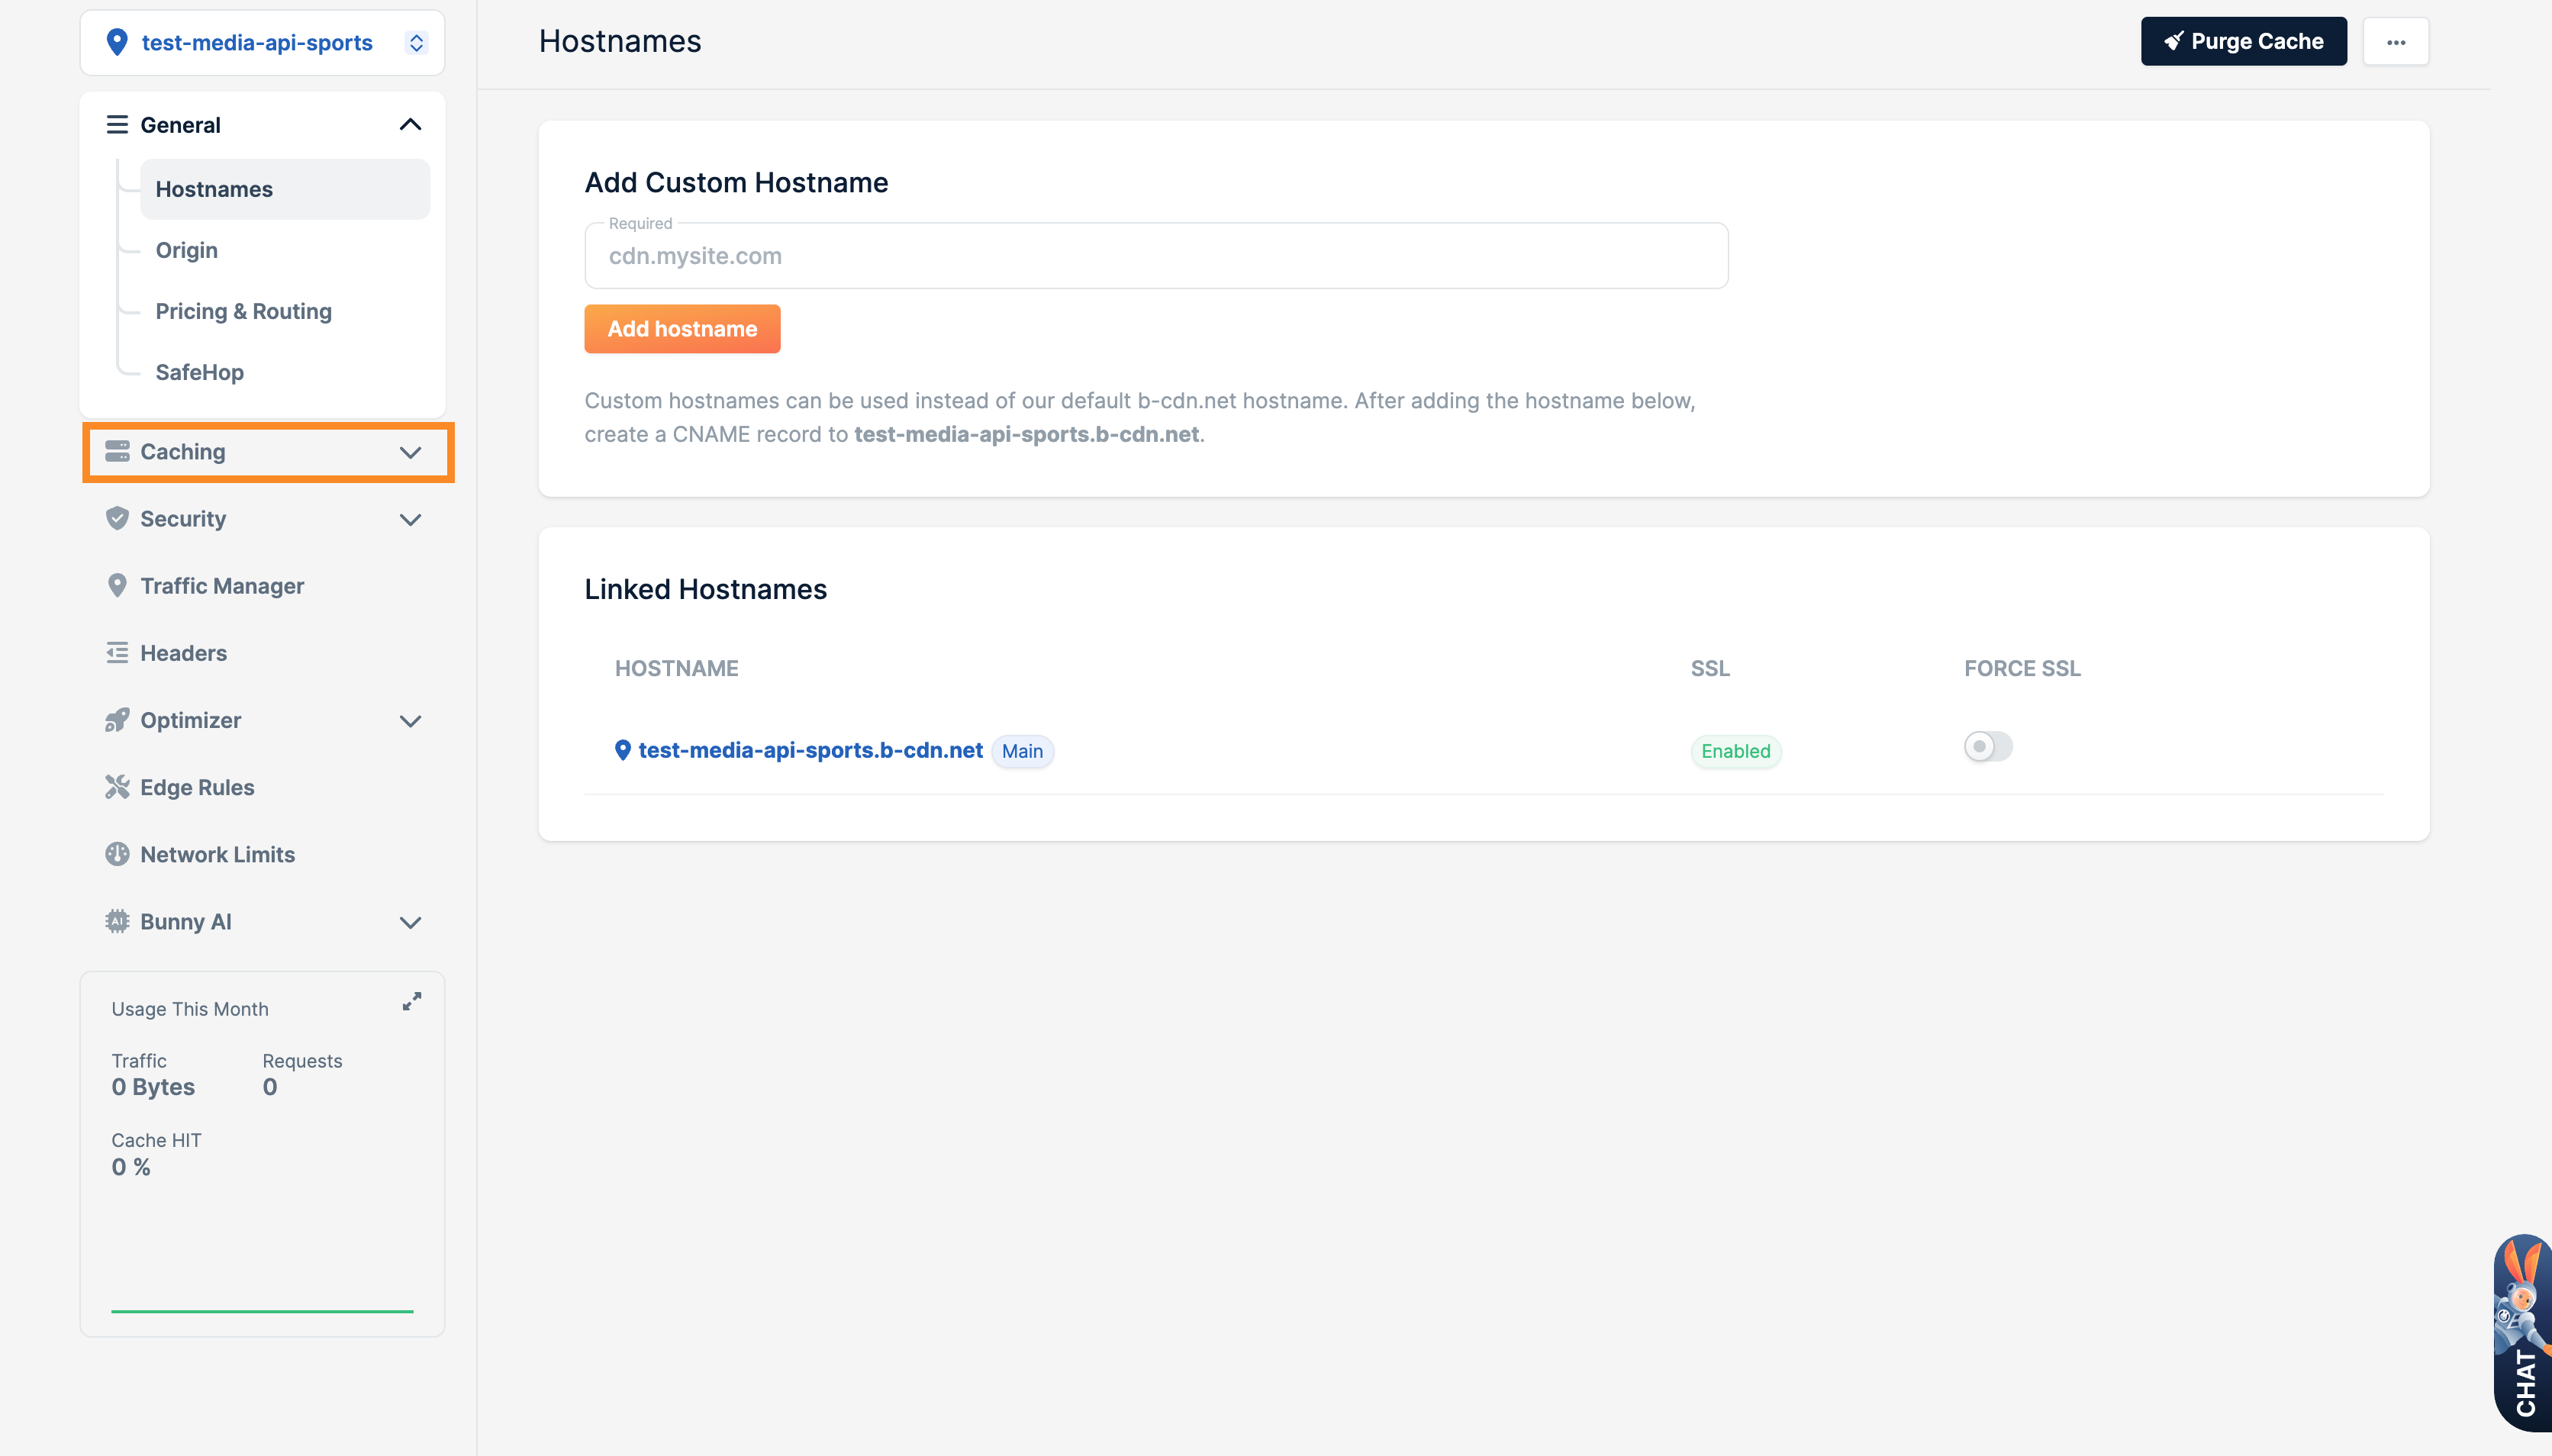
Welcome to your personalized pull zone dashboard, where you have the option to enhance your branding by incorporating your unique domain into the hostname section. This customization allows you to establish a distinct online presence. However, if you prefer simplicity, you can continue using the URL configured in the initial step, which serves as the designated address for your application.
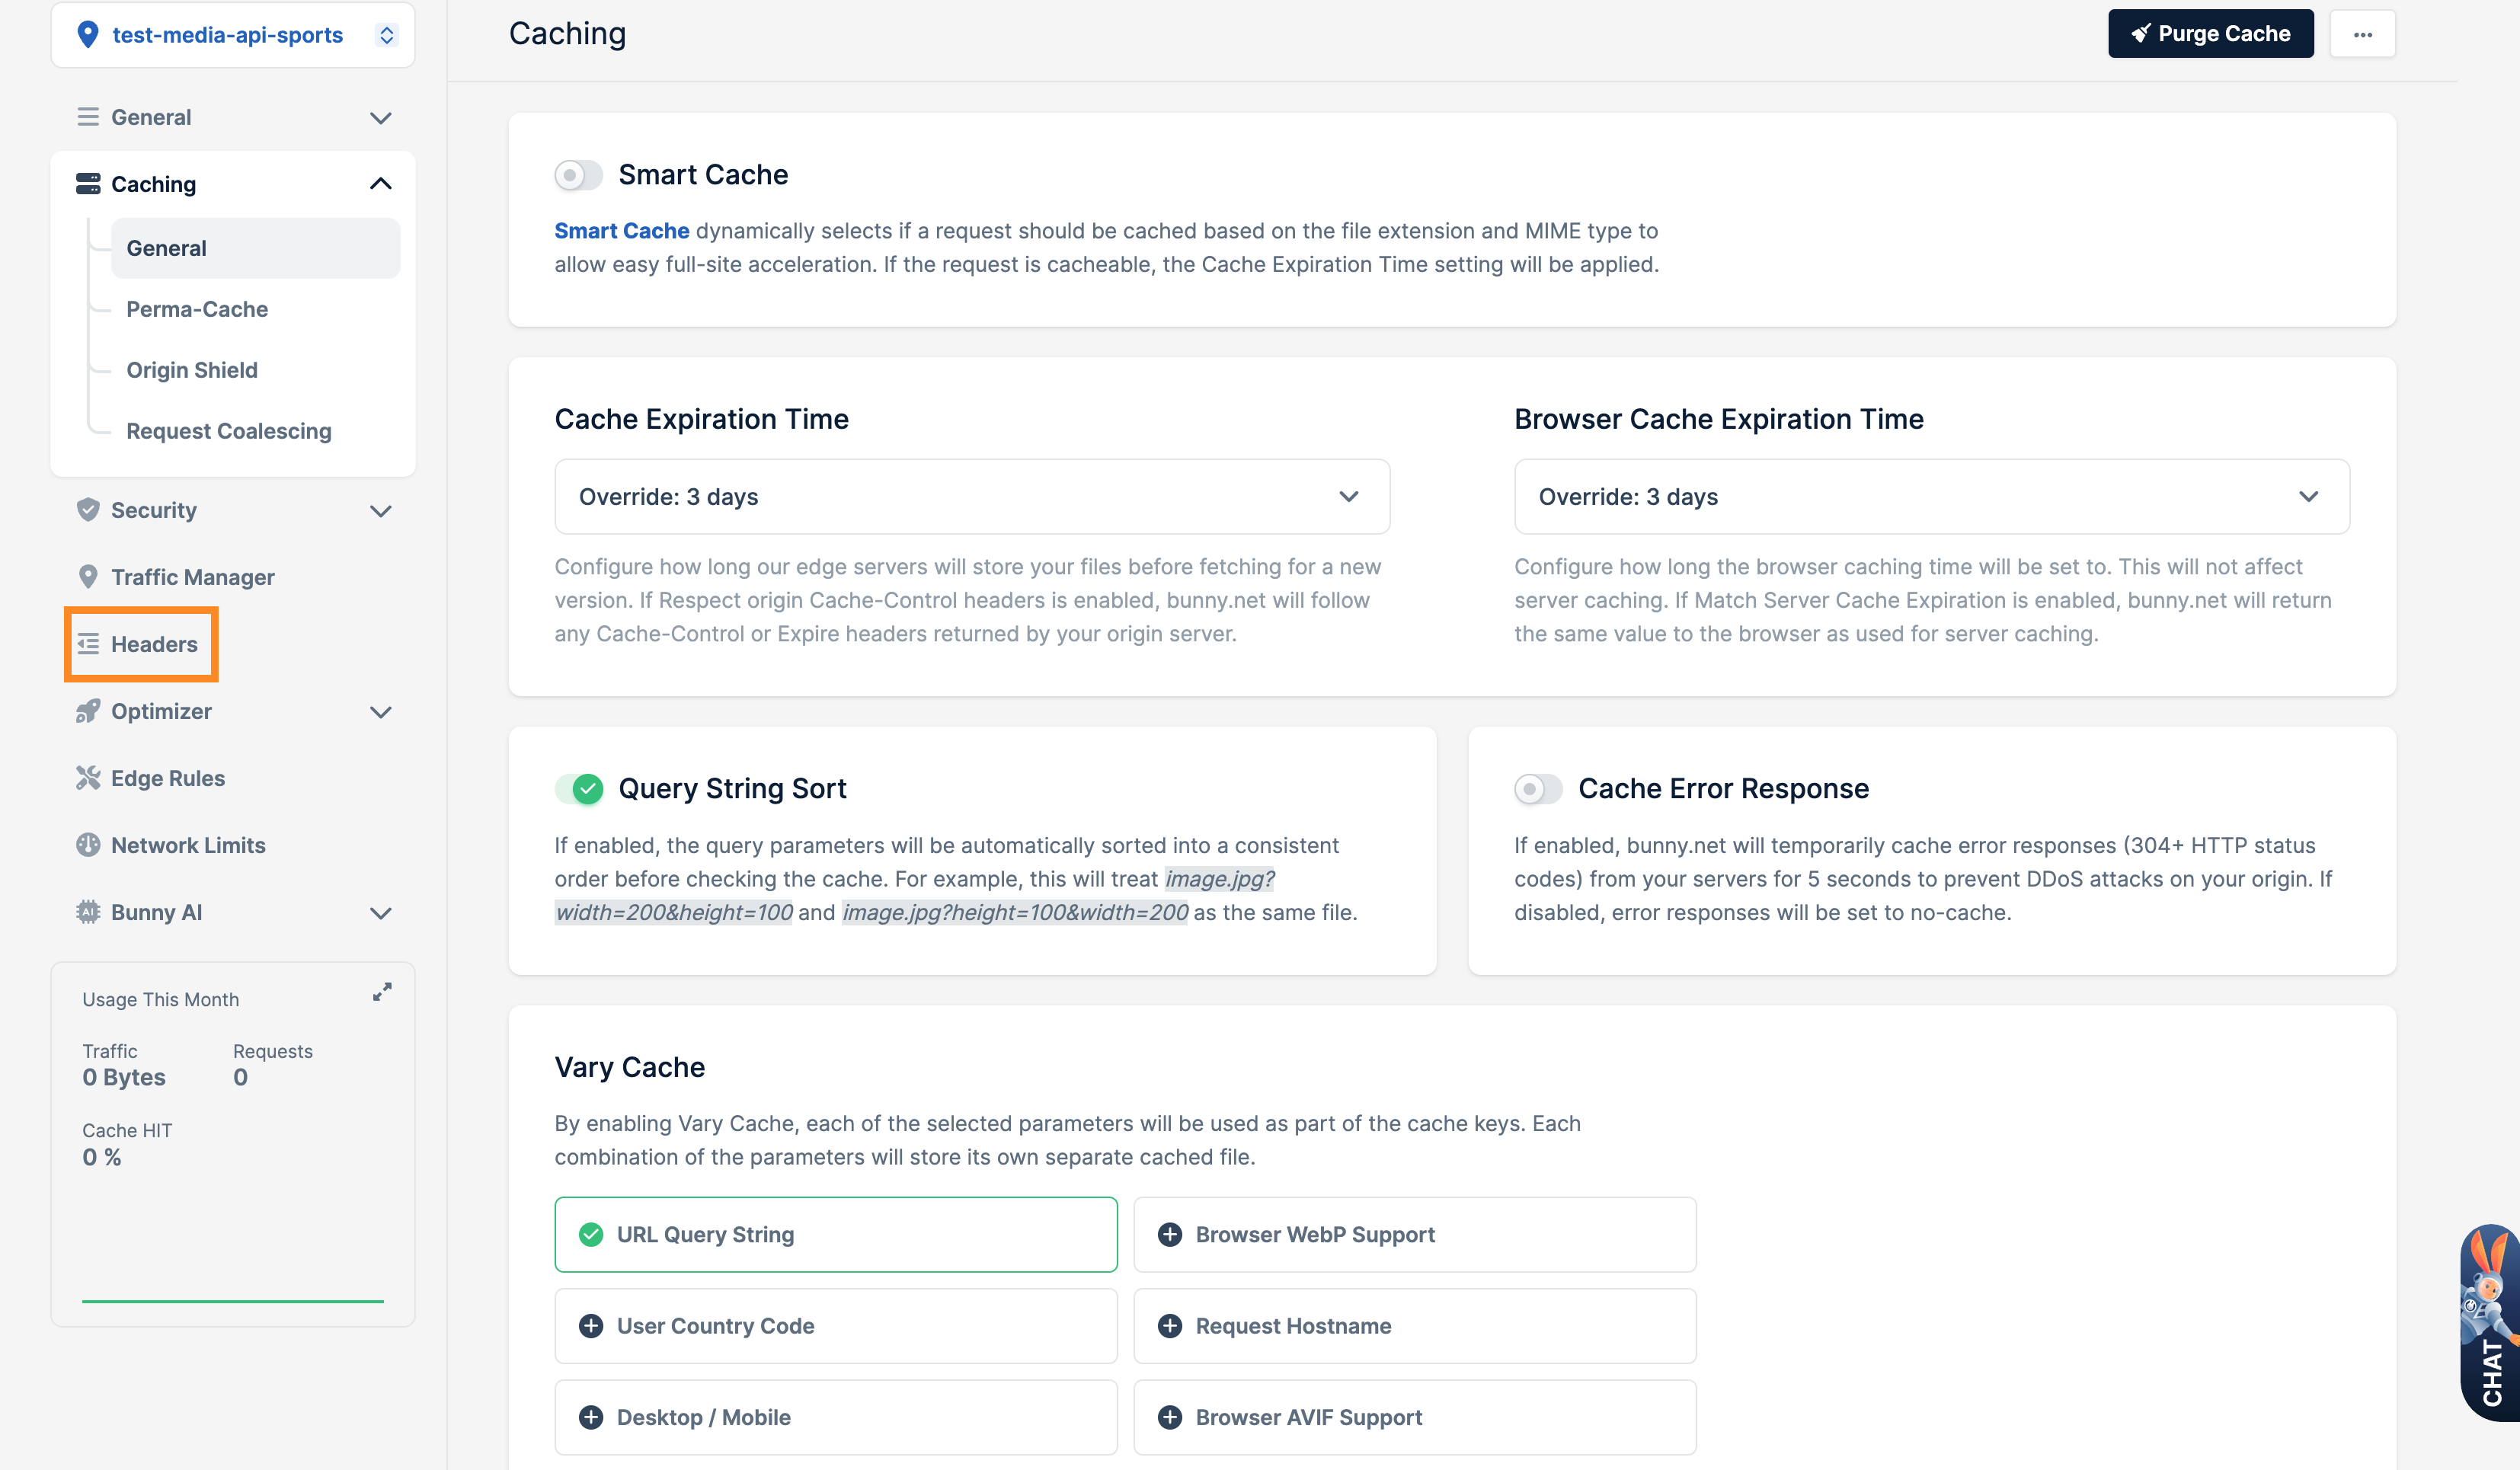
Let's seamlessly proceed with the foundational configuration by clicking on the caching option.
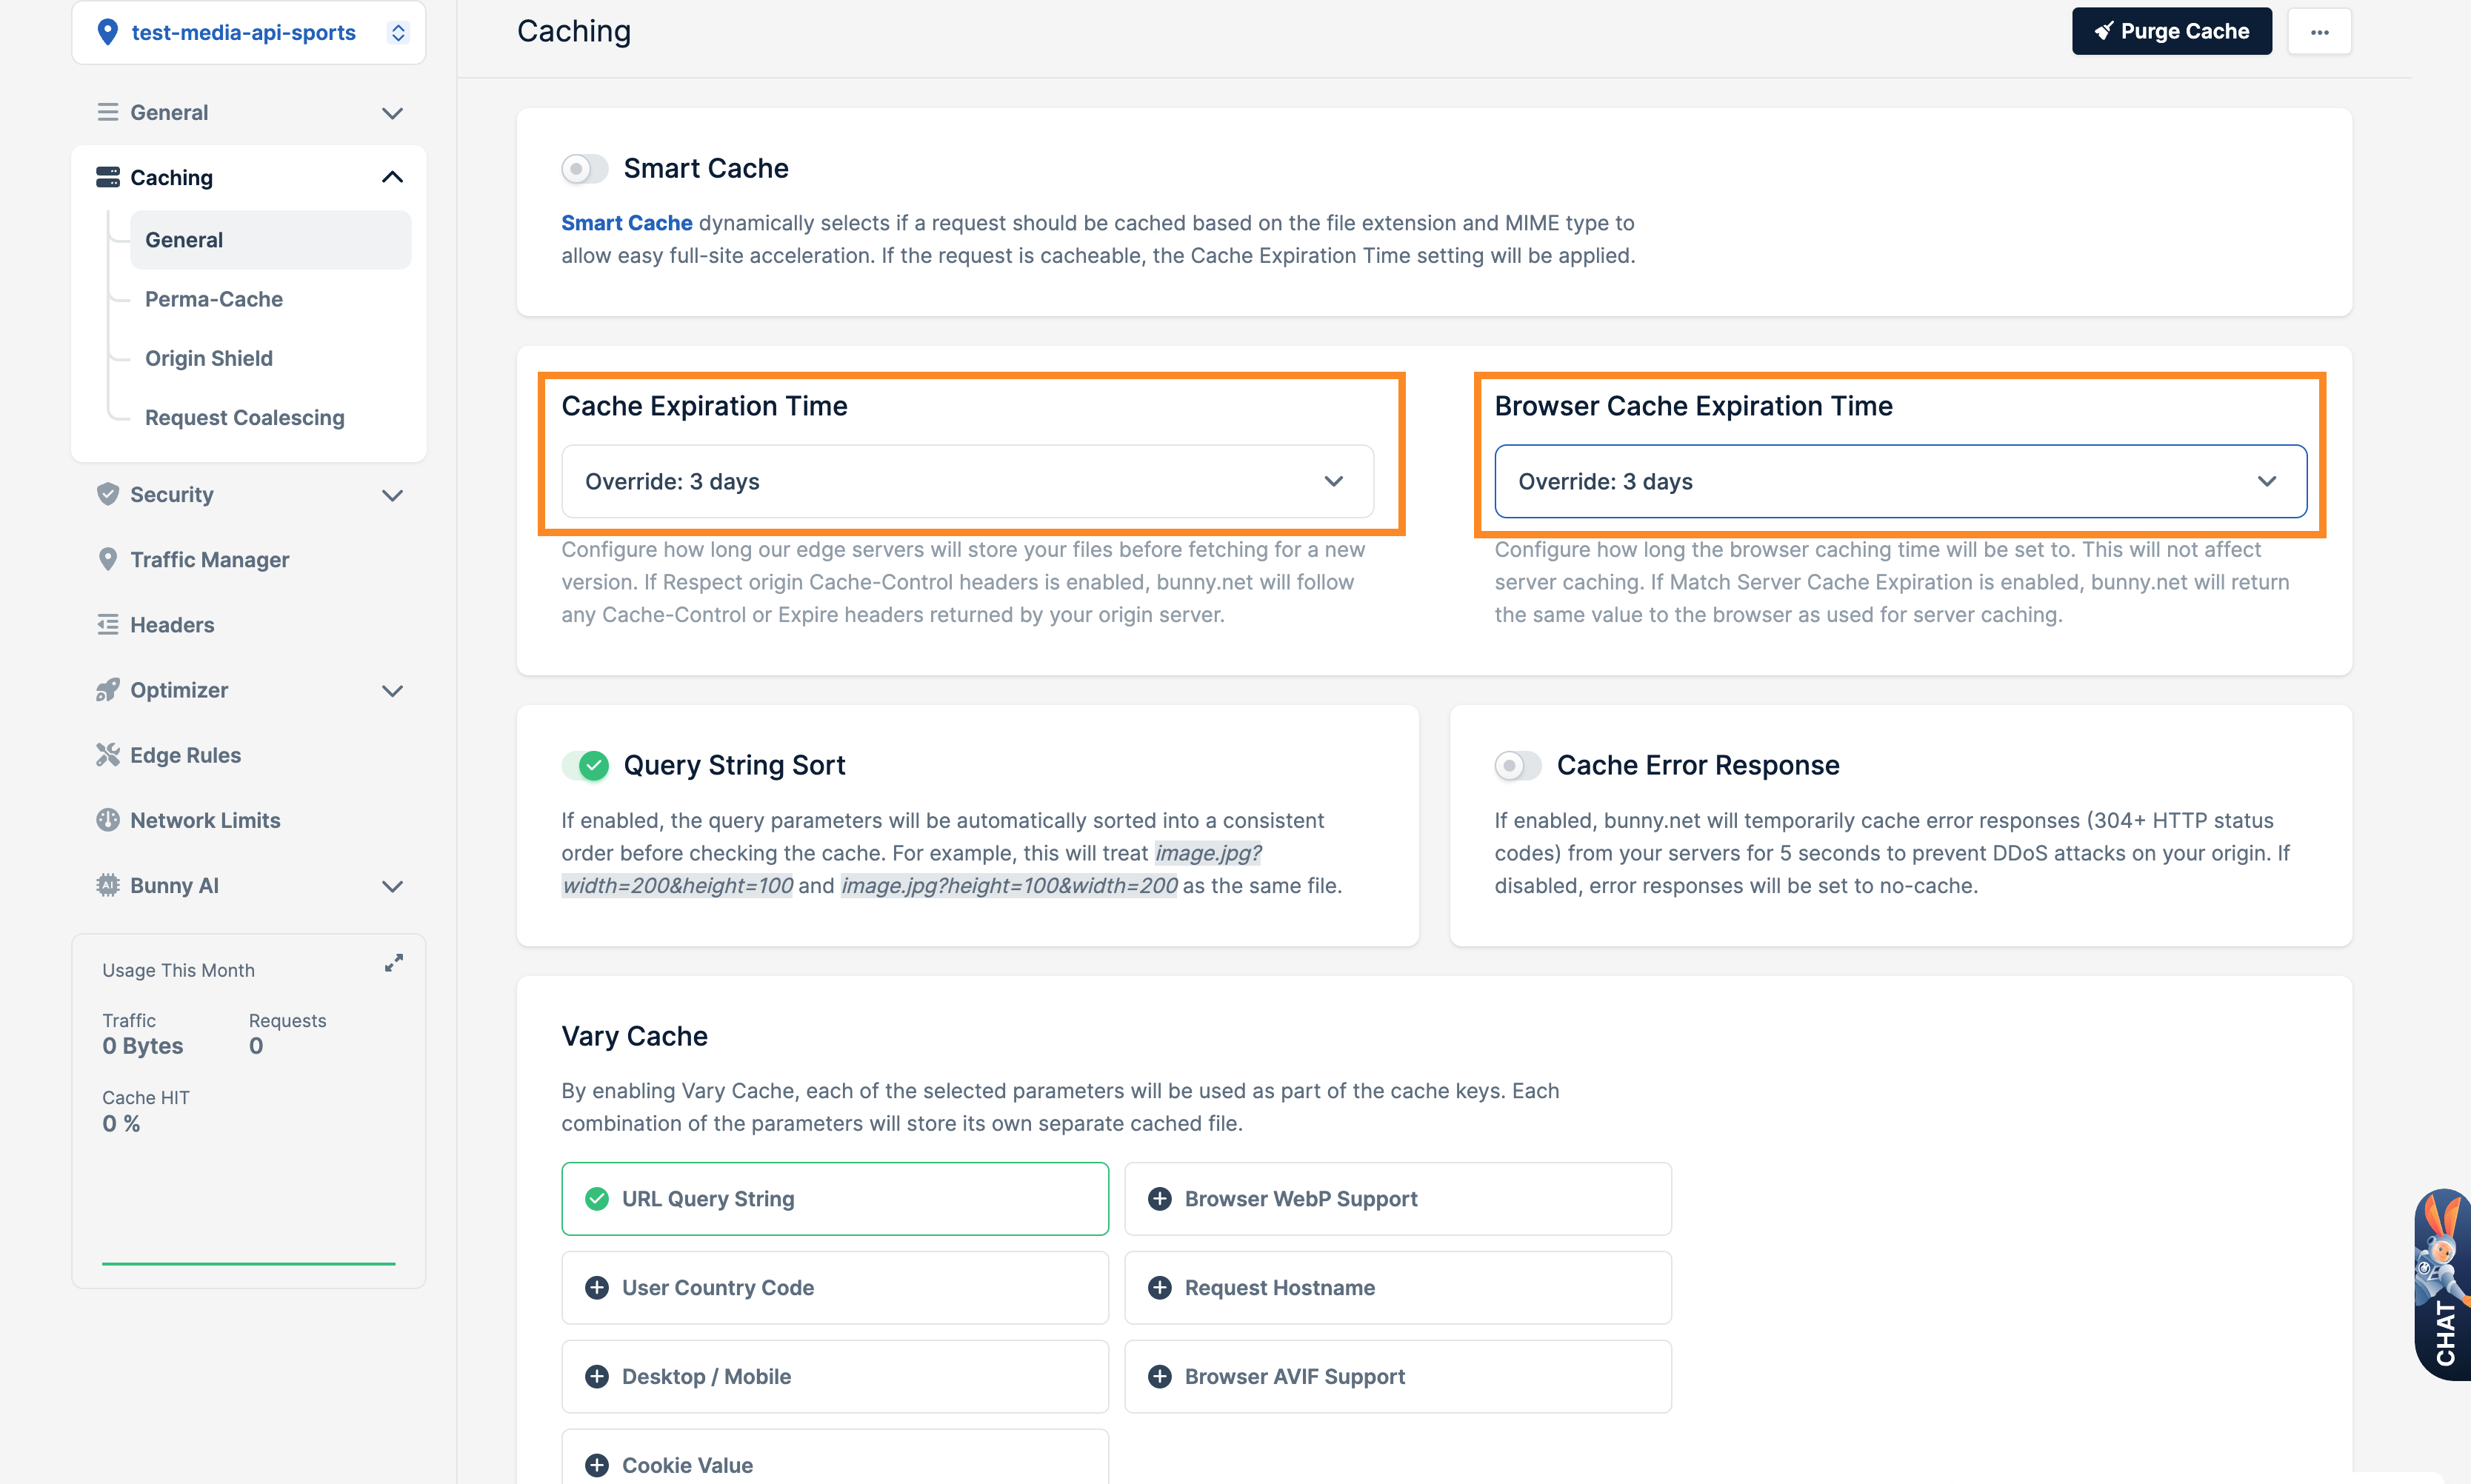
Modify the settings for Cache Expiration Time and Browser Cache Expiration Time according to your preferences. In our instance, we opted for a duration of 3 days. This implies that BunnyCDN will store this data for a period of 3 days before retrieving the latest updates from our servers. Given that these are media files associated with competitions, teams, players, stadiums, etc., and their content remains relatively stable, with minimal changes occurring, you can comfortably set higher values.
In the event of any modifications, rest assured that you can conveniently purge the cache to initiate a prompt update.
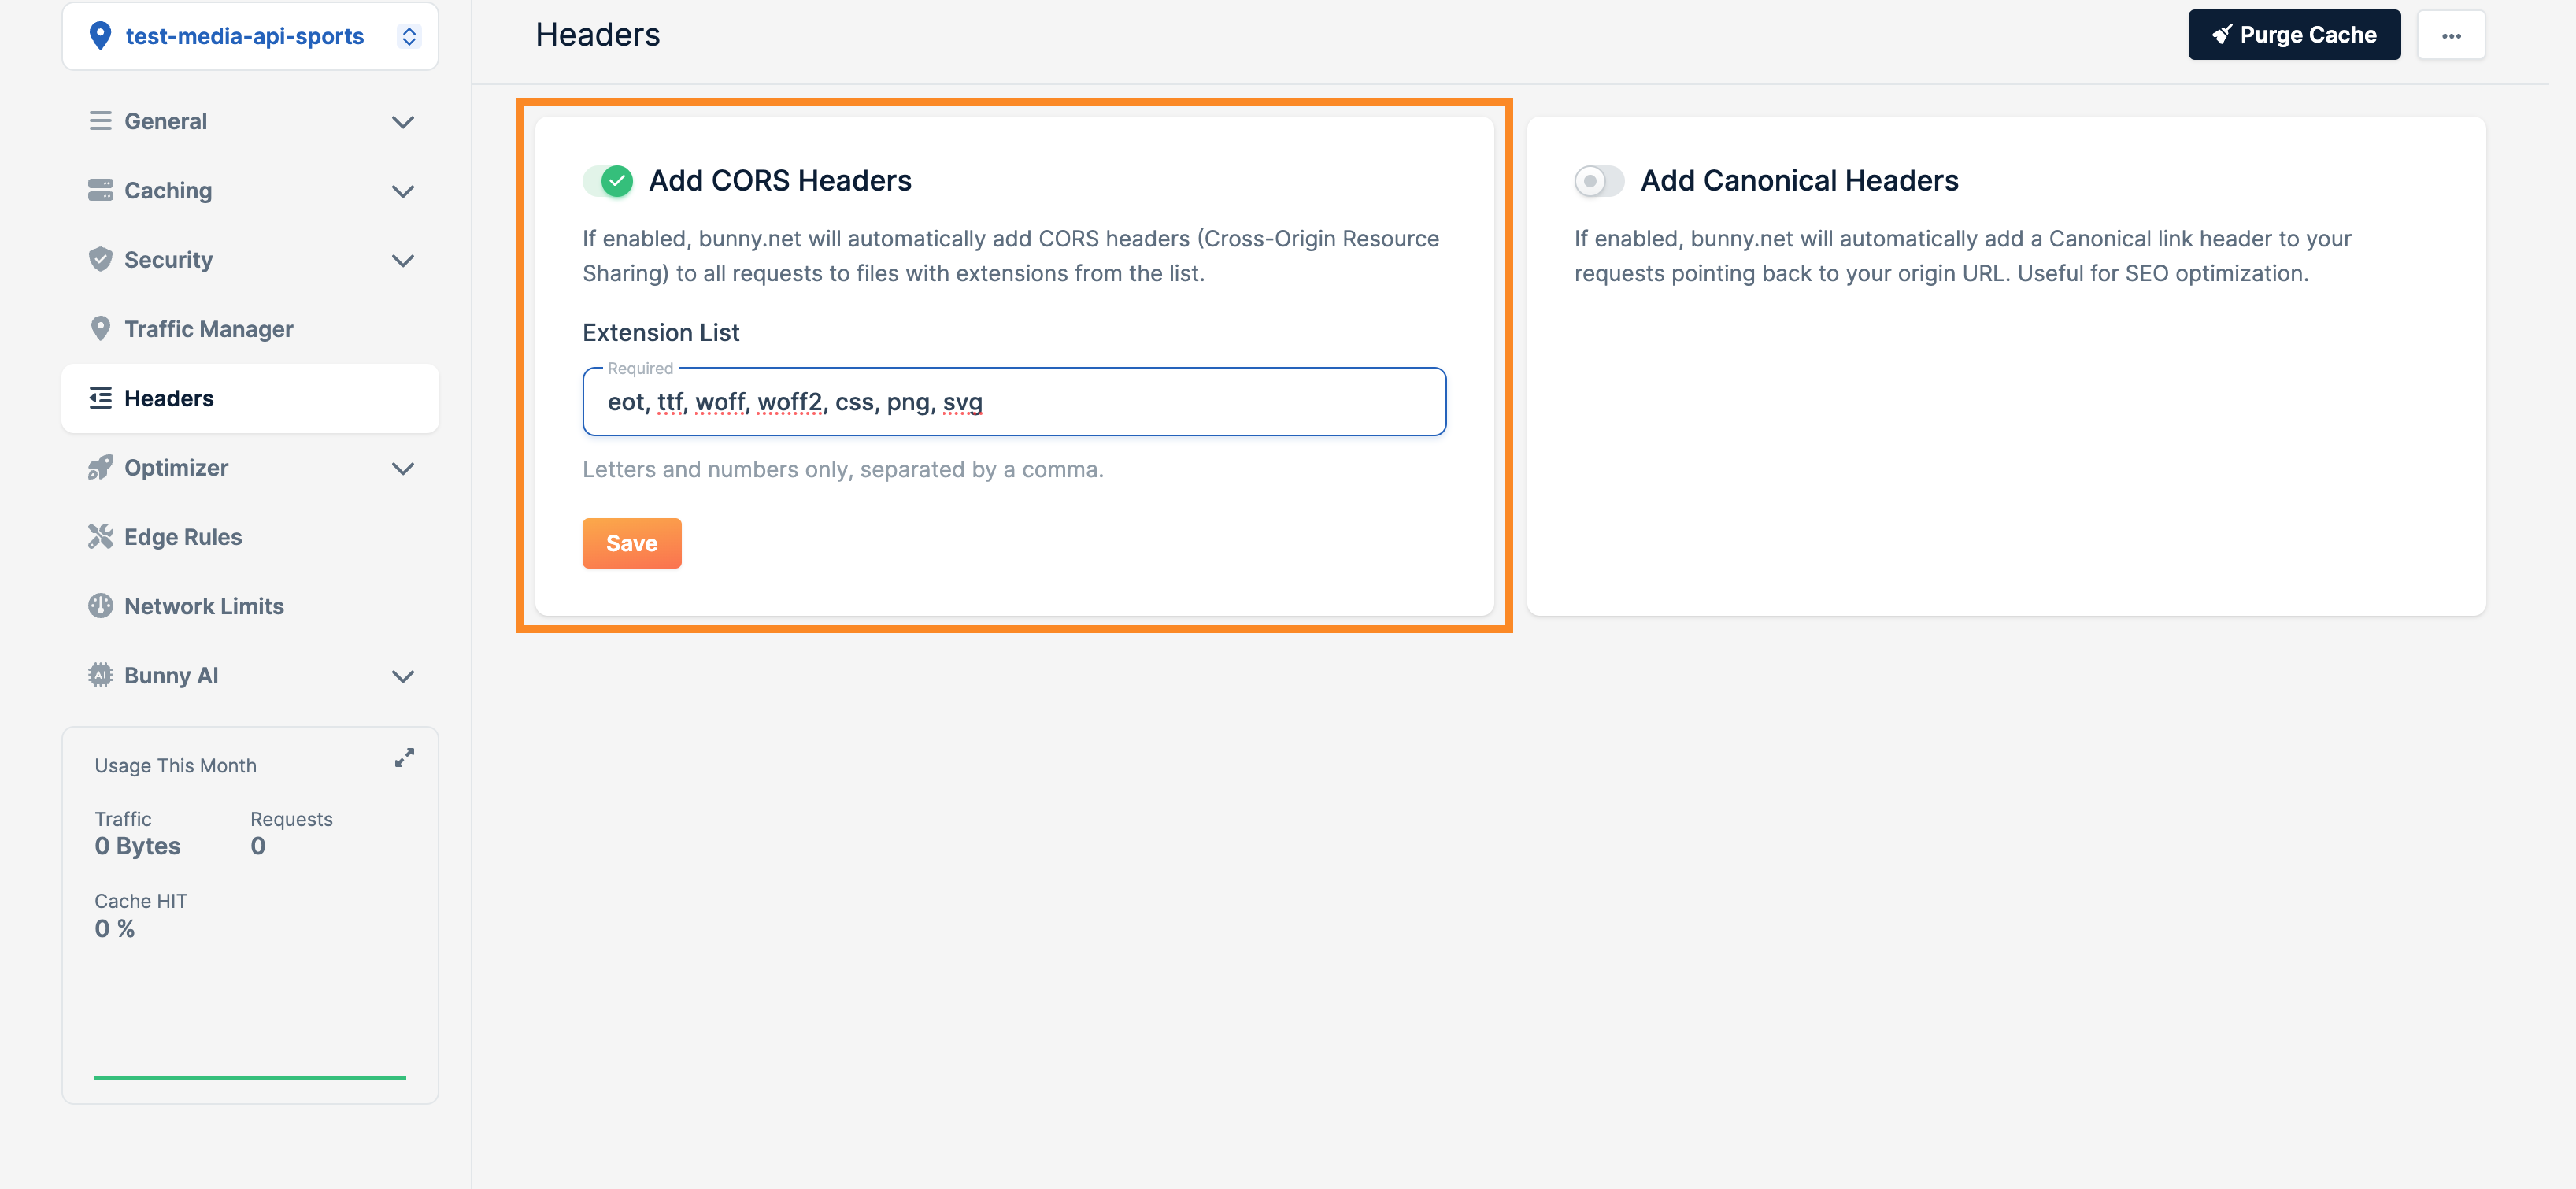
Proceed to the Headers section.
Now, navigate to the add CORS Headers section, where you can enhance your configuration by including specific extensions such as:
- png
- svg
After adding these extensions, make sure to click on the save button to save your configurations. This step ensures a more comprehensive and customized setup for your BunnyCDN pull zone, offering flexibility and control over how your media files are handled.
We have completed the basic configuration, and now your media is accessible through the chosen URL, such as test-media-api-sports/football/leagues/39.png. Feel free to integrate this URL into your application or website instead of using media.api-sports.io/football/leagues/39.png.
For further customization and optimization, BunnyCDN provides an array of features within your pull zone. Explore these options to tailor your content delivery, ensuring an efficient and seamless experience for your users. You can refer to the extensive documentation available at: https://support.bunny.net/hc/en-us/categories/360003064619-CDN
This documentation comprehensively covers various functionalities, providing insights into advanced settings and capabilities to enhance your BunnyCDN experience. Dive into these resources to unlock the full potential of your media delivery solution.