 API-FOOTBALL
The API-FOOTBALL has 4 widgets available : Livescore, Fixtures, Fixture and Standings, and for each of these widgets there are 3 themes available. But these themes may not fit your website or application at all. The documentation concerning the implementation and the parameters of the widgets is available here.
As a reminder, here are the widgets' functionalities:
- LIVESCORE : Display the list of current matches grouped by competition. The matches that start are automatically added and those that end are automatically removed.
- FIXTURES : Display the list of matches grouped by competition according to the parameters used.
- FIXTURE : Display a specific fixture as well as events, statistics, lineups and players statistics if they are available.
- STANDINGS: Display the standings of a competition or a team according to the parameters used.
We will see how to customize the widgets to our own liking in order to adapt them 100% with our needs.
For this tutorial you will need to have some knowledge of CSS, if you don't, you can go to this tutorial to learn the basics because that's all we need.
DOWNLOAD THE NECESSARY FILES
We will start by downloading the sources needed to customize our widgets. For this there is a LINK that is available depending on the version of the widgets you use.
We will do this tutorial on the latest version 1.1.8.
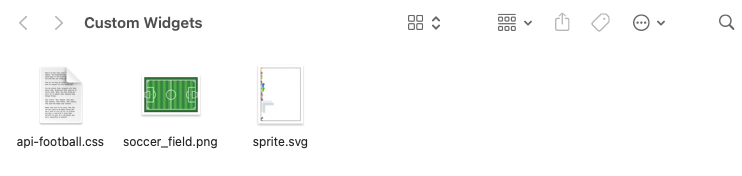
Create a folder that we will name Custom Widgets and put the downloaded files in it. You should have these files here :
We will now create an index.html file where we will put the FIXTURES widget code like this:
<!DOCTYPE html>
<html>
    <head>
        <meta charset="utf-8">
        <meta name="viewport" content="width=device-width, initial-scale=1">
        <title>CUSTOM WIDGET</title>
    </head>
    <body>
        <div id="wg-api-football-fixtures"
                    data-host="v3.football.api-sports.io"
                    data-refresh="60"
                    data-date="2022-02-11"
                    data-key="Your-Api-Key-Here"
                    data-theme=""
                    data-show-errors="false"
                    class="api_football_loader">
        </div>
        <script
                    type="module"
                    src="https://widgets.api-sports.io/football/1.1.8/widget.js">
                </script>
    </body>
</html>
Fill in the data-key field with your API-KEY. If you don't know it, you can find it on the profile page of the dashboard.
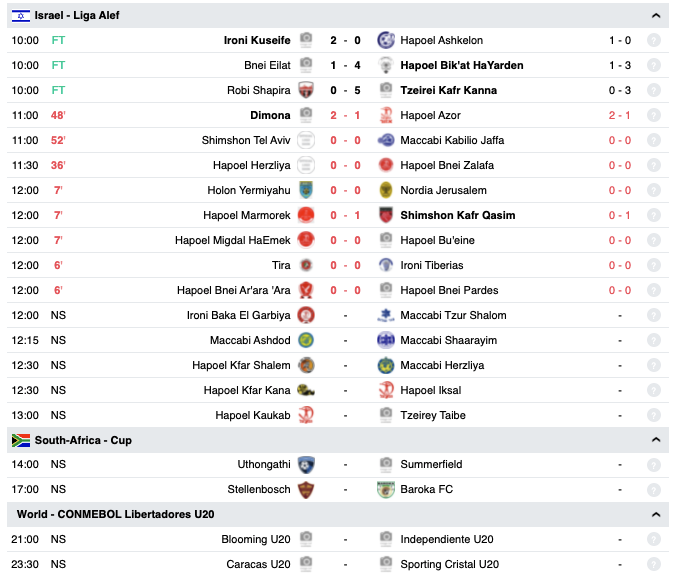
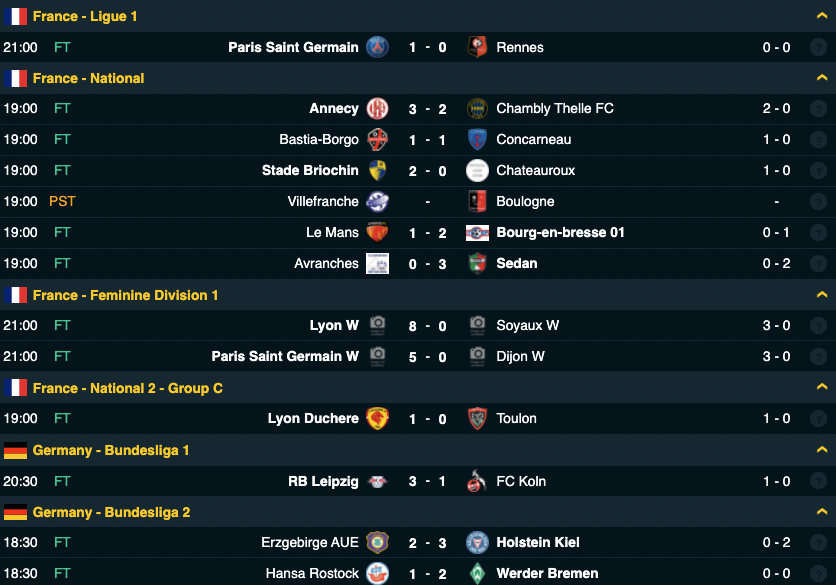
If you launch the index.html page in your browser you should get a result similar to this one:
If this is not the case, you can display the errors by setting the data-show-errors field to true.
For the moment the widget displays the default theme, so we will disable it by setting the data-theme field to false.
<!DOCTYPE html>
<html>
    <head>
        <meta charset="utf-8">
        <meta name="viewport" content="width=device-width, initial-scale=1">
        <title>CUSTOM WIDGET</title>
    </head>
    <body>
        <div id="wg-api-football-fixtures"
                    data-host="v3.football.api-sports.io"
                    data-refresh="60"
                    data-date="2022-02-11"
                    data-key="Your-Api-Key-Here"
                    data-theme="false"
                    data-show-errors="false"
                    class="api_football_loader">
        </div>
        <script
                    type="module"
                    src="https://widgets.api-sports.io/football/1.1.8/widget.js">
                </script>
    </body>
</html>
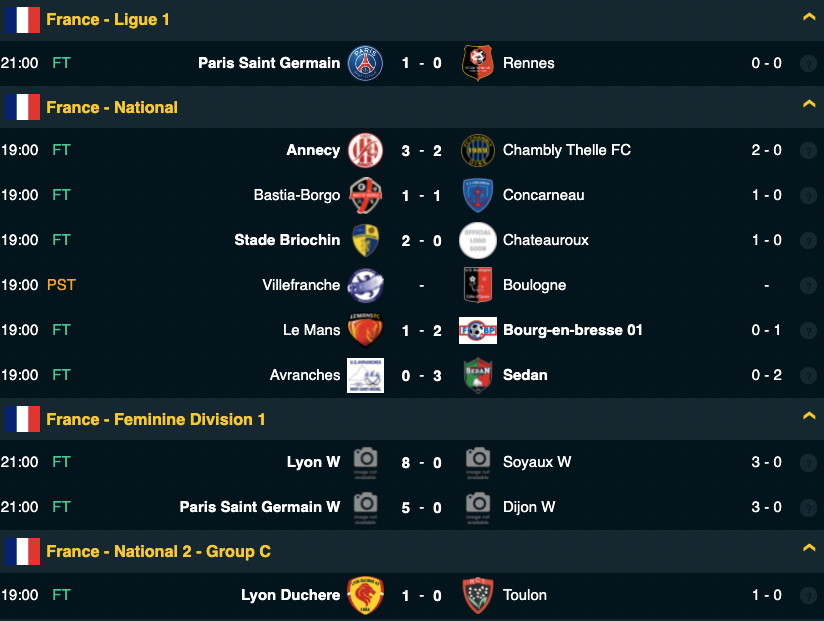
If you reload your index.html page you should get something similar:
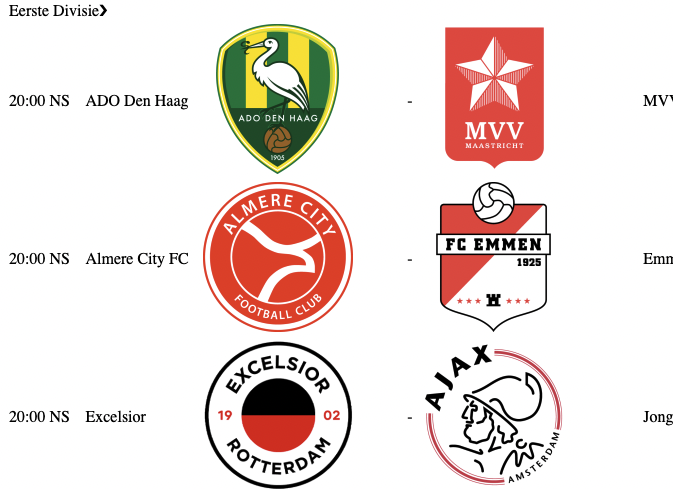
Which is totally normal since we have deactivated the widget theme. We will now modify the index.html file so that it uses the theme that we have downloaded and so that we can modify it as we wish.
We will add the following tag in the head of index.html.
<link rel="stylesheet" href="api-football.css">
The value of the href field is to be modified according to where you have placed your files, in our case all files are at the same level.
Your index.html file should look like this:
<!DOCTYPE html>
<html>
    <head>
        <meta charset="utf-8">
        <meta name="viewport" content="width=device-width, initial-scale=1">
        <title>CUSTOM WIDGET</title>
        <link rel="stylesheet" href="api-football.css">
    </head>
    <body>
        <div id="wg-api-football-fixtures"
                    data-host="v3.football.api-sports.io"
                    data-refresh="60"
                    data-date="2022-02-11"
                    data-key="Your-Api-Key-Here"
                    data-theme="false"
                    data-show-errors="false"
                    class="api_football_loader">
        </div>
        <script
                    type="module"
                    src="https://widgets.api-sports.io/football/1.1.8/widget.js">
                </script>
    </body>
</html>
If you reload the index.html page you should get a result like this:
This displays the default theme but not the one of the widget but the one of the api-football.css file that we have at the root of our project. We will now make some modifications to change :
- the font
- the colors
- the sizes
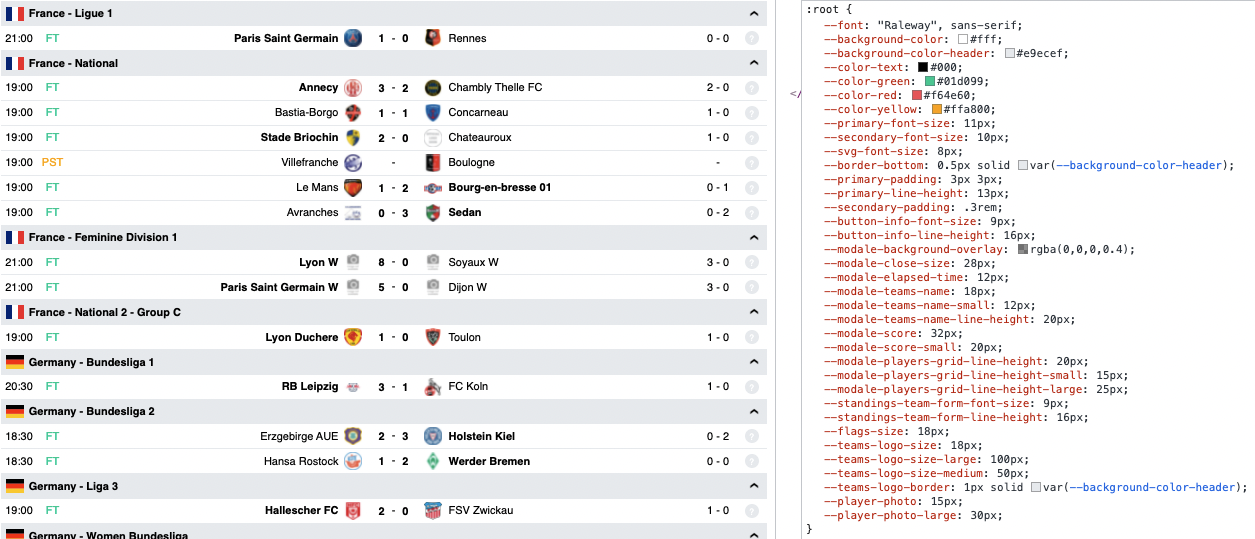
If we open the api-football.css file the first class named :root{} contains all the elements that we can easily modify.
:root {
    --font: "Raleway", sans-serif;

    --background-color: #fff;
    --background-color-header: #e9ecef;
    --color-text: #000;
    --color-text-header: #000;
    --color-green: #01d099;
    --color-red: #f64e60;
    --color-yellow: #ffa800;

    --primary-font-size: 11px;
    --secondary-font-size: 10px;
    --header-font-size: 11px;
    --svg-font-size: 8px; /* Only for icon-svg */

    --border-bottom: 0.5px solid var(--background-color-header); /* 0px for no border */
    --primary-padding: 3px 3px;
    --primary-line-height: 13px;
    --secondary-padding: .3rem; /* For Headers Only */

    --button-info-font-size: 9px ;/* Only for info button */
    --button-info-line-height: 16px ; /* Only for info button */

    /* LIVESCORE, FIXTURES & FIXTURE WIDGETS ONLY */
    --modale-background-overlay: rgba(0,0,0,0.4); /* Only for modale */
    --modale-close-size: 28px; /* Only for the close button in the modale */
    --modale-elapsed-time: 12px; /* Only for elapsed time in the modale or FIXTURE widget */
    --modale-teams-name: 18px; /* Only for Teams Name in the modale or FIXTURE widget */
    --modale-teams-name-small: 12px; /* Only for Teams Name in the modale or FIXTURE widget <480px */
    --modale-teams-name-line-height: 20px; /* Only for Teams Name in the modale or FIXTURE widget */
    --modale-score: 32px; /* Only for Score in the modale or FIXTURE widget >480px */
    --modale-score-small: 20px; /* Only for Score in the modale or FIXTURE widget <480px */
    --modale-players-grid-line-height: 20px; /* Only for players on the lineups grid in the modale or FIXTURE widget */
    --modale-players-grid-line-height-small: 15px; /* Only for players on the lineups grid in the modale or FIXTURE widget <480px */
    --modale-players-grid-line-height-large: 25px; /* Only for players on the lineups grid in the modale or FIXTURE widget >1024px */

    /* STANDINGS WIDGET ONLY */
    --standings-team-form-font-size: 9px; /* Only for team form and info button */
    --standings-team-form-line-height: 16px;

    /* LOGOS / FLAGS / PHOTOS */
    --flags-size: 18px;
    --teams-logo-size: 18px;
    --teams-logo-size-large: 100px; /* Only in the modale or FIXTURE widget */
    --teams-logo-size-medium: 50px; /* Only in the modale or FIXTURE widget <480px */
    --teams-logo-border: 1px solid var(--background-color-header); /* 0px for no border, Only in the modale or FIXTURE widget */
    --player-photo: 15px;  /* Only in the modale or FIXTURE widget */
    --player-photo-large: 30px;  /* Only in the modale or FIXTURE widget <480px */
}
By changing the values contained in these variables we will be able to change the font, the colors, the sizes etc...
We can also do it directly through our browser by opening the console and going to elements->style.
On the right side of your screen you should find all these variables and thus be able to modify them and see the result in real time on the left side.
Note: The changes made here will not be saved in the api-football.css file, it only allows you to have a preview, if you reload the page or close the browser the changes will be lost. Once you have a value that suits you, you must add it to the api-football.css file.
We will start by changing the colors to make it a dark theme. and for that we will only modify background-color, background-color-header, color-text and color-text-header.
:root {
    --background-color: #00141e;
    --background-color-header: #0f2d37;
    --color-text: #fff;
    --color-text-header: #ffcd00;
}
With these modifications we obtain the following result:
We will now make some changes to :
- logos
- fonts
- borders
Let's try
:root {
    --header-font-size: 13px;
    --flags-size: 28px;
    --teams-logo-size: 30px;
    --border-bottom: 0px solid var(--background-color-header);
    --primary-font-size: 12px;
    --primary-line-height: 15px;
    --secondary-padding: .4rem;

    --modale-teams-name: 16px;
    --teams-logo-border: 0px solid var(--background-color-header);
    --modale-score: 40px;
}
With these modifications we obtain the following result:
And that's it! You just have to find the design that suits you in order to have a widget 100% integrated in your application or website.
Don't hesitate to share your creations with us.