 API-FOOTBALL
Hello everyone.
Today we are going to see how to change the attributes of a widget without having to reload the page and that just with a click on a link or a button.
In this tutorial, we will take for example the standings widget but it works for all widgets. You just have to adapt the script.
We will use version 2.0.3 of the widgets, but again it can work for earlier versions. To see the differences between the versions, you have the changelog available in the documentation.
We will focus only on functionality and not on design but feel free to add your personal touch.
PART 1:
To start we will create an index.html file, and paste this code inside.
<!DOCTYPE html>
<html>
    <head>
        <meta charset="utf-8">
        <meta name="viewport" content="width=device-width, initial-scale=1">
        <title>Demo - Widget</title>
    </head>
    <body>

    </body>
</html>
Once this is done, we will retrieve the widget code and integrate it into our index.html file in the < body > tags.
The widget code is available here on the right side of the documentation.
Don't forget to include your API-KEY in the data-key field. If you don't have it, it is available there in the dashboard.
Your index.html page should look like this for now :
<!DOCTYPE html>
<html>
    <head>
        <meta charset="utf-8">
        <meta name="viewport" content="width=device-width, initial-scale=1">
        <title>Demo - Widget</title>
    </head>
    <body>

        <div id="wg-api-football-standings"
            data-host="v3.football.api-sports.io"
            data-key="Your-Api-Key-Here"
            data-league="39"
            data-team=""
            data-season="2022"
            data-theme=""
            data-show-errors="false"
            data-show-logos="true"
            class="wg_loader">
        </div>
        <script
            type="module"
            src="https://widgets.api-sports.io/2.0.3/widgets.js">
        </script>

    </body>
</html>
You will notice that we have changed the value of data-season to 2022.
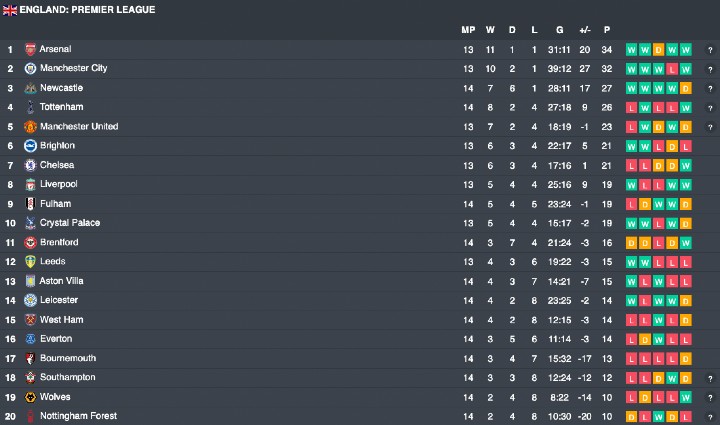
If you have added your API-KEY and run the index.html file on your browser, you should have the Premier League standings displayed.
PART 2:
For our example we will use 3 competitions
- England - Premier League
- France - Ligue 1
- Germany - Bundesliga 1
The ids and seasons for these competitions are available in the dashboard.
We will now create a menu with 3 links that will allow us later to dynamically change the data-league attribute of the widget.
Here is the code to integrate in your index.html file :
<div>
    <a href="#">England - Premier League</a>
    <a href="#">France - Ligue 1</a>
    <a href="#">Germany - Bundesliga 1</a>
</div>
Your index.html page should look like this for now :
<!DOCTYPE html>
<html>
    <head>
        <meta charset="utf-8">
        <meta name="viewport" content="width=device-width, initial-scale=1">
        <title>Demo - Widget</title>
    </head>
    <body>

        <div>
            <a href="#">England - Premier League</a>
            <a href="#">France - Ligue 1</a>
            <a href="#">Germany - Bundesliga 1</a>
        </div>

        <div id="wg-api-football-standings"
            data-host="v3.football.api-sports.io"
            data-key="Your-Api-Key-Here"
            data-league="39"
            data-team=""
            data-season="2022"
            data-theme=""
            data-show-errors="false"
            data-show-logos="true"
            class="wg_loader">
        </div>
        <script
            type="module"
            src="https://widgets.api-sports.io/2.0.3/widgets.js">
        </script>

    </body>
</html>
As you have noticed for the moment nothing happens when you click on the links and this is normal, we will have to create a javascript function for that.
PART 3:
We are now going to develop a javascript function that will change the attributes of the widget depending on the link we click on.
For this we will need to add 2 elements to the links we have created:
- A class, that will trigger the function that we will name
_link - A attribute containing the id of the competition that we will name
data-league
Like this :
<div>
    <a href="#" class="_link" data-league="39">England - Premier League</a>
    <a href="#" class="_link" data-league="61">France - Ligue 1</a>
    <a href="#" class="_link" data-league="78">Germany - Bundesliga 1</a>
</div>
We will also add a < script > tag at the end of the index.html file in which we will integrate our javascript function.
Now that everything is ready on this side we will move to the development of the script.
Our function will have 4 steps to make it work :
- Launch when a click is made on the
_linkclass - Get the value of the
data-leagueattribute of the clicked link - Update the
data-leagueattribute of the widget with the retrieved value - Reload the widget so that it displays the right data
Step 1
We will create an event that will only listen for clicks on the _link class :
document.addEventListener('click', function (event) {

        if (!event.target.matches('._link')) return
        event.preventDefault()
Step 2
We will retrieve the value of the data-league attribute of the clicked link and assign it to the id variable :
let id = event.target.getAttribute('data-league')
Step 3
We change the data-league of the widget with the retrieve value and empty the content of the widget :
let standings = document.getElementById('wg-api-football-standings')
            standings.innerHTML = ''
            standings.setAttribute('data-league', id);
Step 4
In order for the widget to relaunch with the data-league we have modified, we will have to broadcast an event indicating that the DOM is loaded again.
window.document.dispatchEvent(new Event("DOMContentLoaded", {
          bubbles: true,
          cancelable: true
        }));
The complete function should look like this :
document.addEventListener('click', function (event) {

    if (!event.target.matches('._link')) return
    event.preventDefault()

    let id = event.target.getAttribute('data-league')

    let standings = document.getElementById('wg-api-football-standings')
        standings.innerHTML = ''
        standings.setAttribute('data-league', id);

    window.document.dispatchEvent(new Event("DOMContentLoaded", {
      bubbles: true,
      cancelable: true
    }));
})
If you go back to your browser and click on the links, you now have widgets that change depending on the link you clicked on.
This script is just an example of what can be done and greatly improved for a better user experience.
Here is the full index.html file :
<!DOCTYPE html>
<html>
    <head>
        <meta charset="utf-8">
        <meta name="viewport" content="width=device-width, initial-scale=1">
        <title>Demo - Widget</title>
    </head>
    <body>

        <div>
            <a href="#" class="_link" data-league="39">England - Premier League</a>
            <a href="#" class="_link" data-league="61">France - Ligue 1</a>
            <a href="#" class="_link" data-league="78">Germany - Bundesliga 1</a>
        </div>

        <div id="wg-api-football-standings"
            data-host="v3.football.api-sports.io"
            data-key="Your-Api-Key-Here"
            data-league="39"
            data-team=""
            data-season="2022"
            data-theme=""
            data-show-errors="false"
            data-show-logos="true"
            class="wg_loader">
        </div>
        <script
            type="module"
            src="https://widgets.api-sports.io/2.0.3/widgets.js">
        </script>

    </body>
</html>
<script>
    document.addEventListener('click', function (event) {

        if (!event.target.matches('._link')) return
        event.preventDefault()

        let id = event.target.getAttribute('data-league')

        let standings = document.getElementById('wg-api-football-standings')
            standings.innerHTML = ''
            standings.setAttribute('data-league', id);

        window.document.dispatchEvent(new Event("DOMContentLoaded", {
          bubbles: true,
          cancelable: true
        }));
    })
</script>