 API-FOOTBALL

In this tutorial, we will show you how to integrate our API with Firebase for real-time data management. You will learn how to make API calls, save this data to Firebase, and display it in real-time to users.
Prerequisites
Before you dive into integrating our API with Firebase for real-time data management, it's essential to ensure you have the necessary prerequisites in place. Here's what you'll need:
- Firebase Account: To get started, you'll need a Firebase account. If you don't have one, head to the Firebase website and sign up for an account. Firebase offers a robust set of tools and services that will help you manage your app's backend, including the Realtime Database, which is the core component we'll be working with in this tutorial.
- API Account: You'll also need an account to access our API services. If you haven't already, sign up for an API account to obtain an API key. This key will allow you to make requests to our service and retrieve data that you can later store and display in your Firebase project.
Once you've set up your Firebase and API accounts, you'll be ready to move on to the next steps. Make sure to have your Firebase project details and API key on hand, as we'll need them later in the tutorial.
Making API Calls
In this section, we'll cover the steps to make API calls to retrieve data from our service, using the fixtures endpoint as an example. This data will be the foundation of what you'll save and display in Firebase's Realtime Database.
API Authentication
Before you can start making API calls, you need to authenticate your requests with your API key. This key acts as your authorization to access our services. Here's how to obtain and use your API key:
Obtaining an API Key: If you haven't already obtained an API key, sign in to your API account. Once you're logged in, navigate to the profile section. (Your Api key is available in the top right-hand corner of this page.)
Using the API Key: When making requests to our API, include your API key in the request headers as specified in our API documentation. This key is essential for identifying your application and ensuring that you have the necessary access to retrieve data.
Making API Calls Using the "Fixtures" Endpoint
For our example, we'll use the fixtures endpoint to retrieve data about football fixtures.
We'll start by creating an index.html file that will contain our JavaScript request.
index.html
// Replace 'YOUR_API_KEY' with your API key
const apiKey = 'YOUR_API_KEY';

// Specify the date for which you want fixture data
const date = '2023-10-30';

// Define the API endpoint URL
const apiUrl = `https://v3.football.api-sports.io/fixtures?date=${date}`;

// Set up the API request headers with the correct 'x-apisports-key'
const headers = {
  'x-apisports-key': apiKey,
  'Accept': 'application/json',
};

// Make the API request using the fetch method
fetch(apiUrl, {
  method: 'GET',
  headers: headers
})
 .then(response => {
   if (!response.ok) {
     throw new Error('Network response was not ok');
   }
   return response.json();
 })
 .then(apiData => {
   // Here, 'data' contains the fixtures data for the specified date
   console.log(apiData);
 })
 .catch(error => {
   console.error('There was a problem with the fetch operation:', error);
 });
If you open the index.html file with your browser, open the console and click on the network tab, you should be able to see the API result :
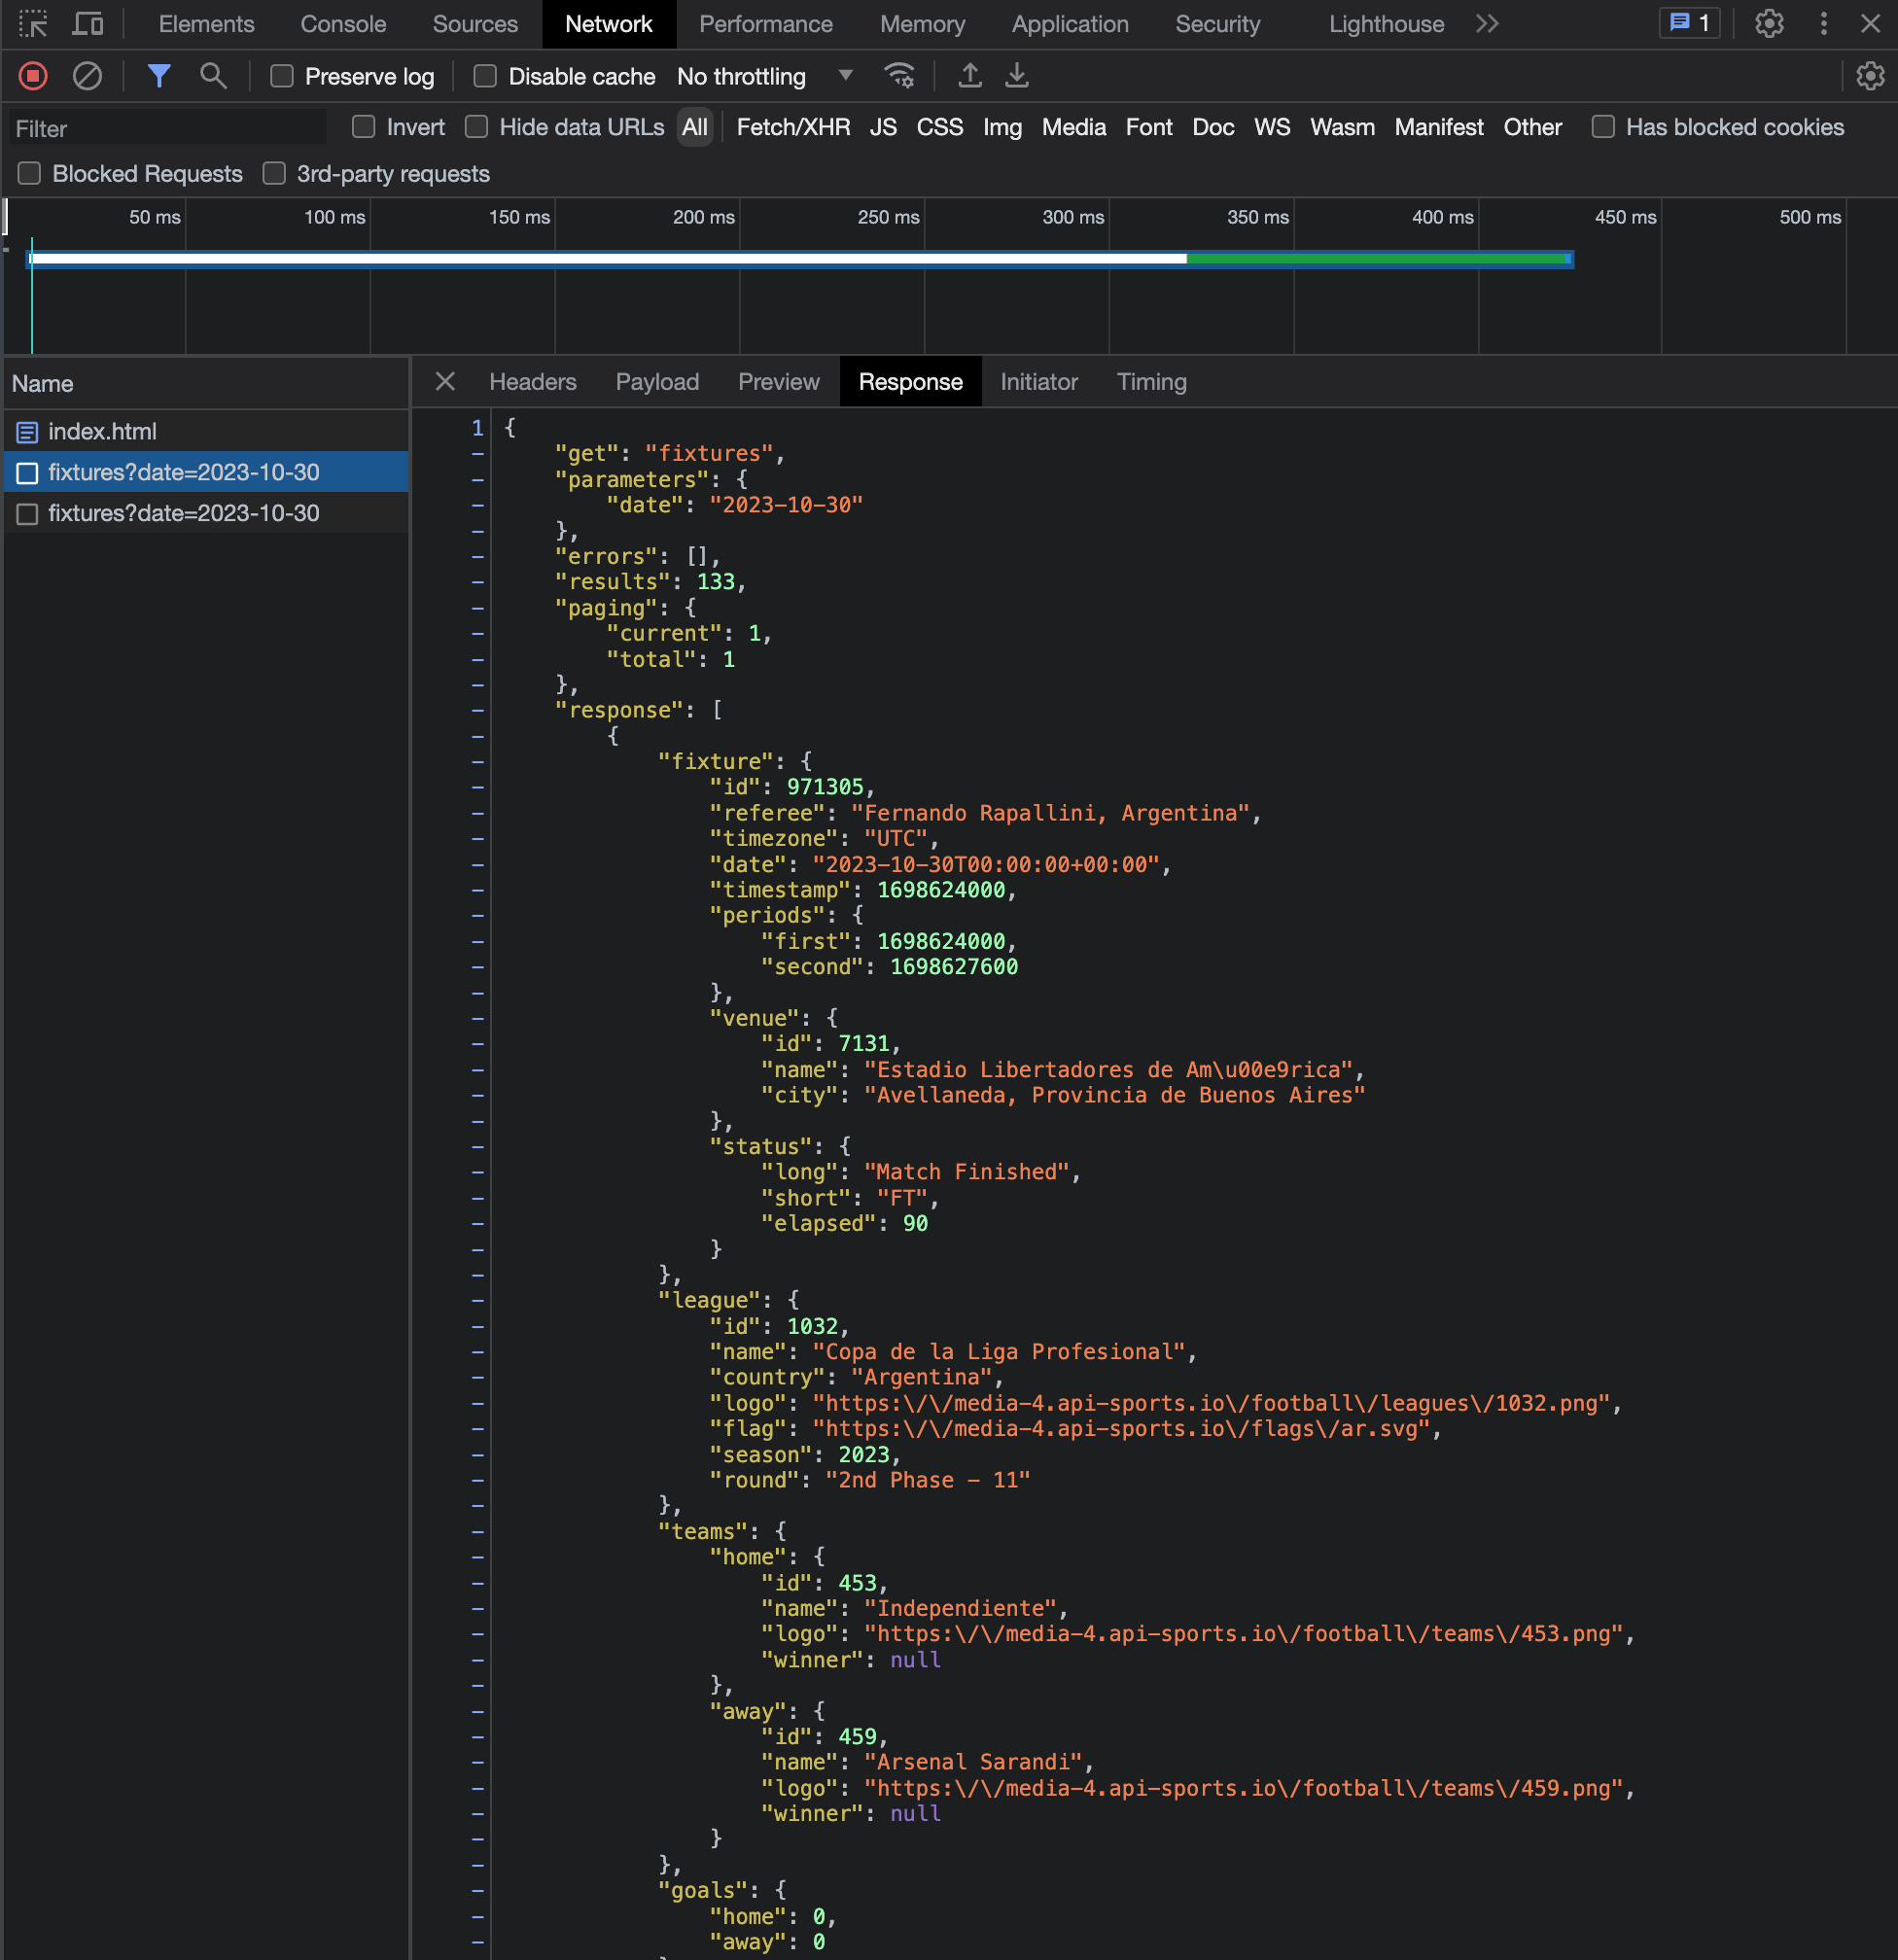
Now that we know how to retrieve data from the API for Firebase implementation.
Firebase Setup
In this section, we'll guide you through the process of setting up Firebase for real-time data storage. Firebase will serve as the backend database to store the data you retrieve from our API. Follow these steps to get your Firebase project up and running. If you haven't yet opened a Firebase account, you can do so here.
Create a Firebase Project
If you don't already have a Firebase project, here's how to create one:
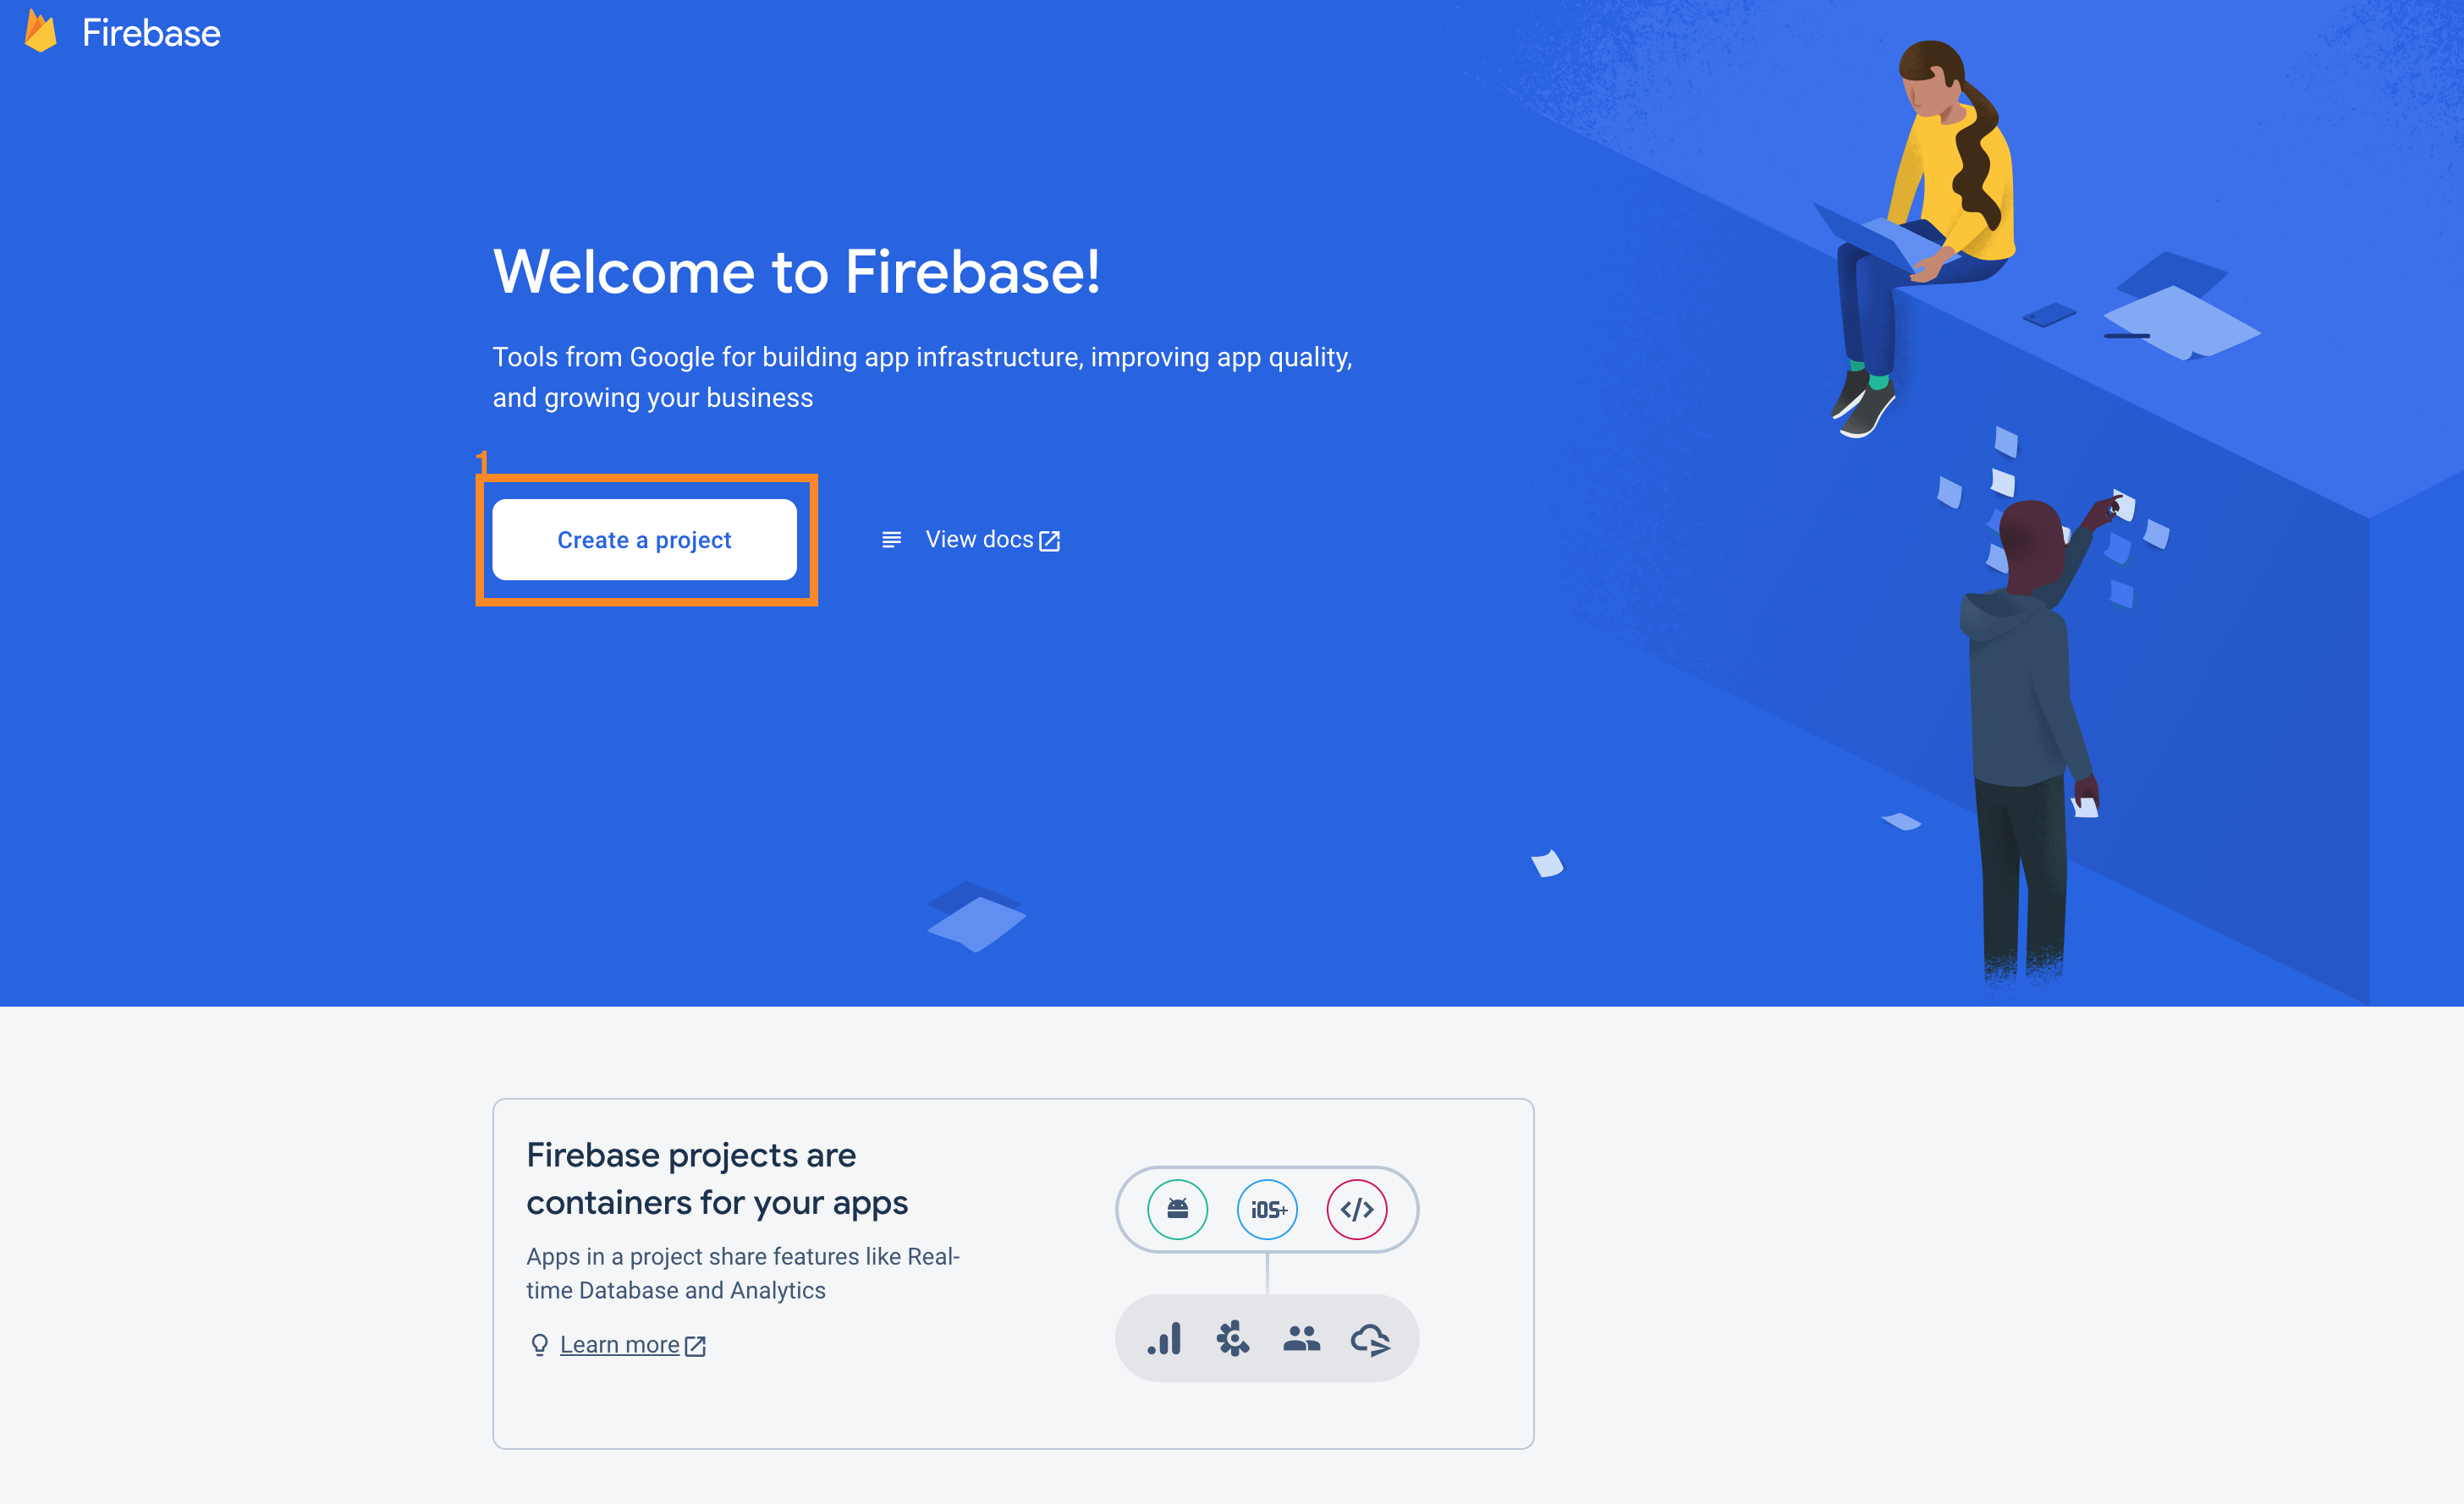
On the home page, click on Create a project.
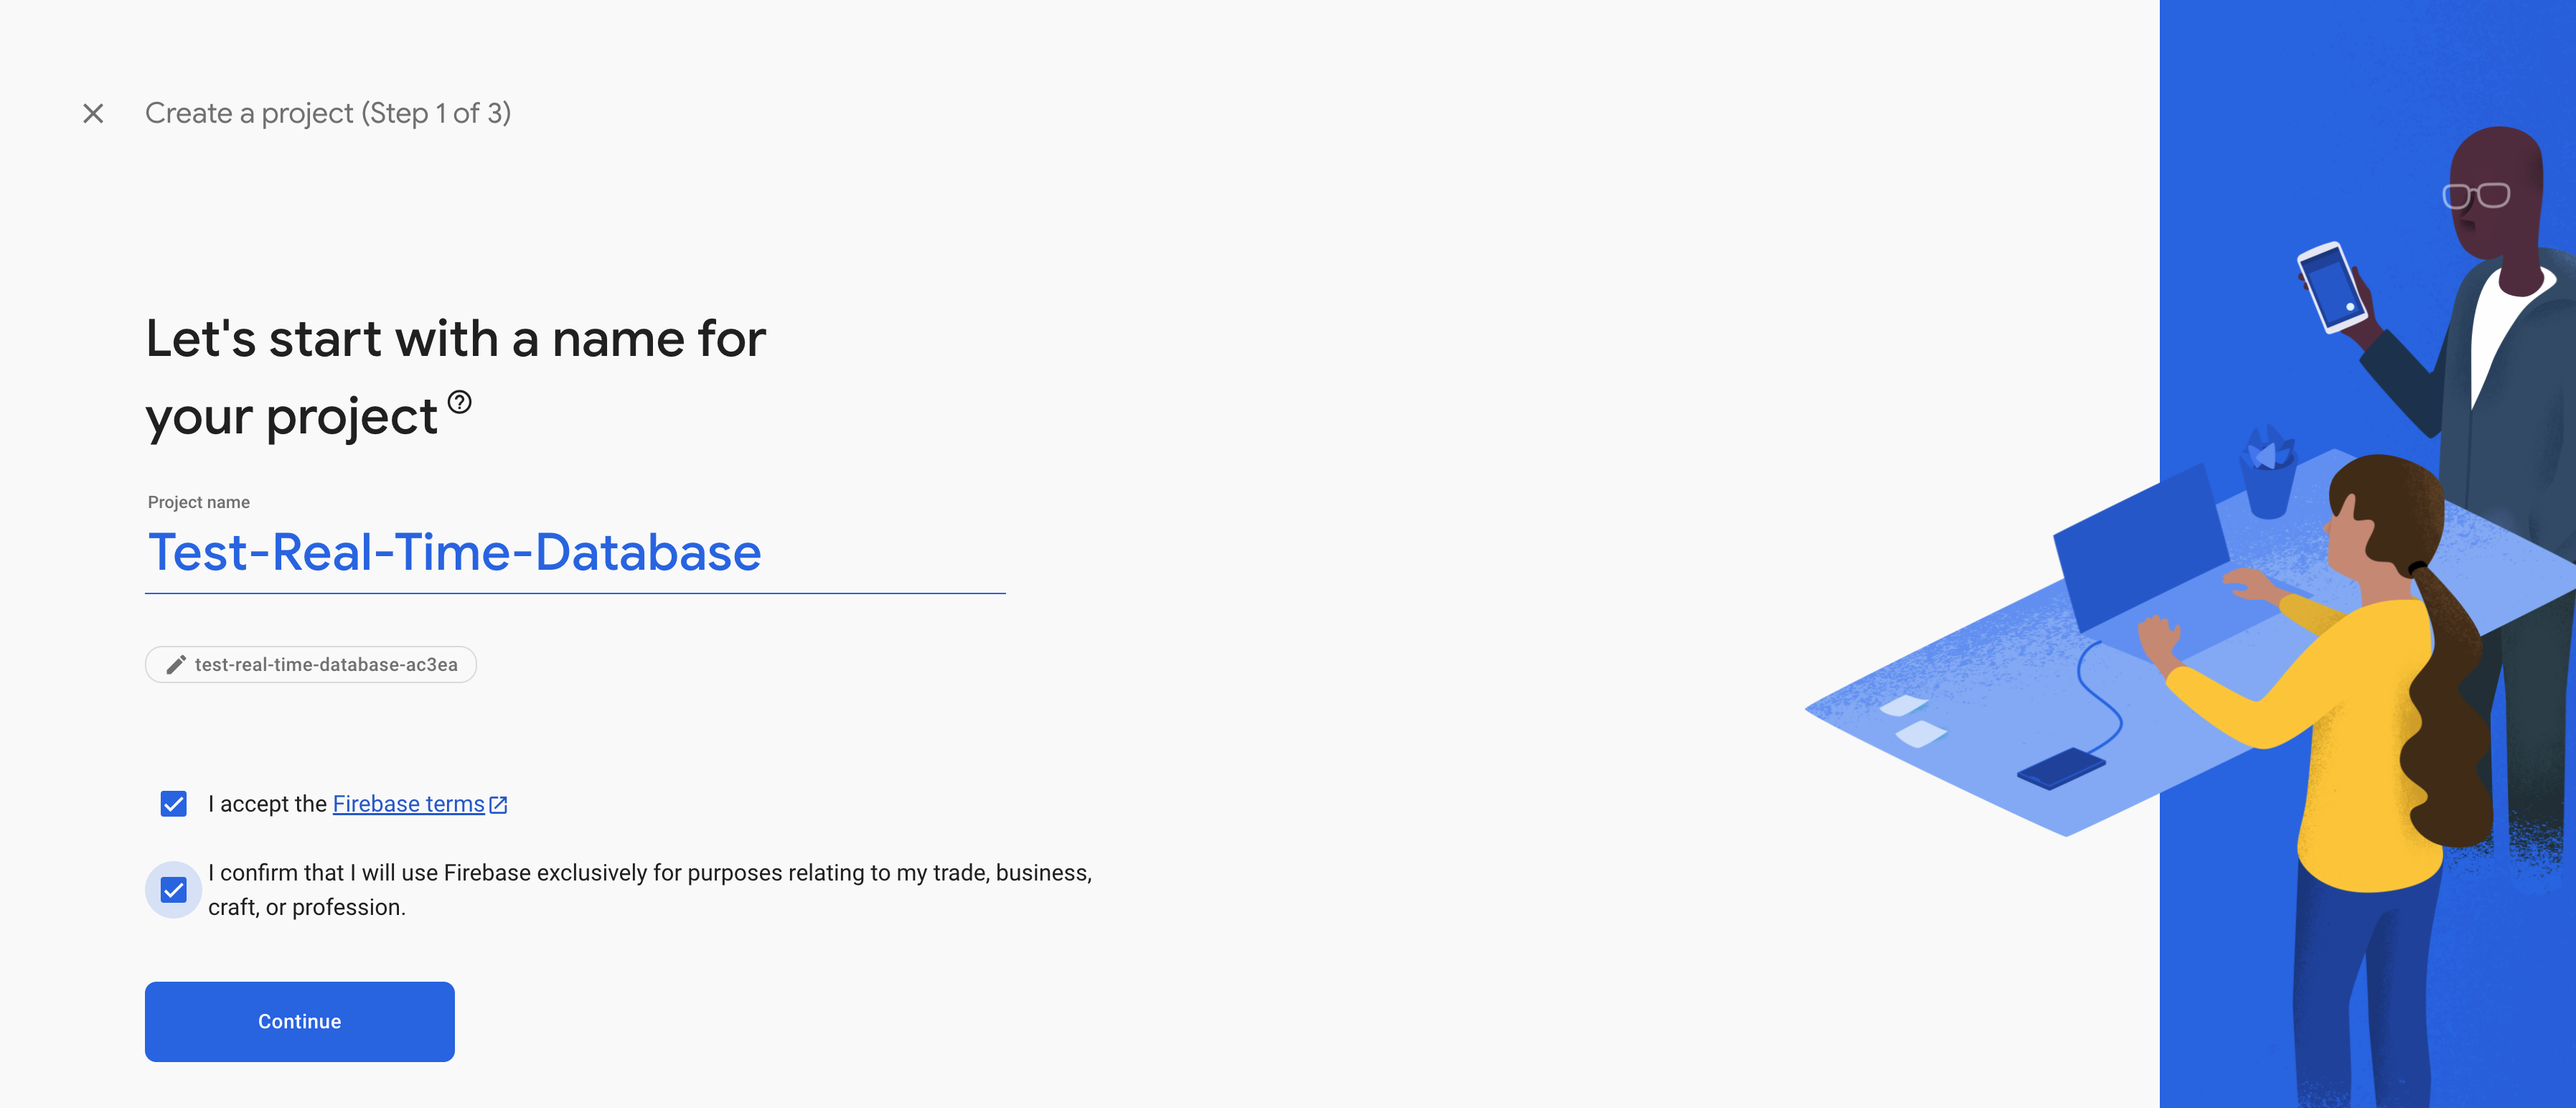
Enter a name for your project and click on Continue.

When you create your project, you'll be asked if you want to activate Google Analytics. In our tutorial, we won't activate it, but feel free to do so when your project goes live in the future.
Click on Create project and wait few seconds.


Once it's done, click on Continue.
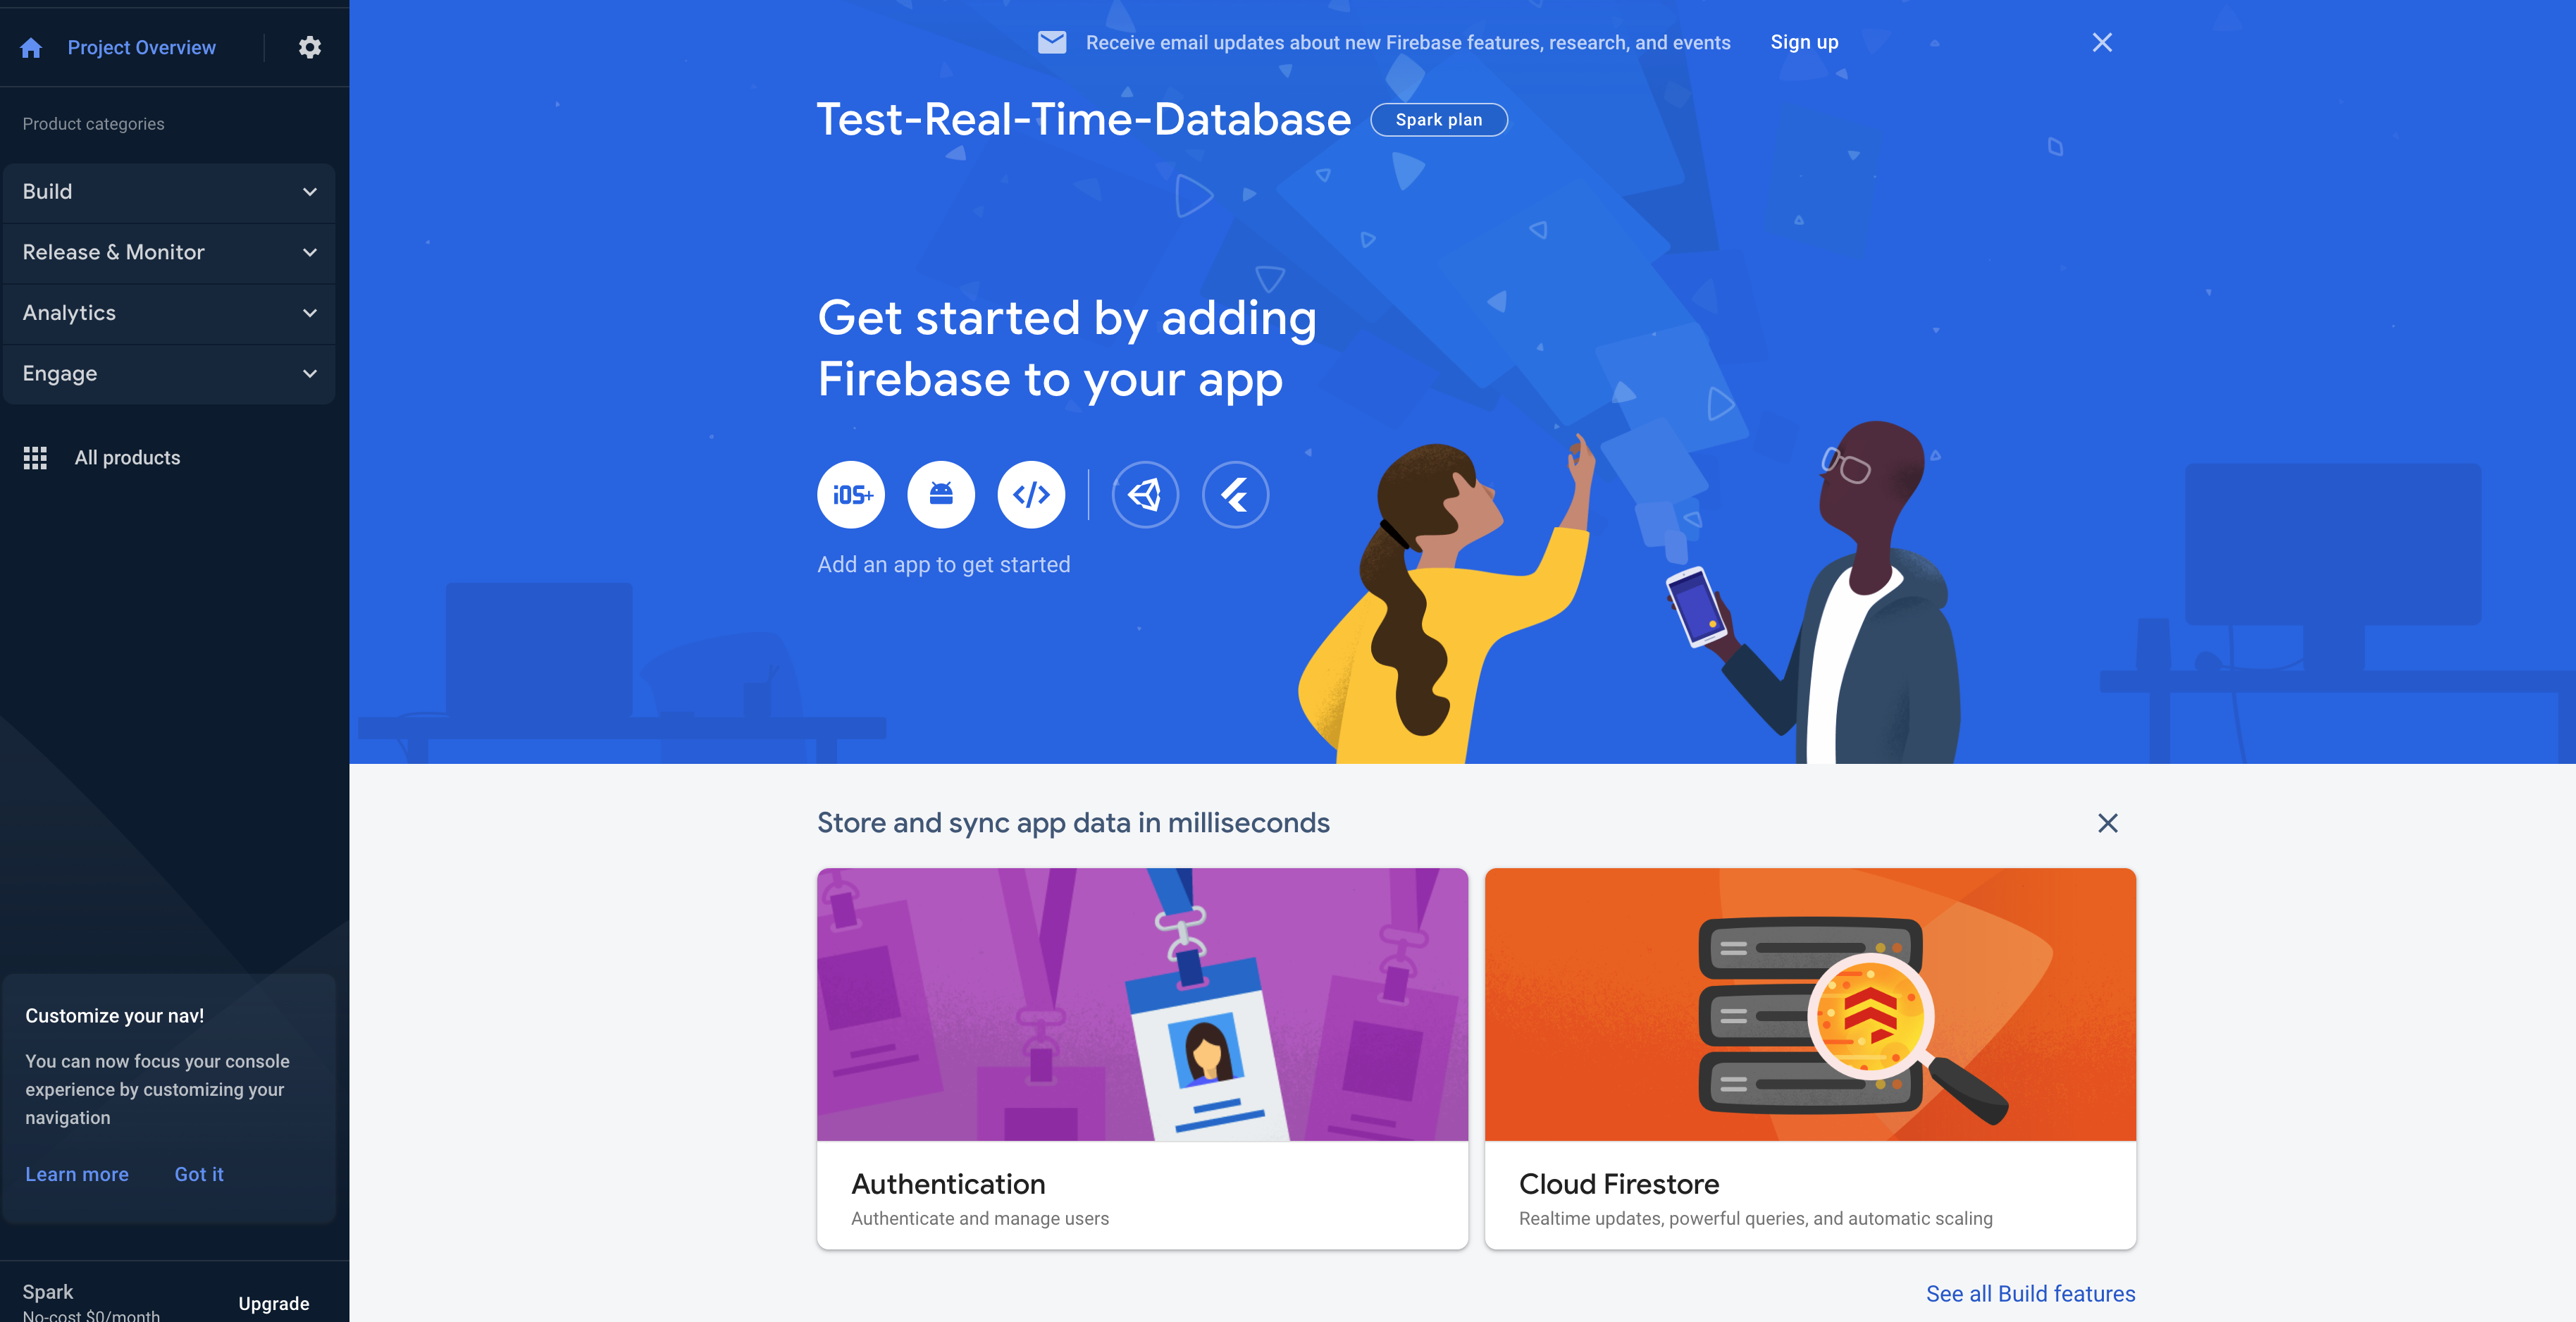
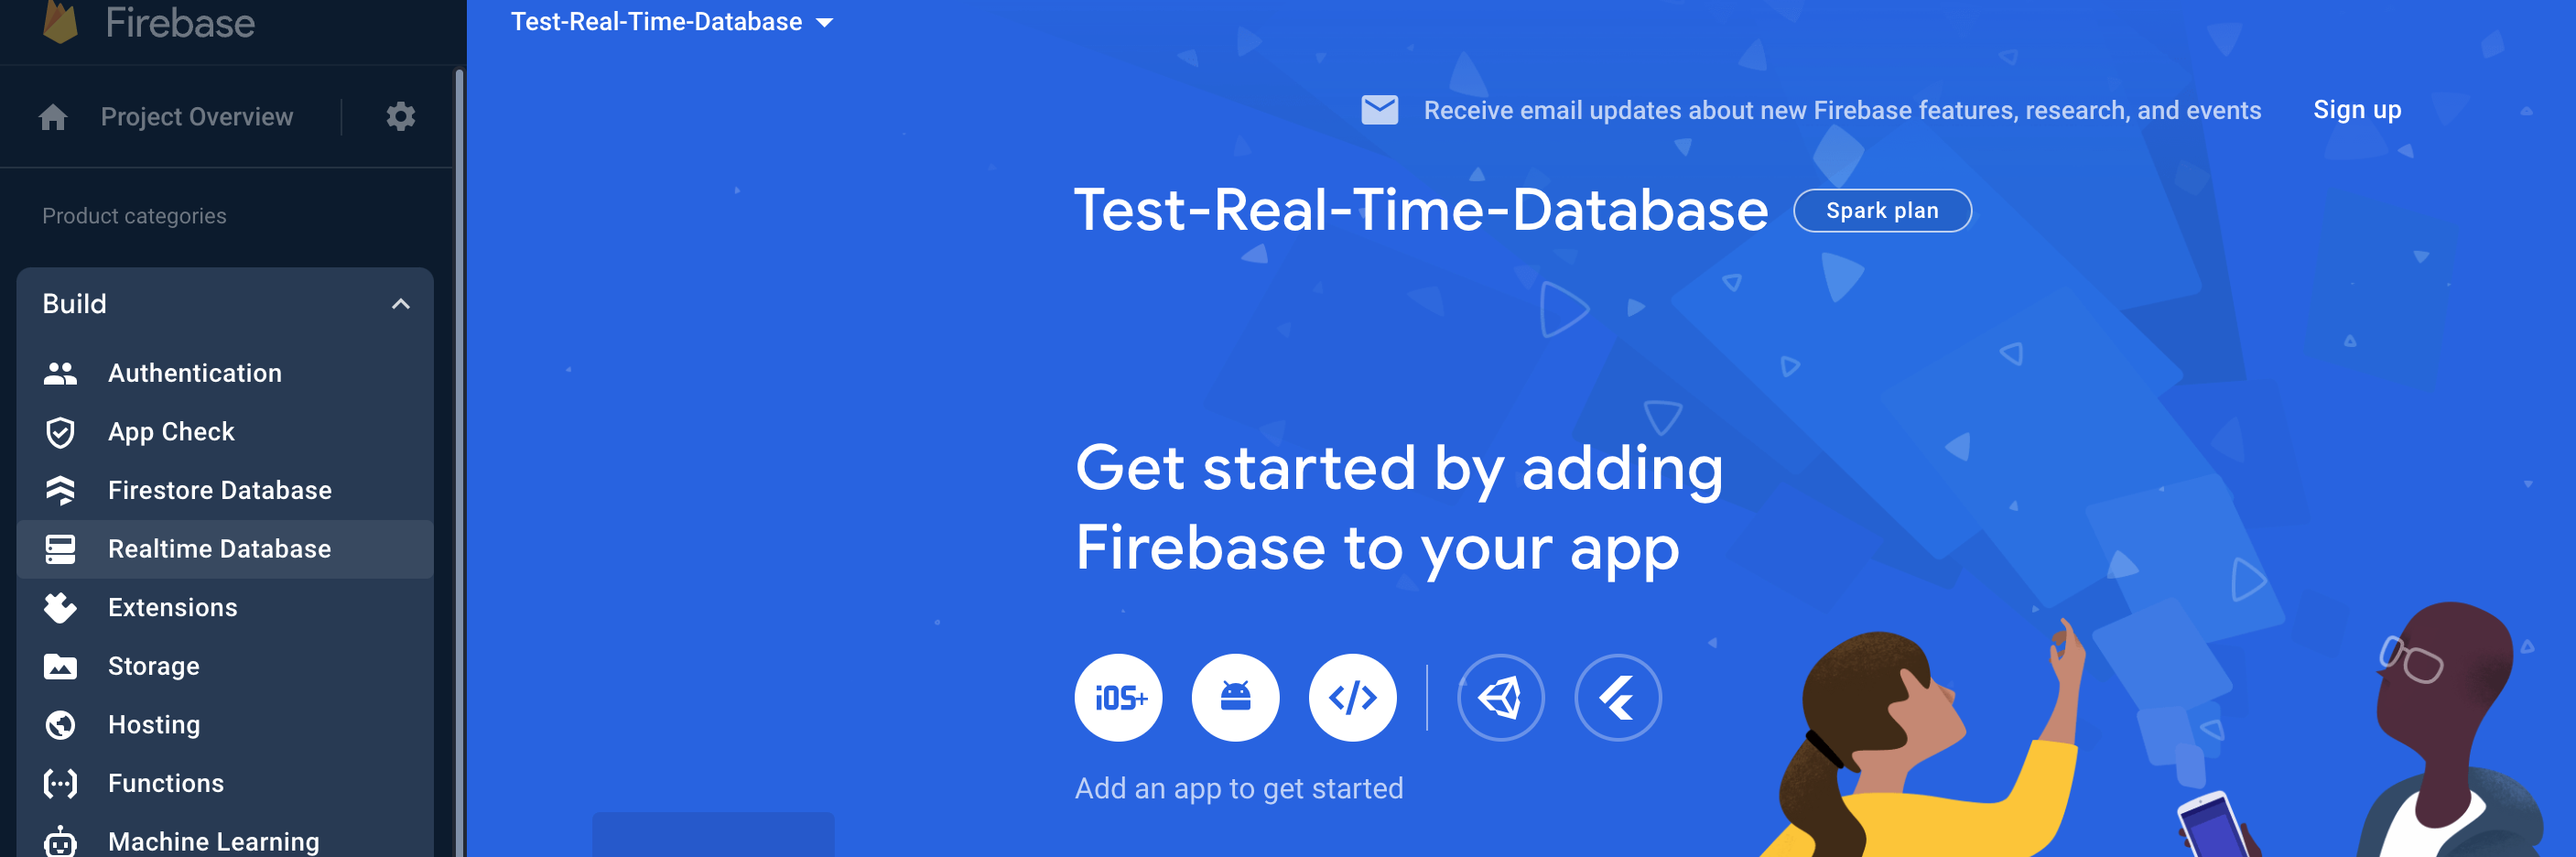
If all goes well, you will be redirected to the firebase home page.
Initialize Firebase Database
Now that you have a Firebase project, you'll need to initialize Firebase in your application. Here's how to do it:
In the left-hand menu, click on Build then Realtime Database.
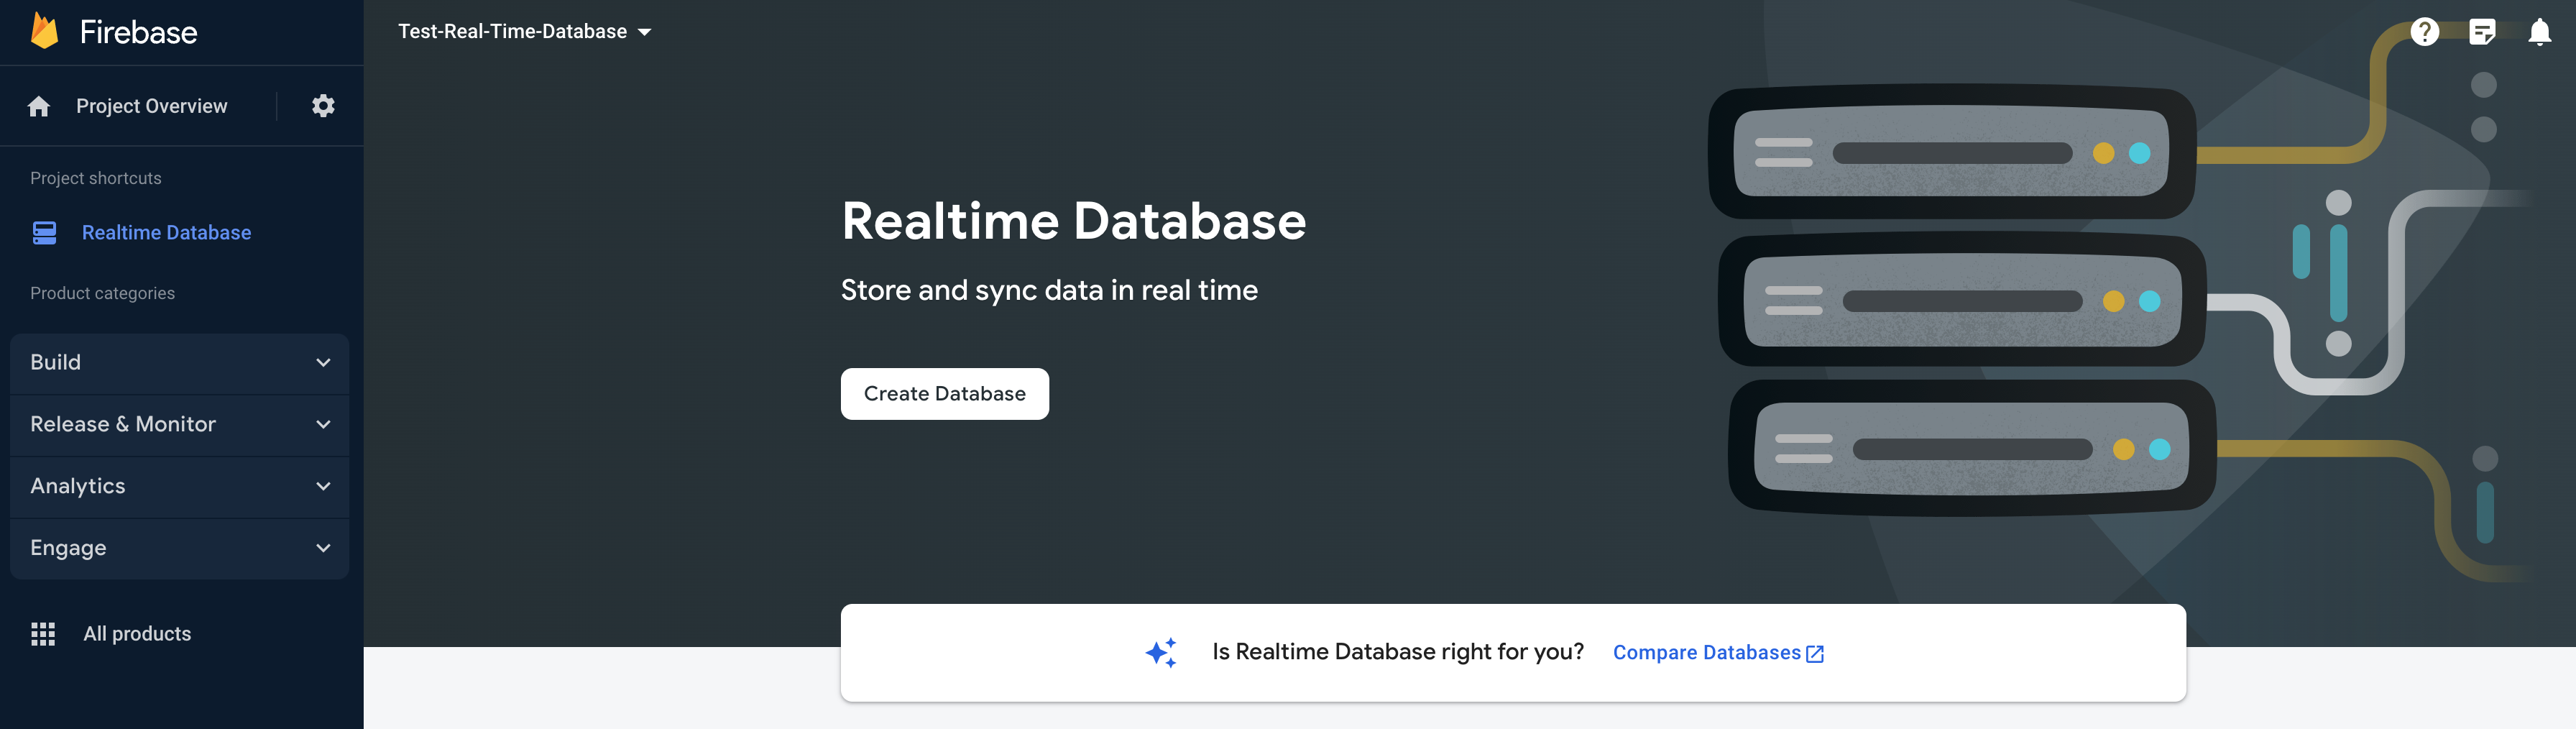
Click on Create Database.
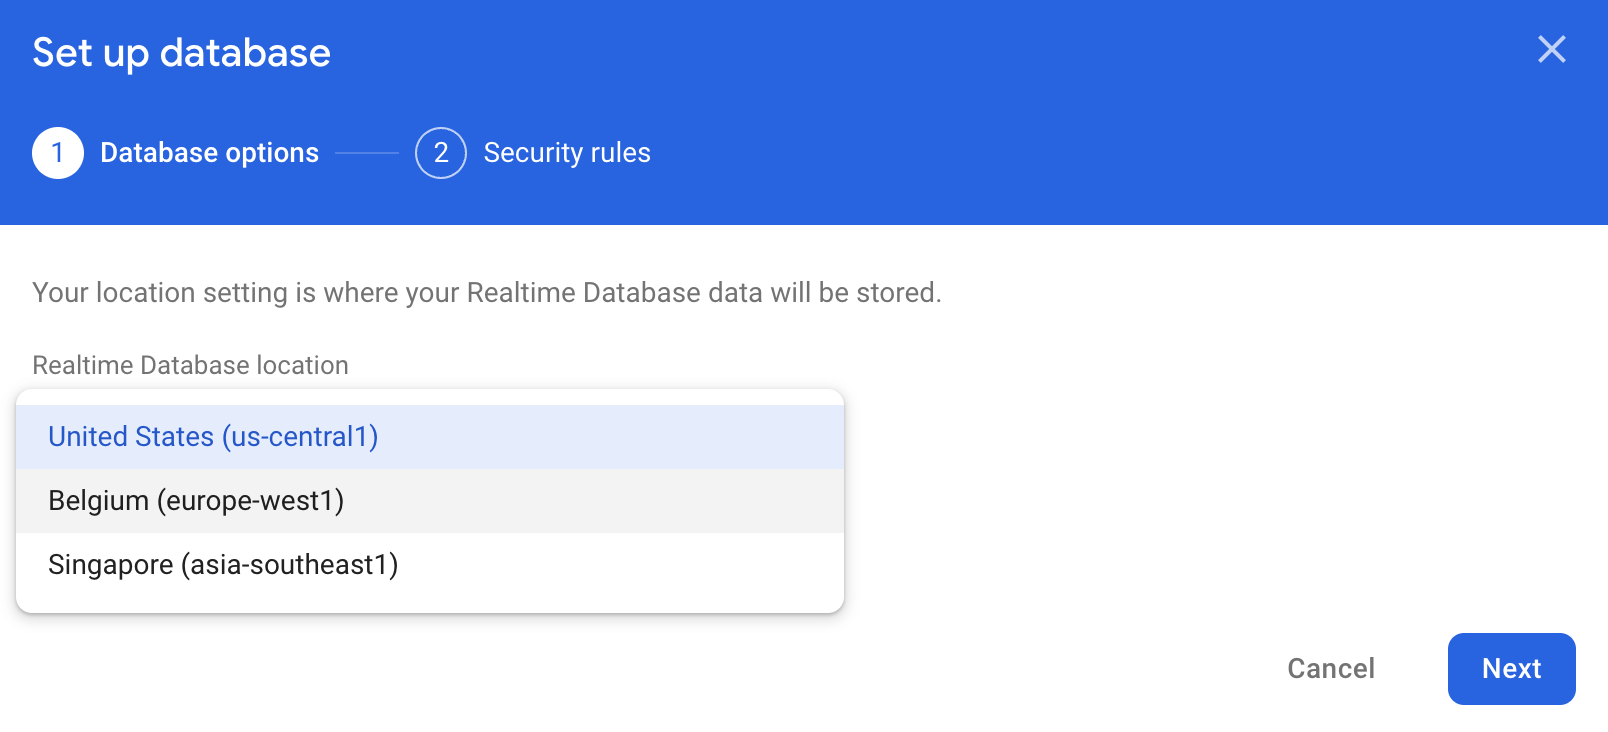
Select the region closest to your servers and click on next.
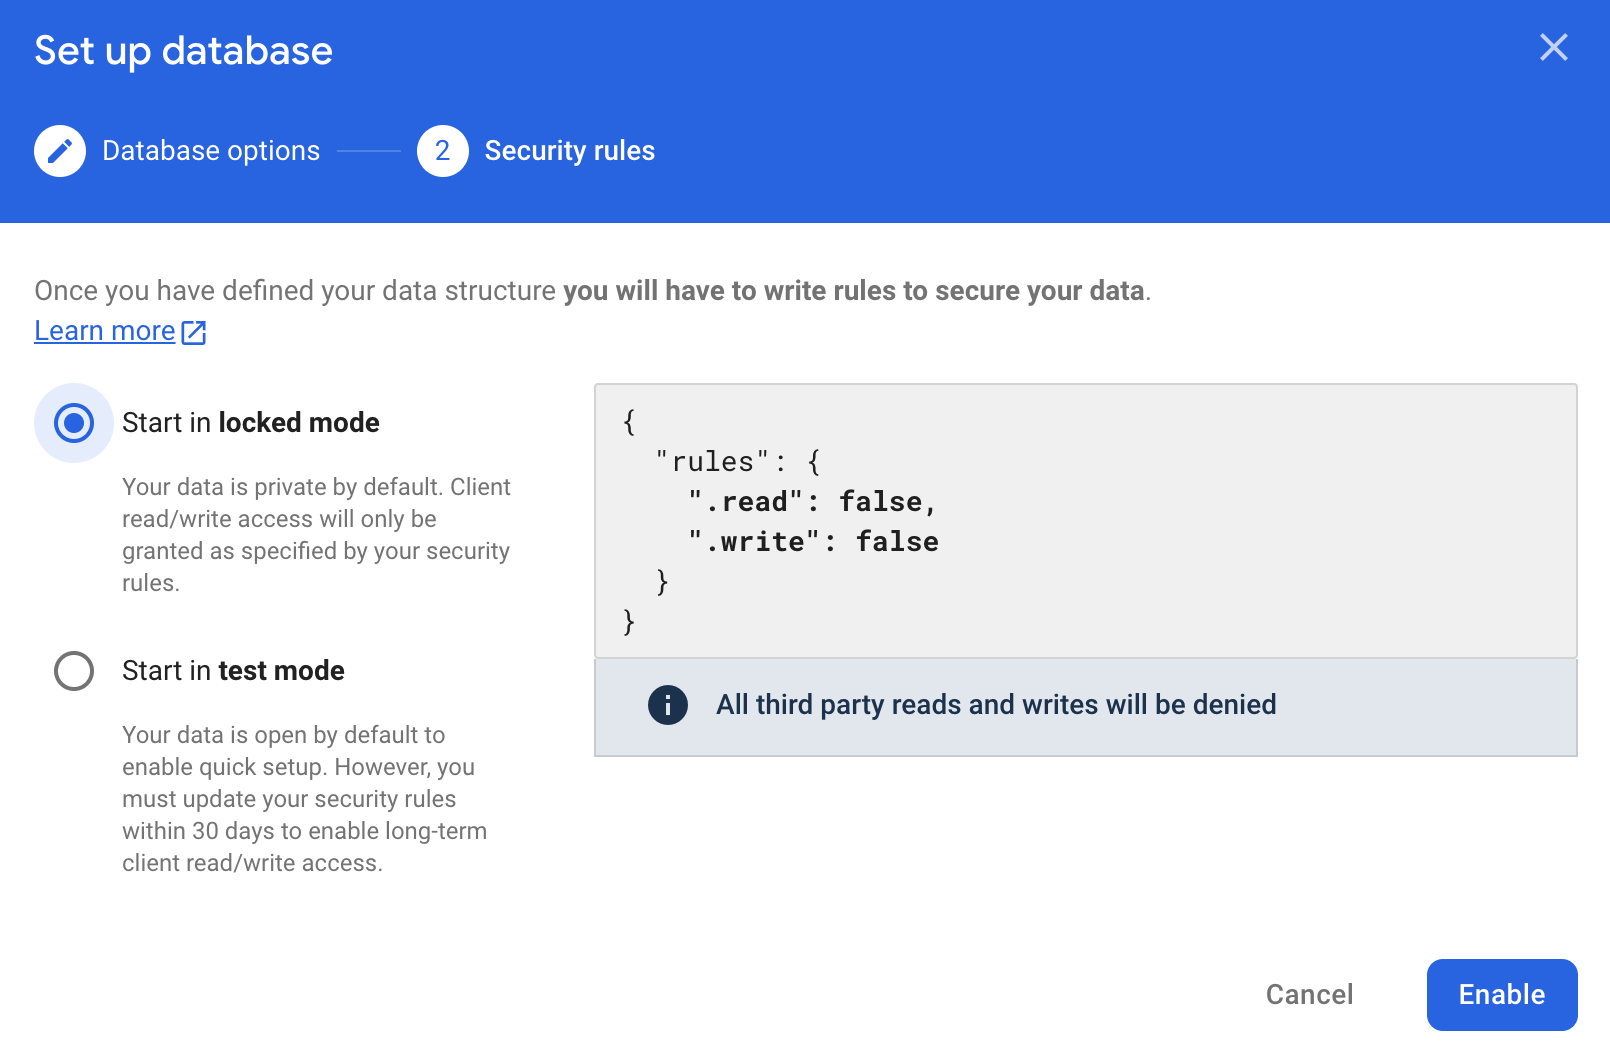
You've now reached the security rules for your database, and we recommend that you consult their documentation to understand how they work.
In our case and for the purposes of this tutorial, we're going to start in test mode, but this is not recommended for production.
Then click on Enable.
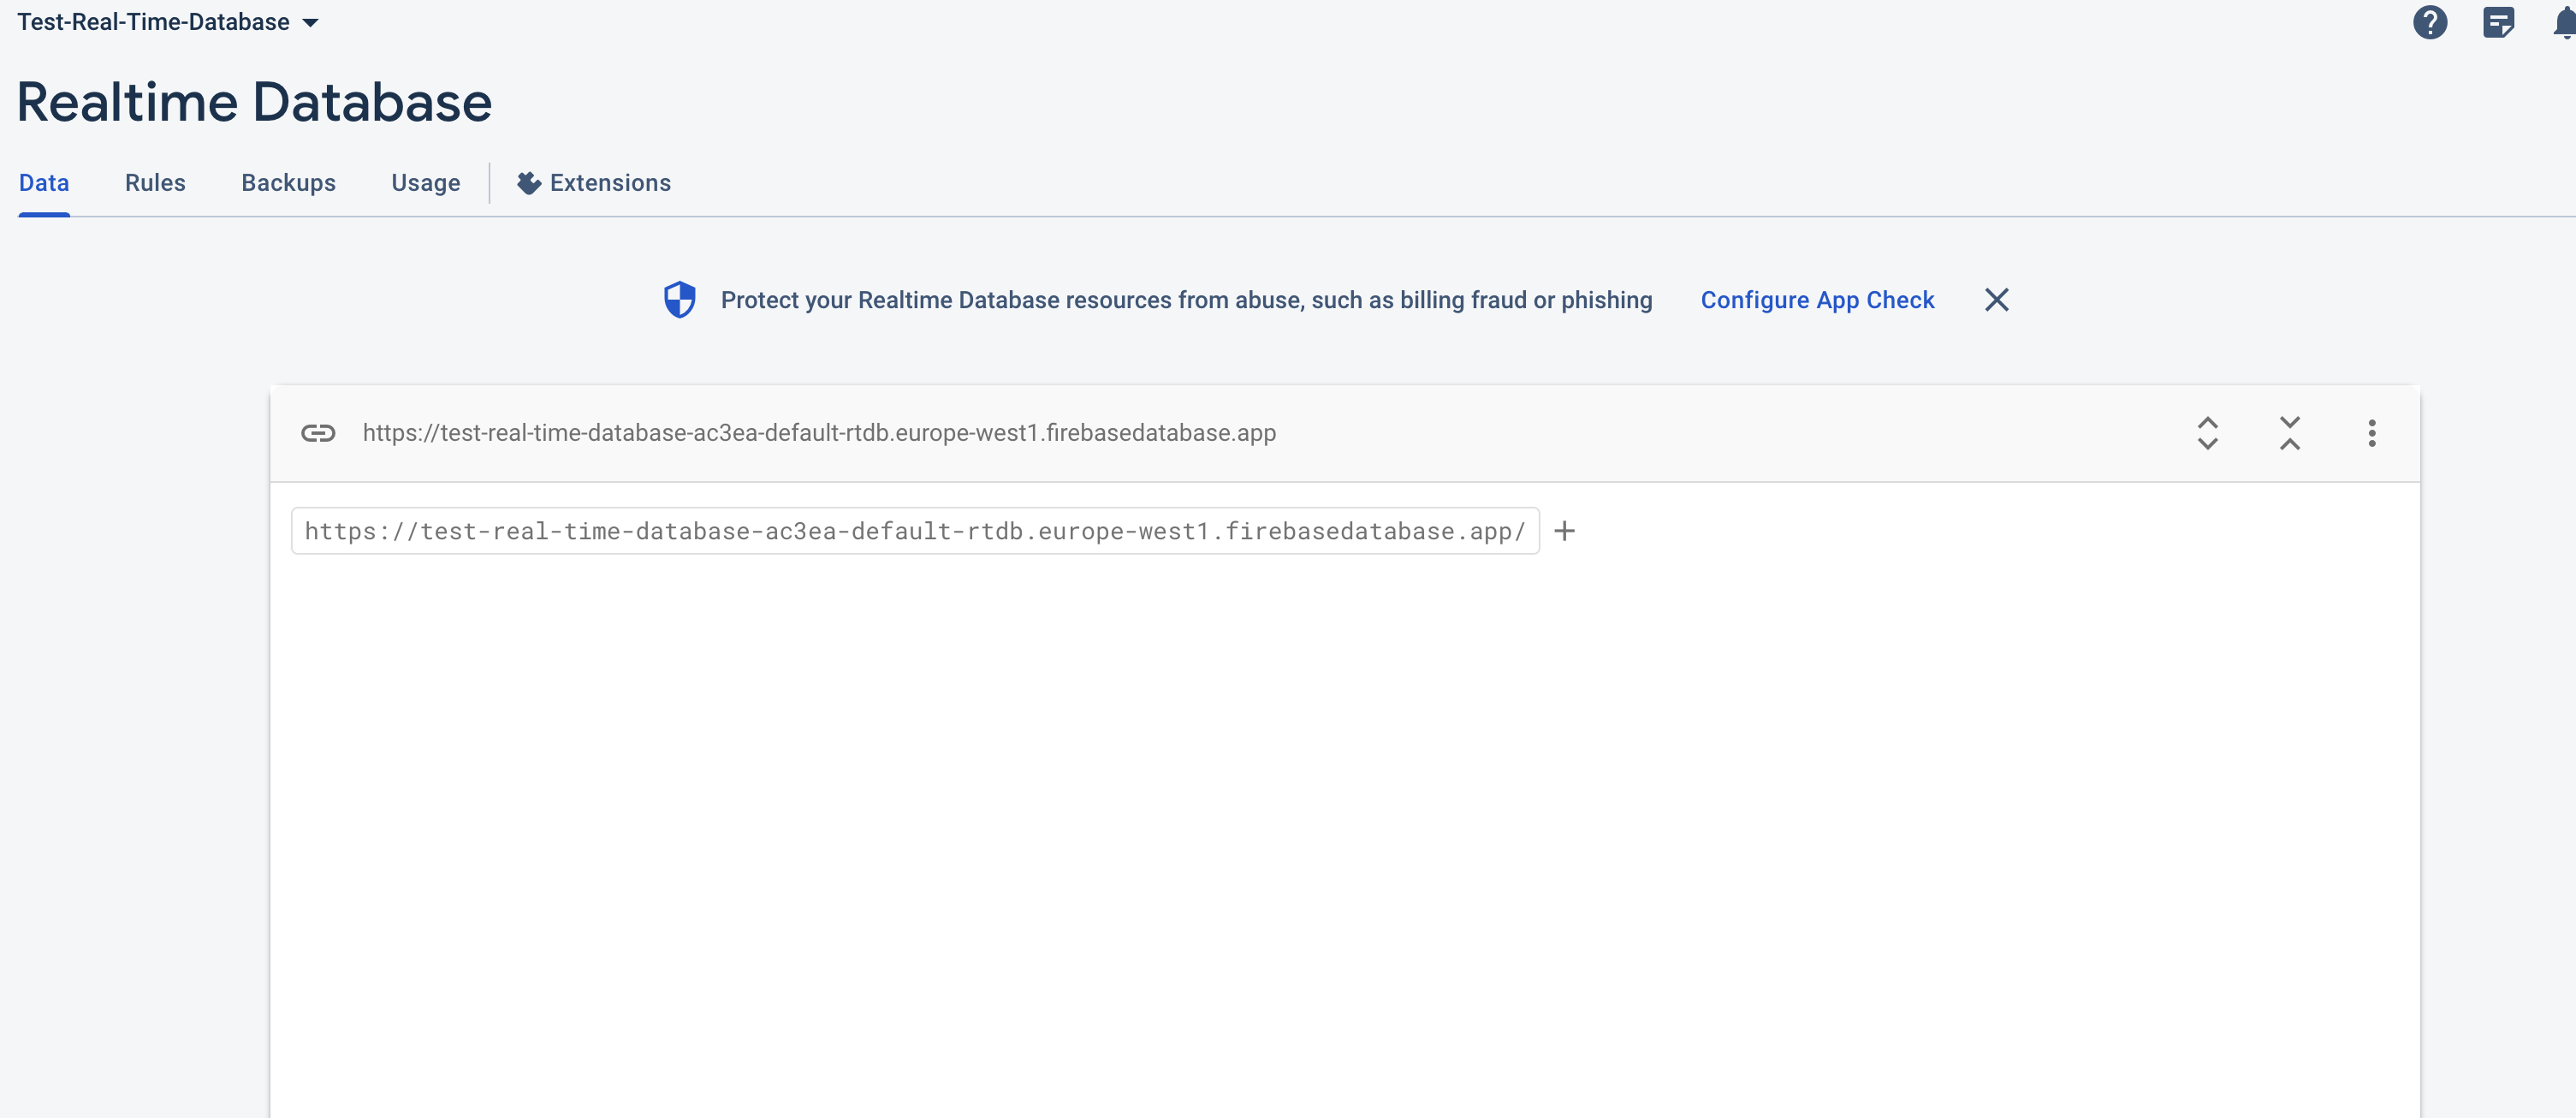
Here we are, you're on the home page of your (currently empty) database.
Saving API Data to Firebase
In this section, we will focus on how to save data retrieved from our API into Firebase's Realtime Database. This step is crucial as it enables you to store and manage the data in real-time.
We'll need the login details for our database, and to do this we'll need to create a specific app.
To begin, click on the gear in the top left-hand corner, then on Project settings.
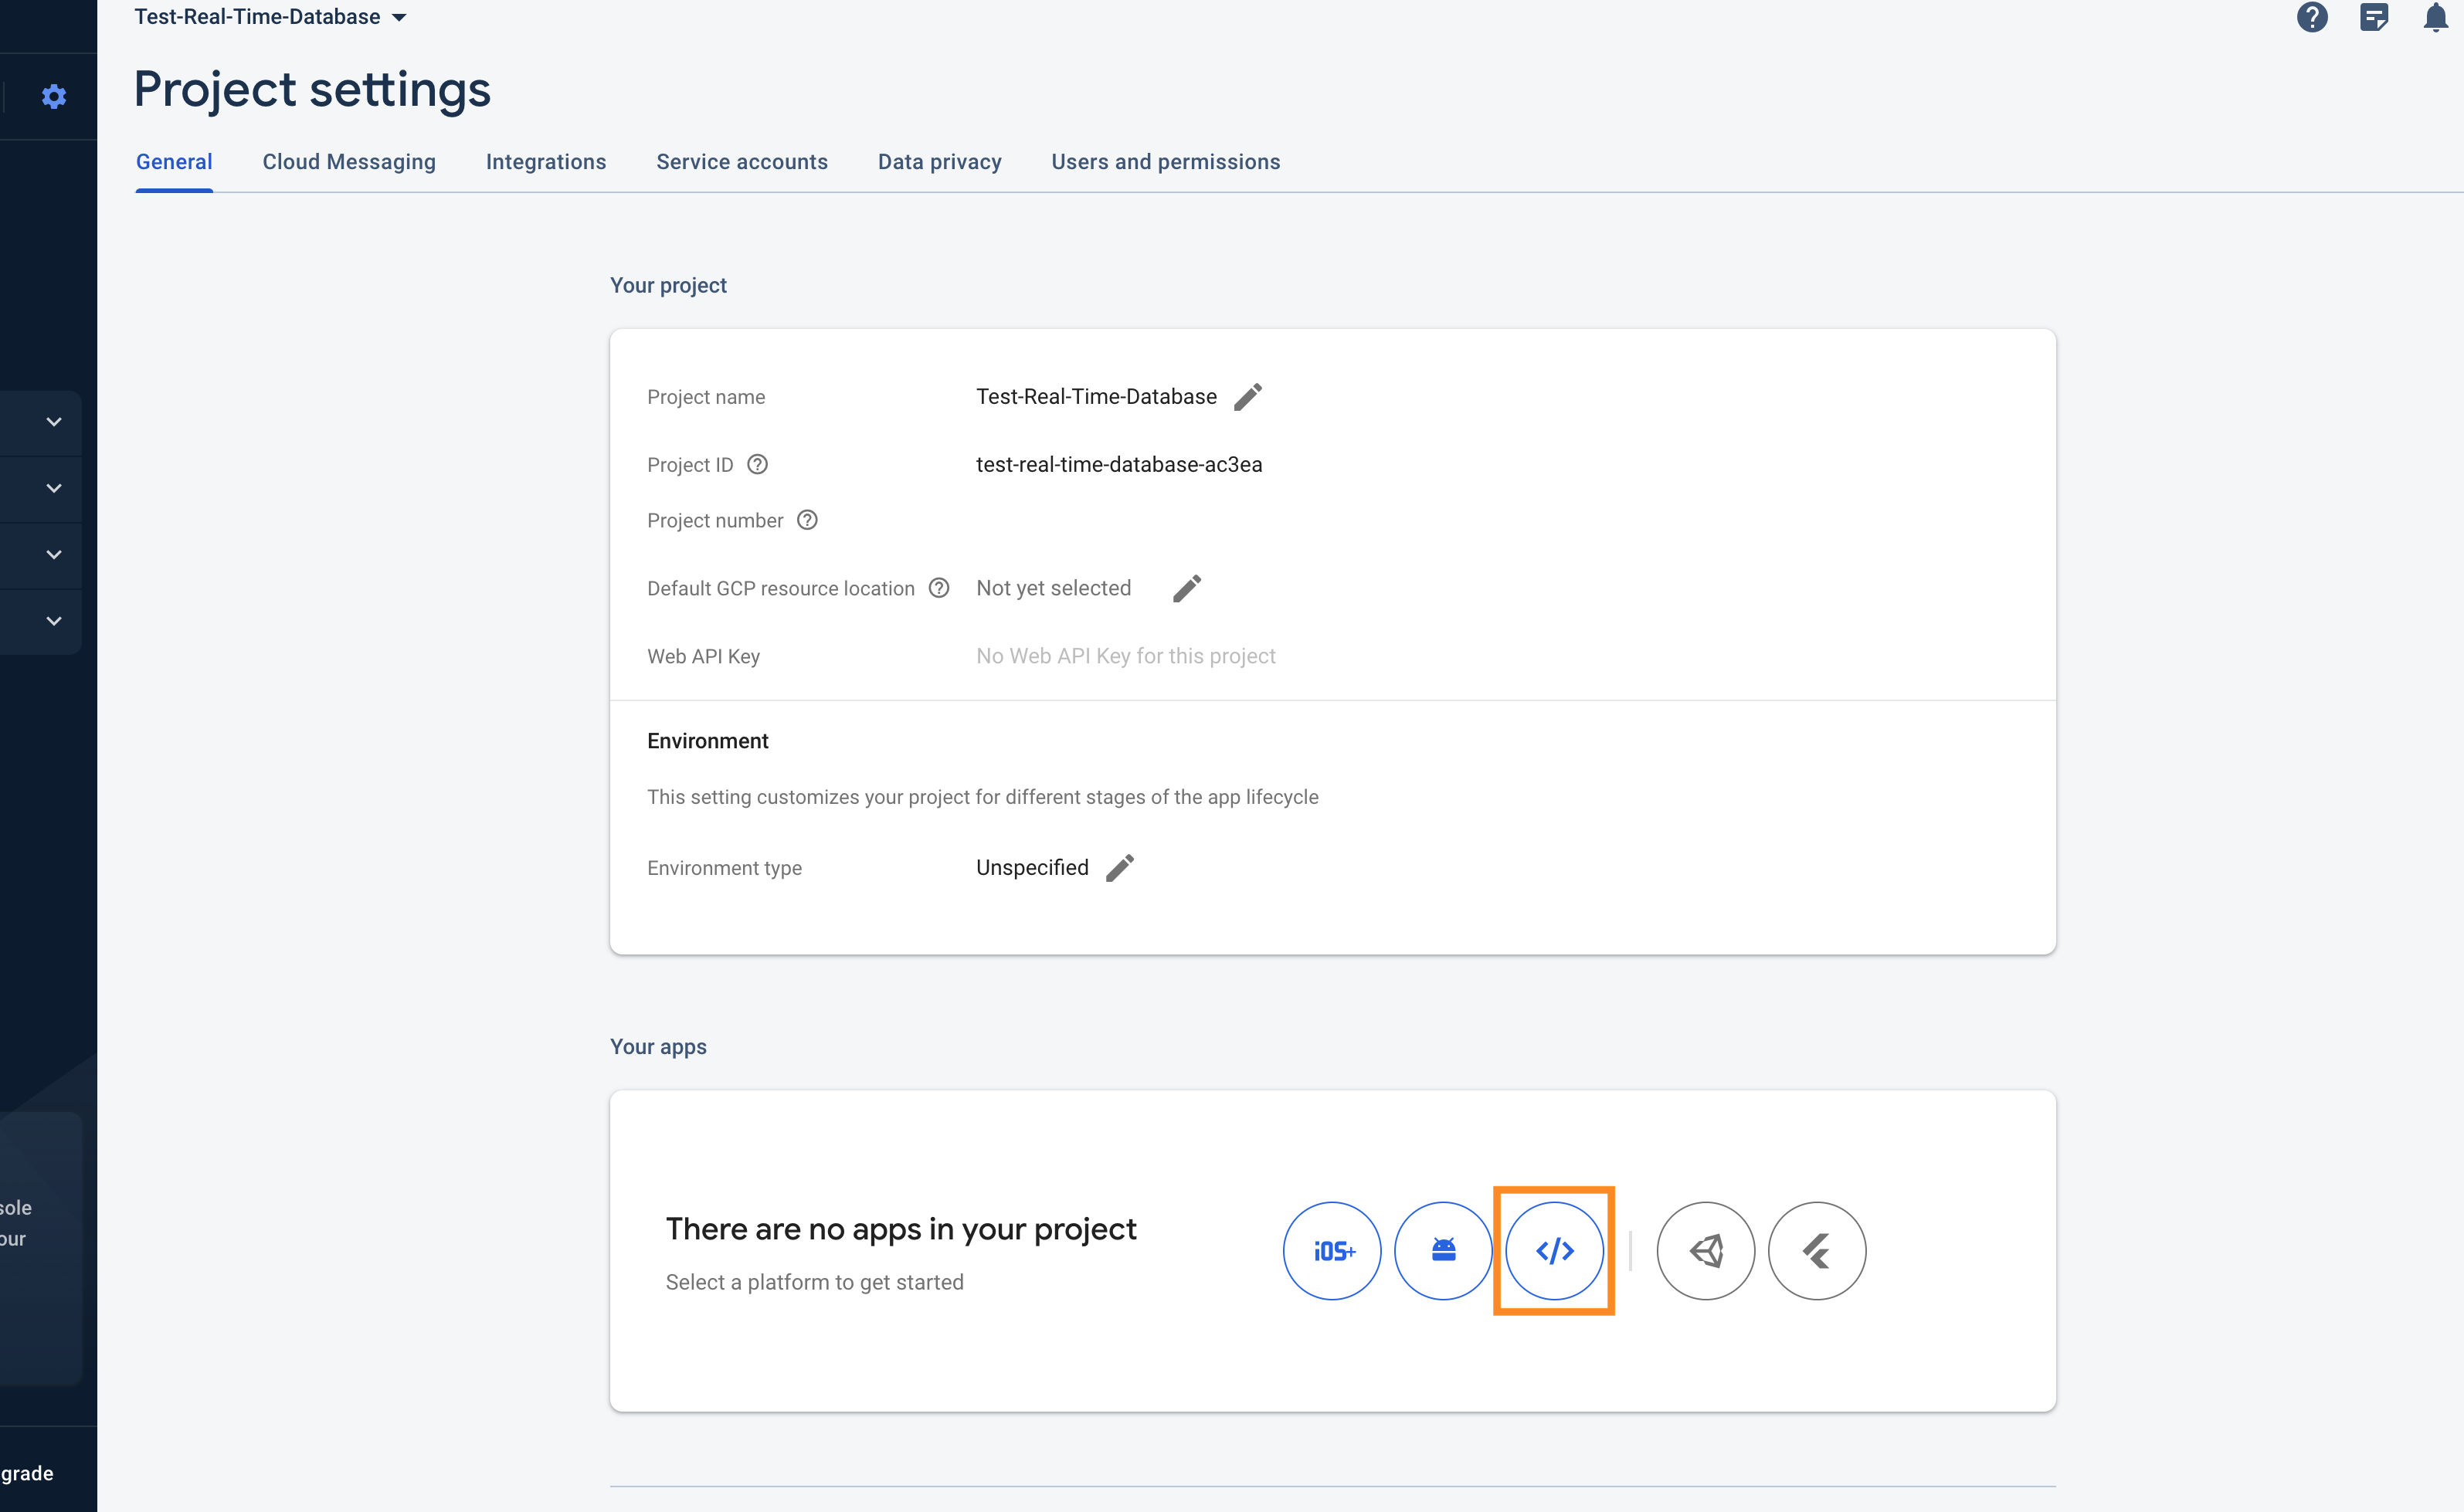
In the Your apps section, click on the 3rd icon (corresponding to the web application).
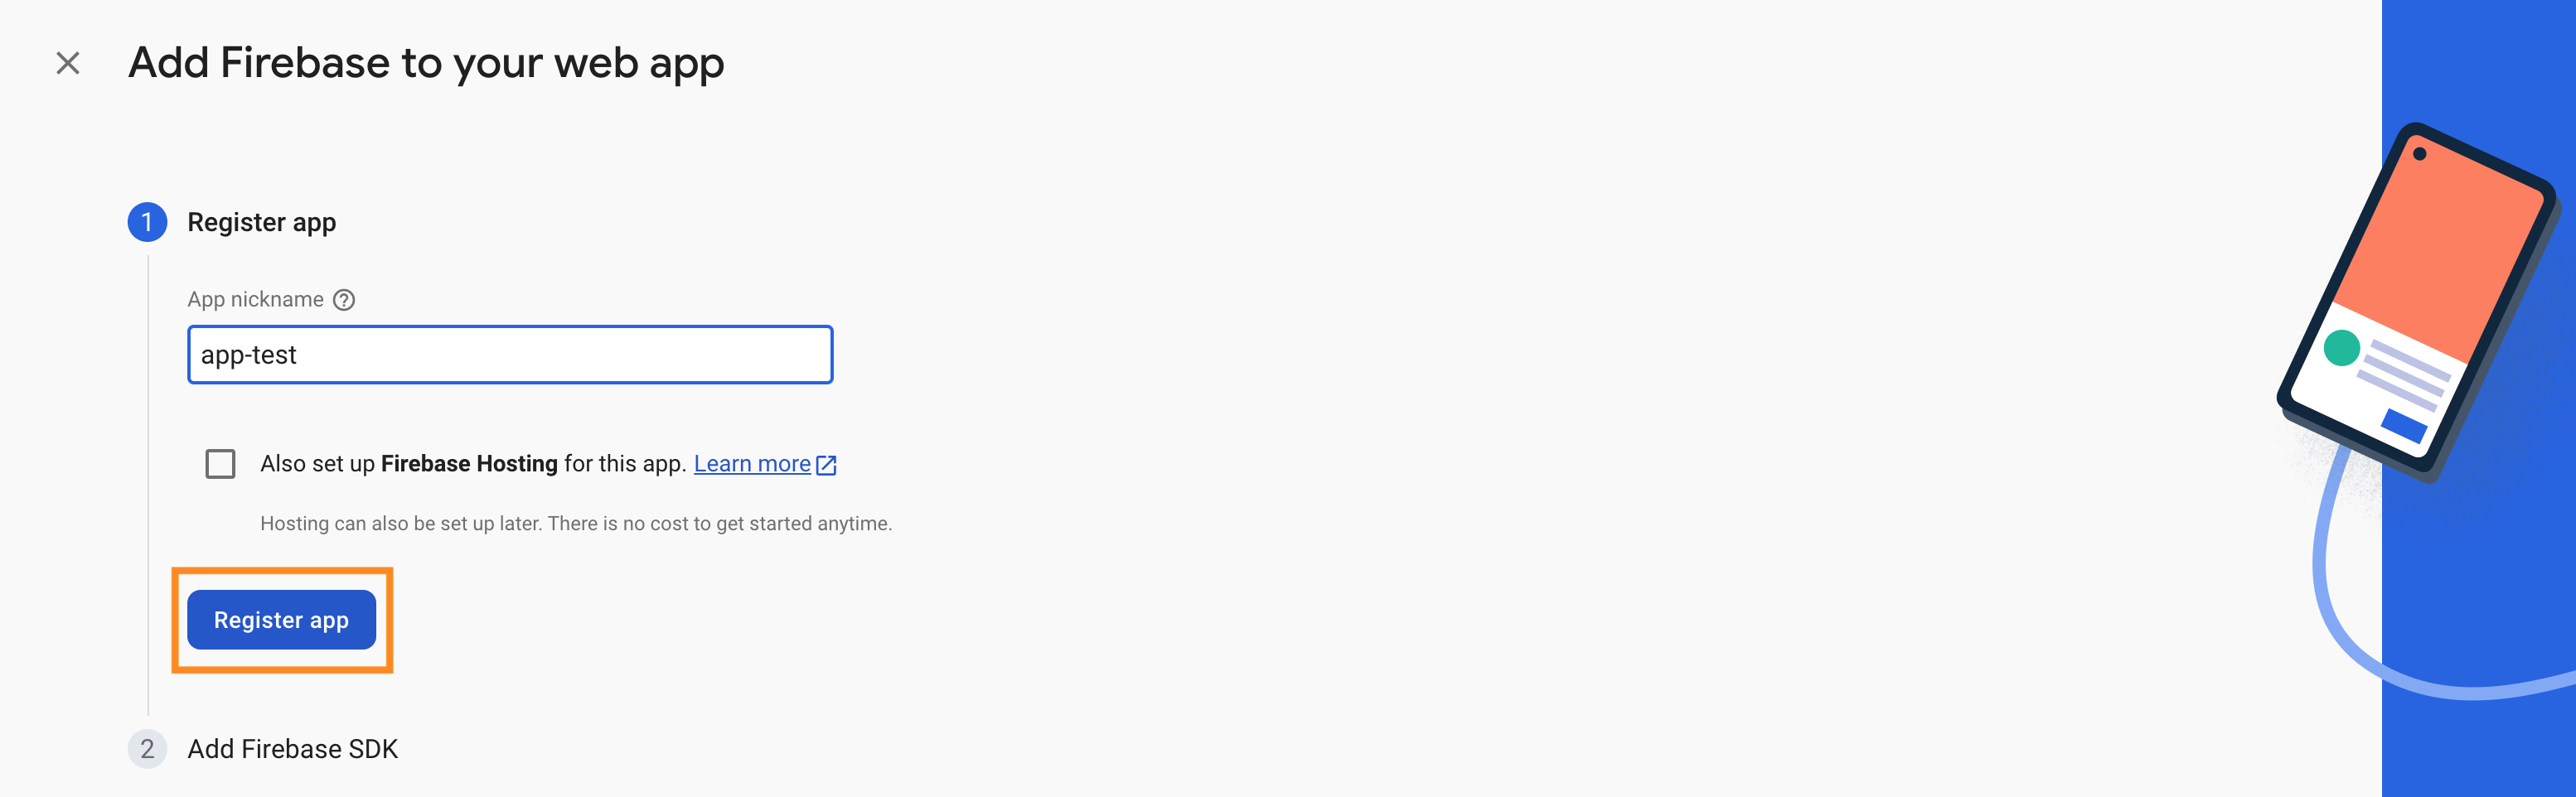
You'll be asked to choose a name for your app. Choose a name in line with the project you're developing.
Firebase will also ask you if you want to activate Firebase Hosting (which is their web hosting solution). In our case, we won't, as the result of this tutorial will not be online.
Click on Register app.
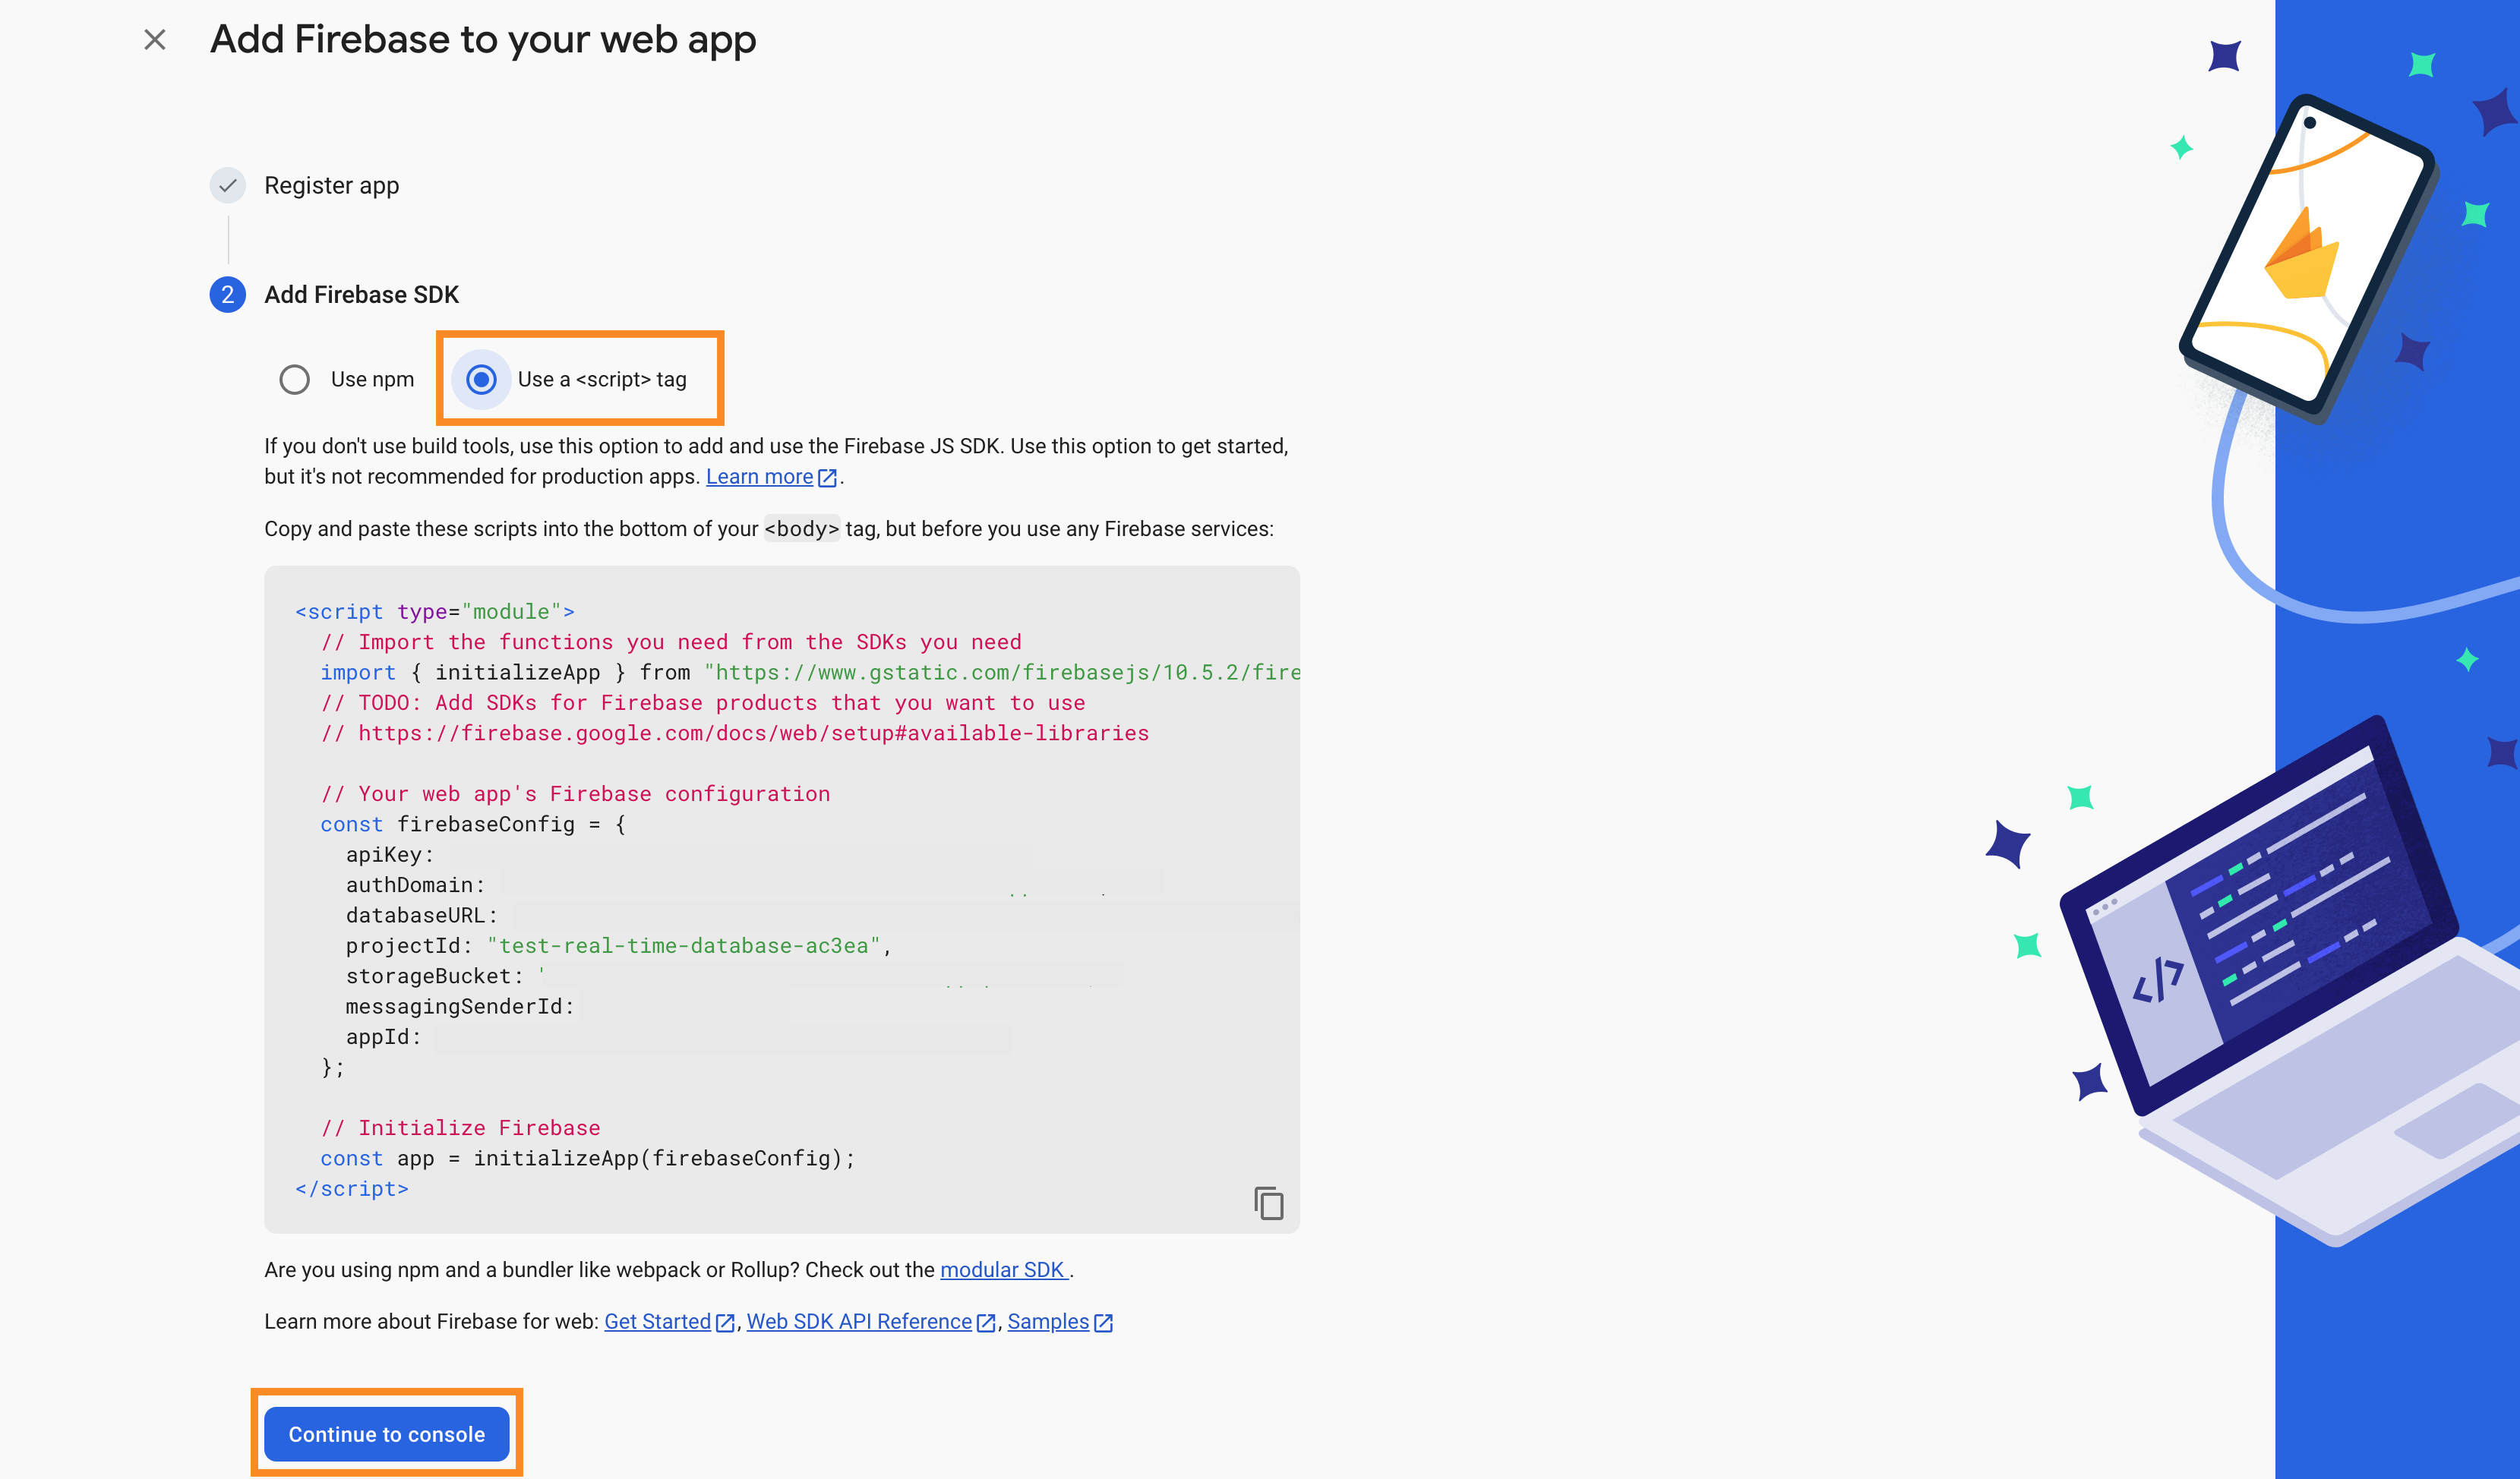
There are several ways of loading the necessary libraries into your code, and we'll be using scripts tag in our case. The choice is not definitive: you can change it later.
Then Click on Continue to console.
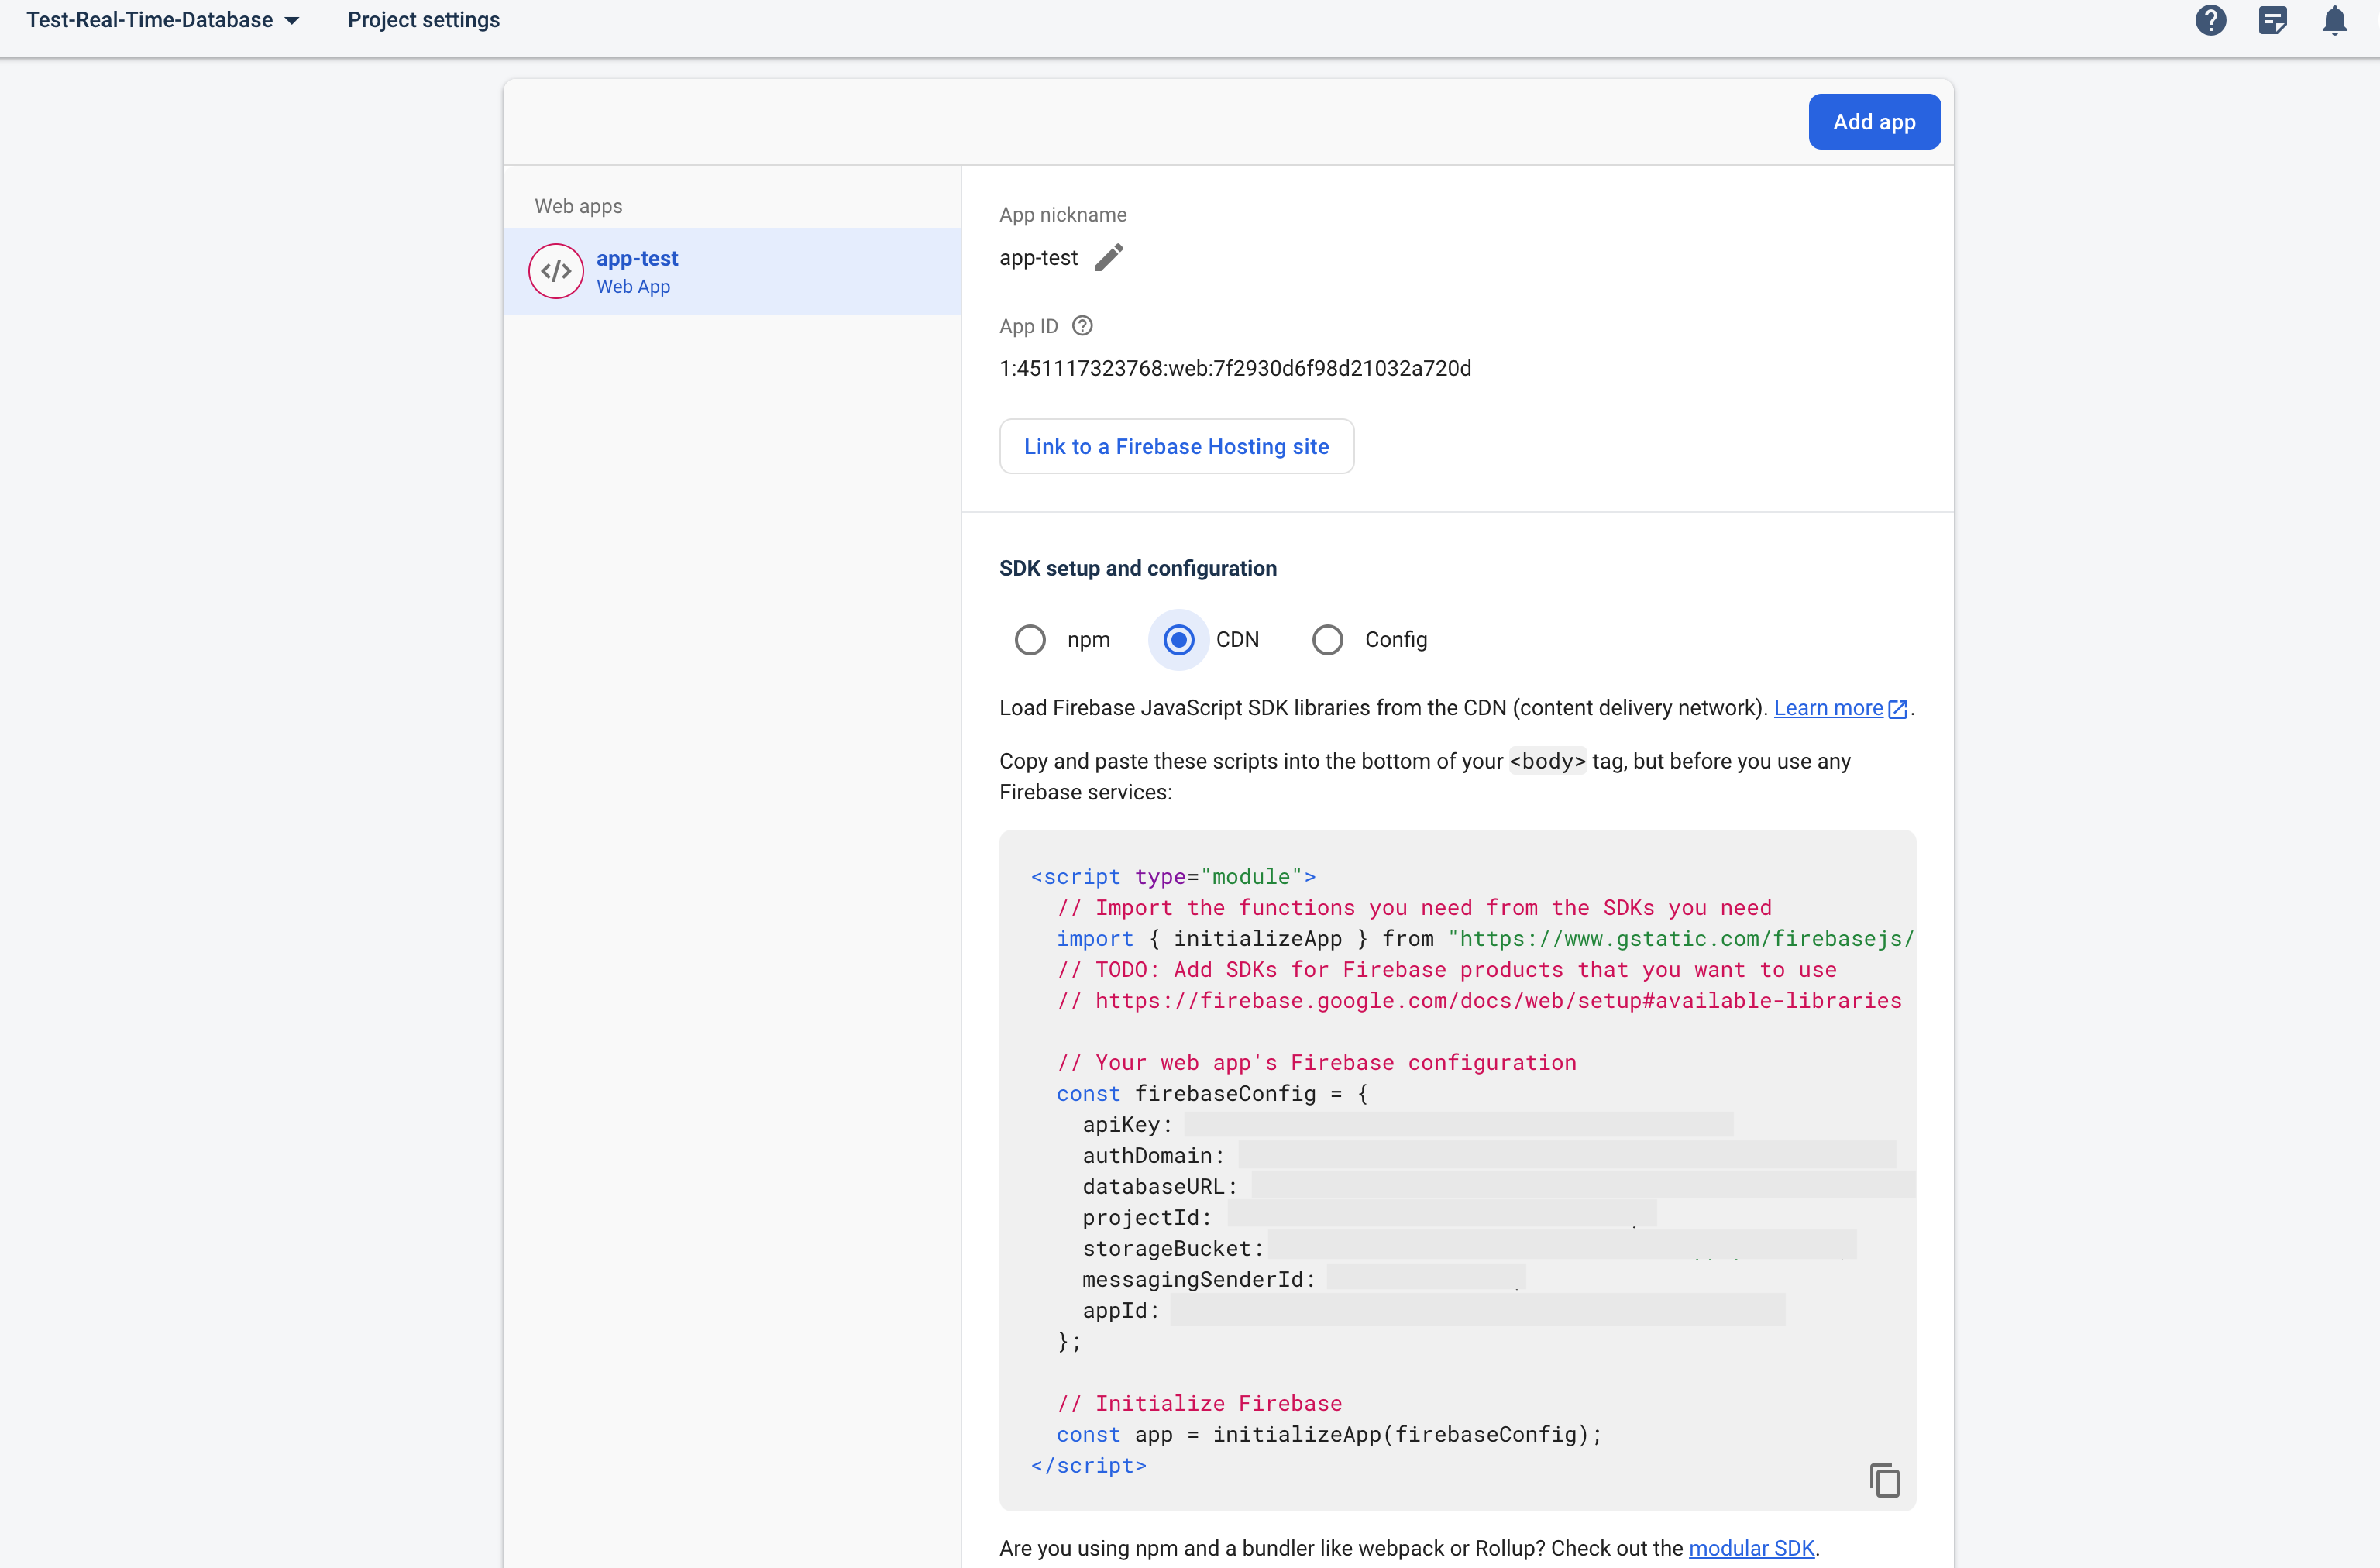
You'll be redirected to the Project settings page, and in the Your apps section you should see your display application and login details.
We now have all the information we need to connect to the database and can integrate it into our existing code. Since we're not using NPM for library installation in this tutorial, you can retrieve the code by clicking on CDN.
Let's go back to the index.html file we created earlier, which called endpoint fixtures. We're going to modify it so that the API response is saved in the firebase database.
To do this, we'll need to add the connection to our database and the lines of code that will save the data.
index.html
<script type="module">
// Import Firebase modules
import { initializeApp } from "https://www.gstatic.com/firebasejs/10.5.2/firebase-app.js";
import { getDatabase, ref, set } from "https://www.gstatic.com/firebasejs/10.5.2/firebase-database.js";

// Replace these values with your Firebase project configuration
const firebaseConfig = {
    apiKey: " ",
    authDomain: " ",
    databaseURL: " ",
    projectId: " ",
    storageBucket: " ",
    messagingSenderId: " ",
    appId: " "
  };

// Initialize Firebase with your configuration
const app = initializeApp(firebaseConfig);

// Get a reference to the Firebase database
const database = getDatabase(app);

// Make an API request
// Replace 'YOUR_API_KEY' with your API key.
const apiKey = 'YOUR_API_KEY';
const date = '2023-10-30';
const apiUrl = `https://v3.football.api-sports.io/fixtures?date=${date}`;

// Configure API request headers
const headers = {
  'x-apisports-key': apiKey,
  'Accept': 'application/json',
};

// Request API
fetch(apiUrl, {
  method: 'GET',
  headers: headers,
})
.then(response => {
  if (!response.ok) {
    throw new Error('The network response was not correct');
  }
  return response.json();
})
.then(apiData => {
  // Save API data in Firebase Realtime Database
  const databaseRef = ref(database, 'fixtures');
  set(databaseRef, apiData)
    .then(() => {
      console.log('API data successfully registered in Firebase database.');
    })
    .catch((error) => {
      console.error('Error saving API data in Firebase database: ', error);
    });
})
.catch(error => {
  console.error('There was a problem with the API request operation: ', error);
});
</script>
If you run your code again in your browser, the console should display "API data successfully registered in Firebase database."
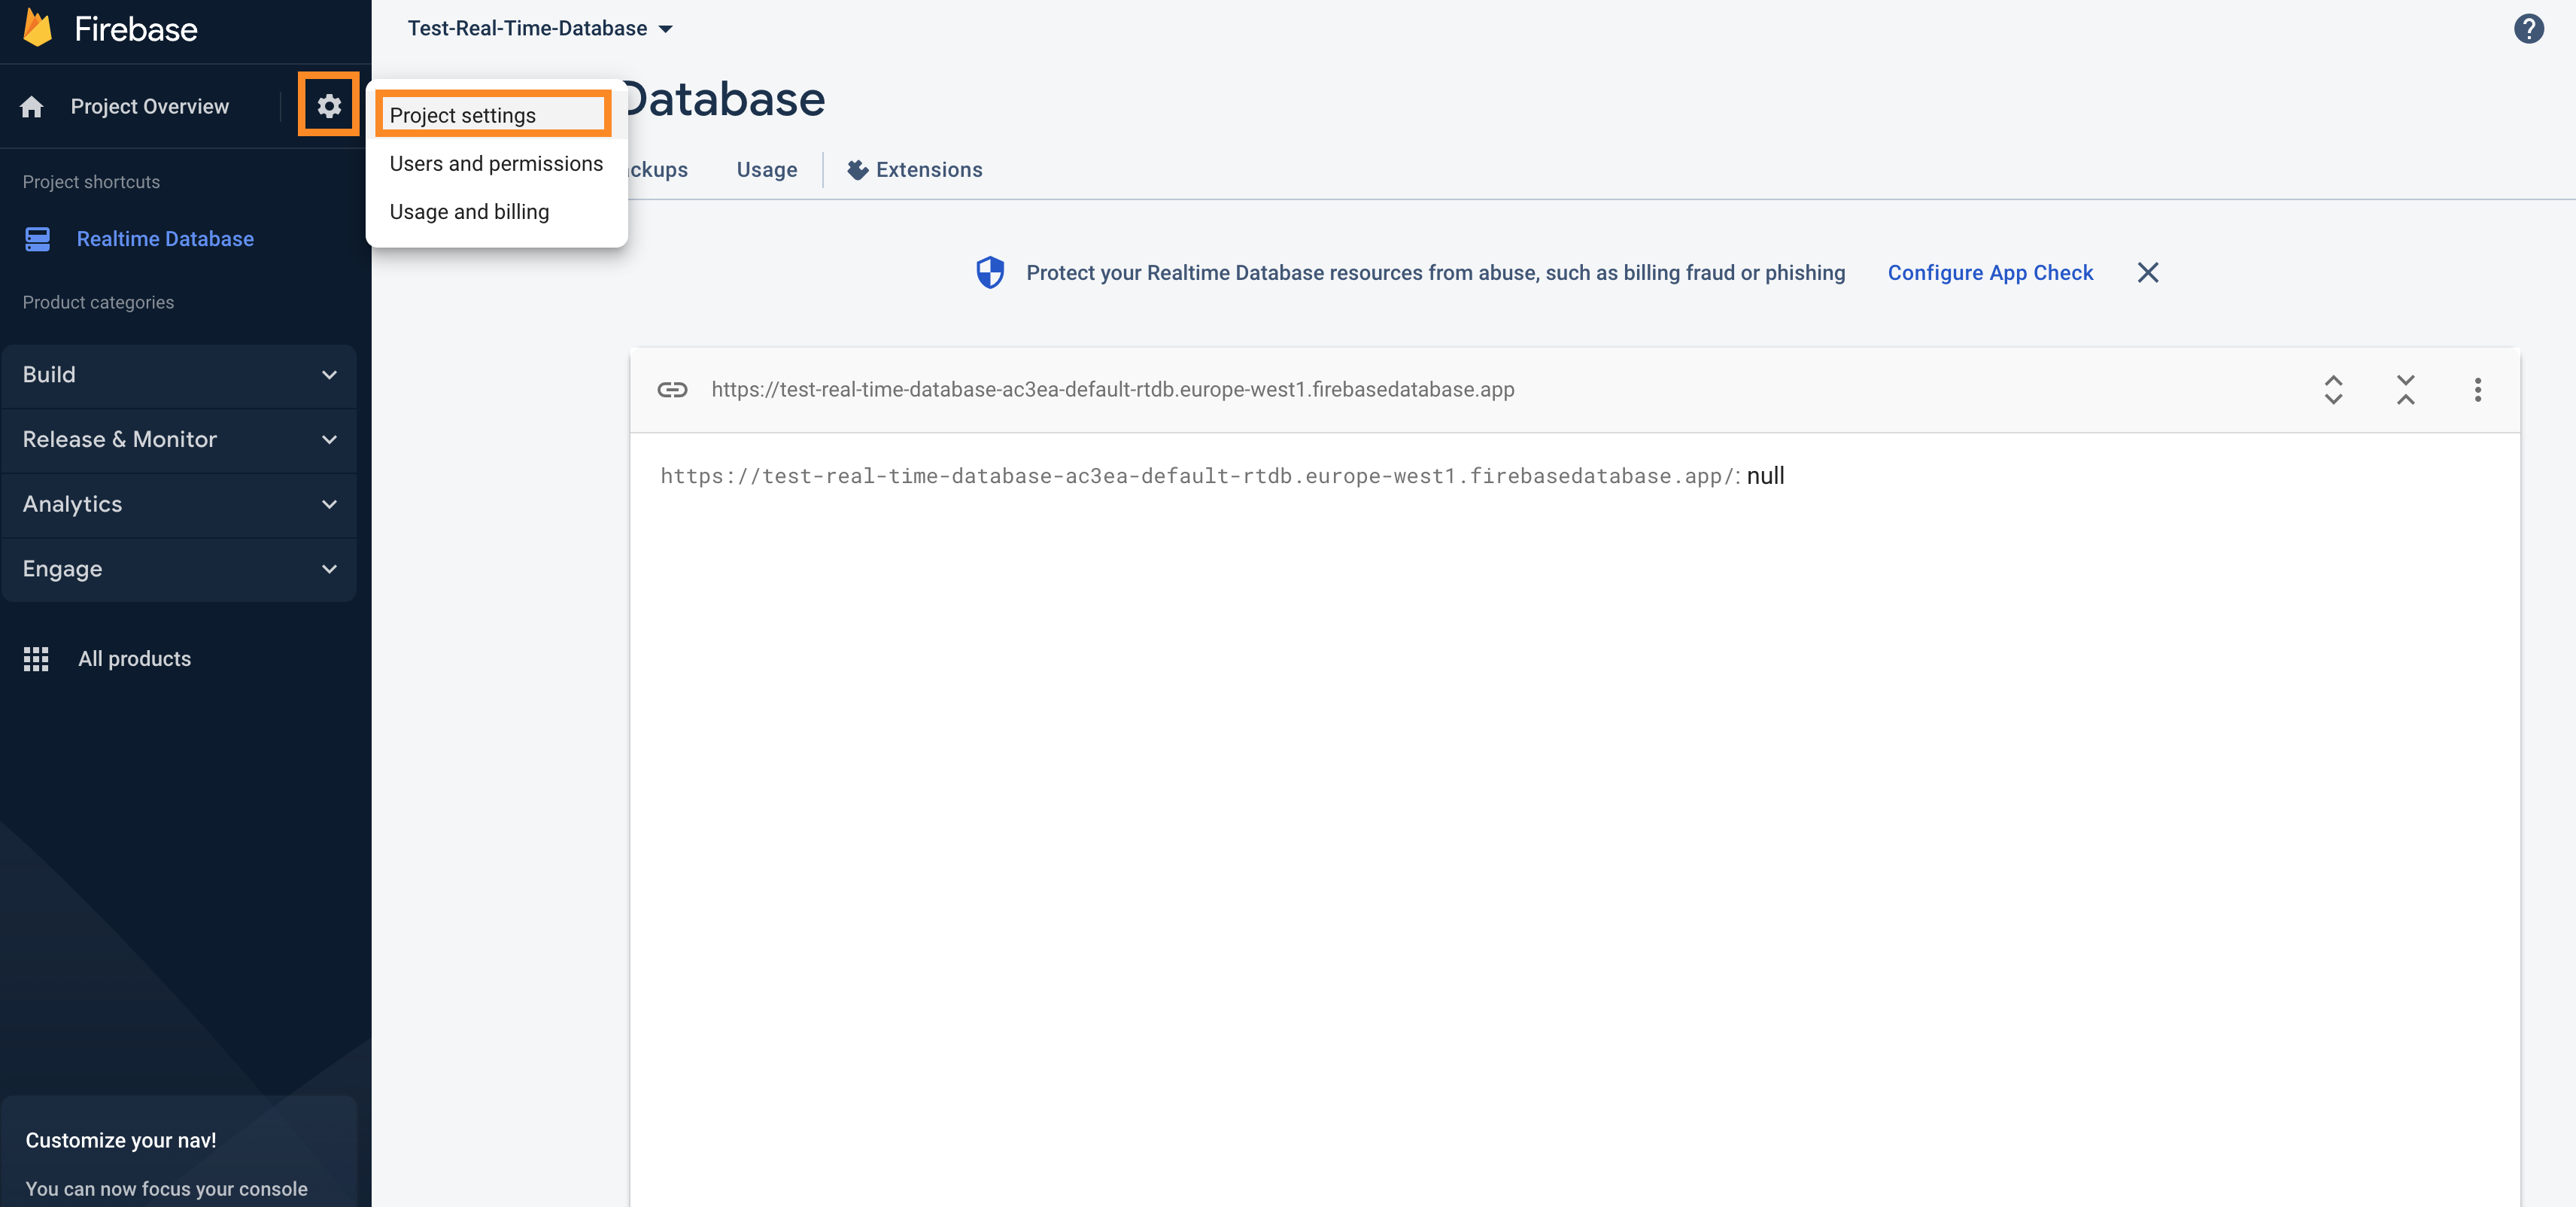
If we return to the home page of our database, it should display the data
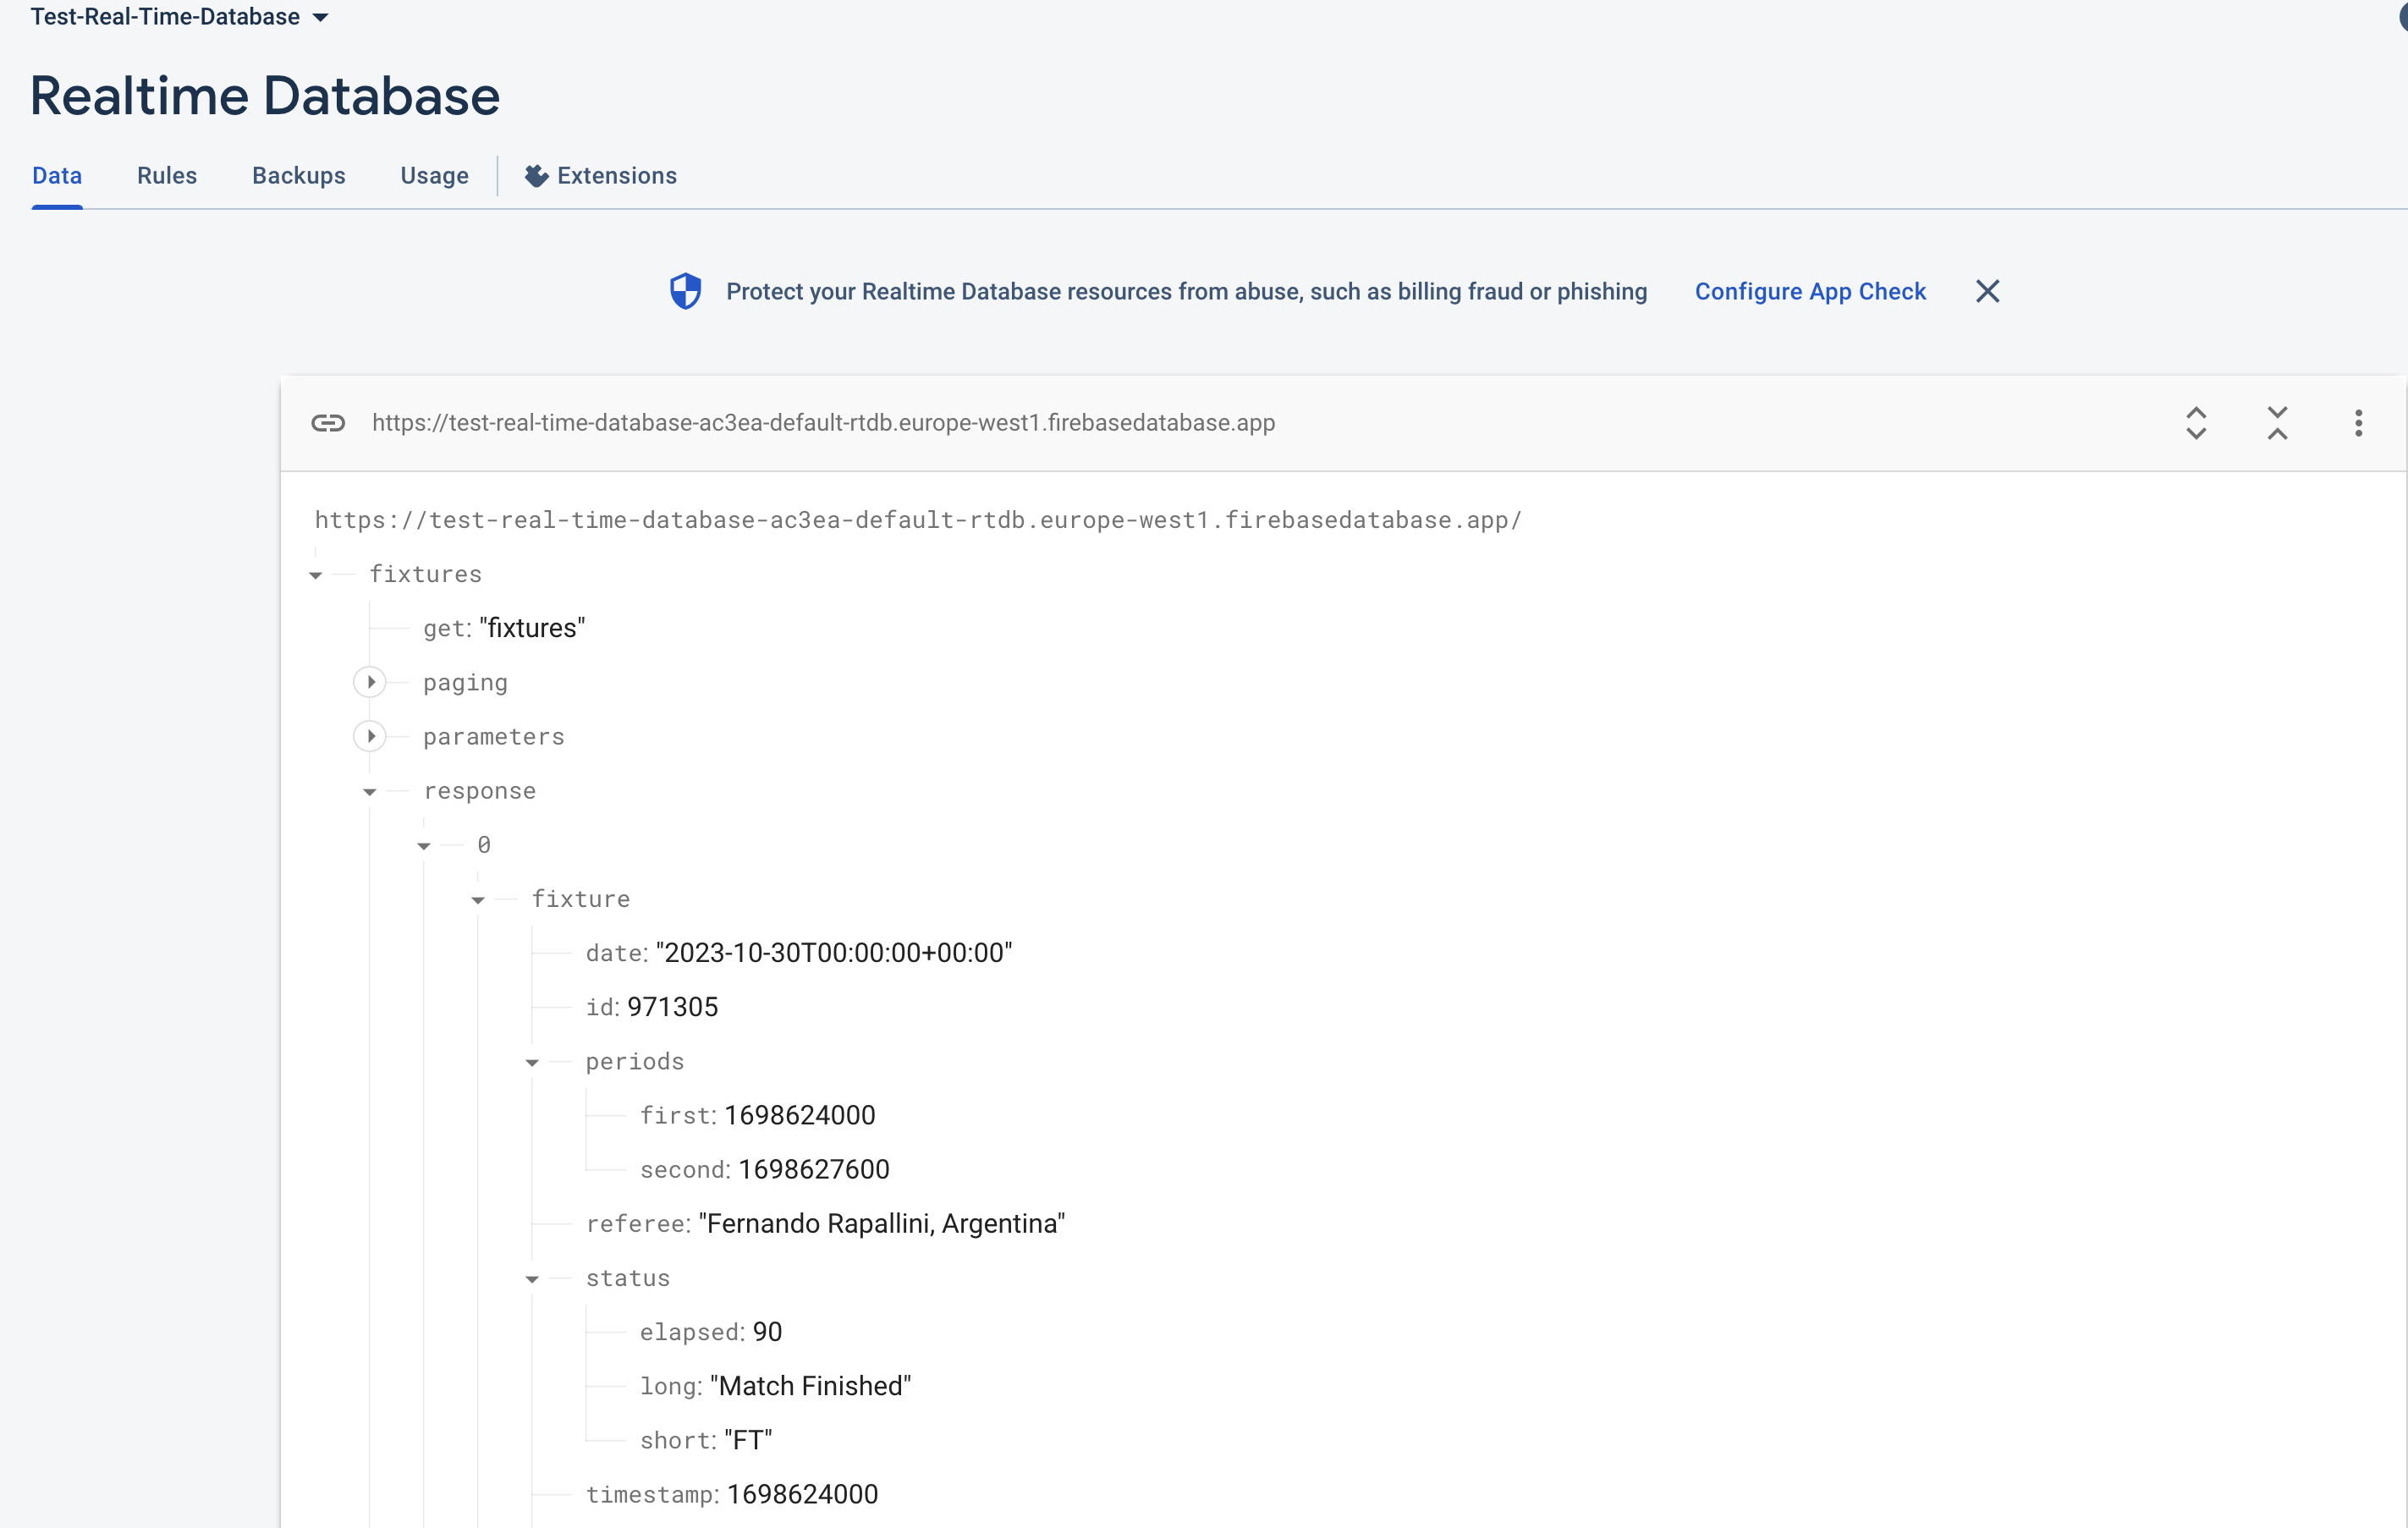
We do have a "fixtures" key which has been created and which contains all the data received from the API.
The "fixtures" key that was created corresponds to this line of our code:
const databaseRef = ref(database, 'fixtures');
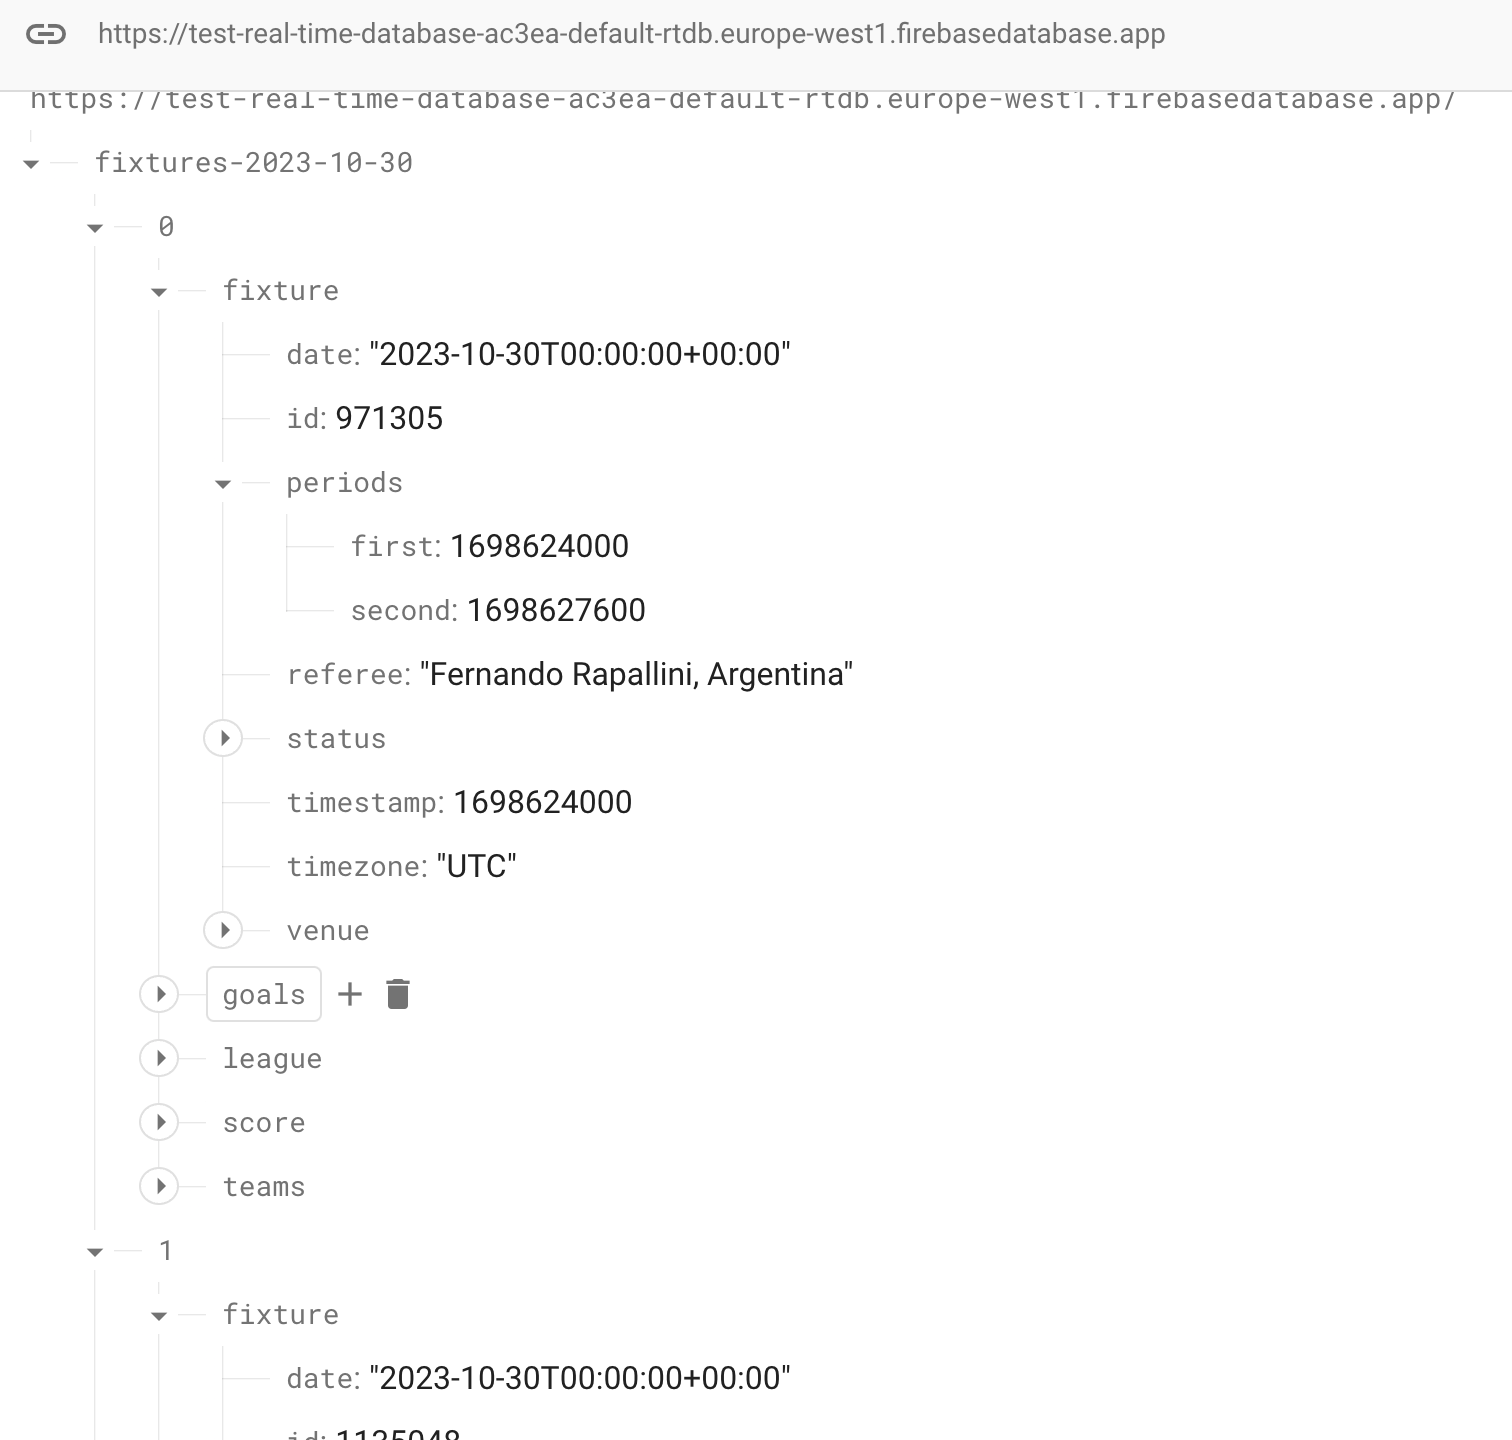
Depending on your needs, it may be necessary for this key to be dynamic and reflect the data it contains. It is therefore possible to make a modification of this type:
const databaseRef = ref(database, 'fixtures-'+date);
In order to create a key by date, which will facilitate the retrieval of fixtures by date for your future application.
Let's test it. Update the code and relaunch the page in your browser.
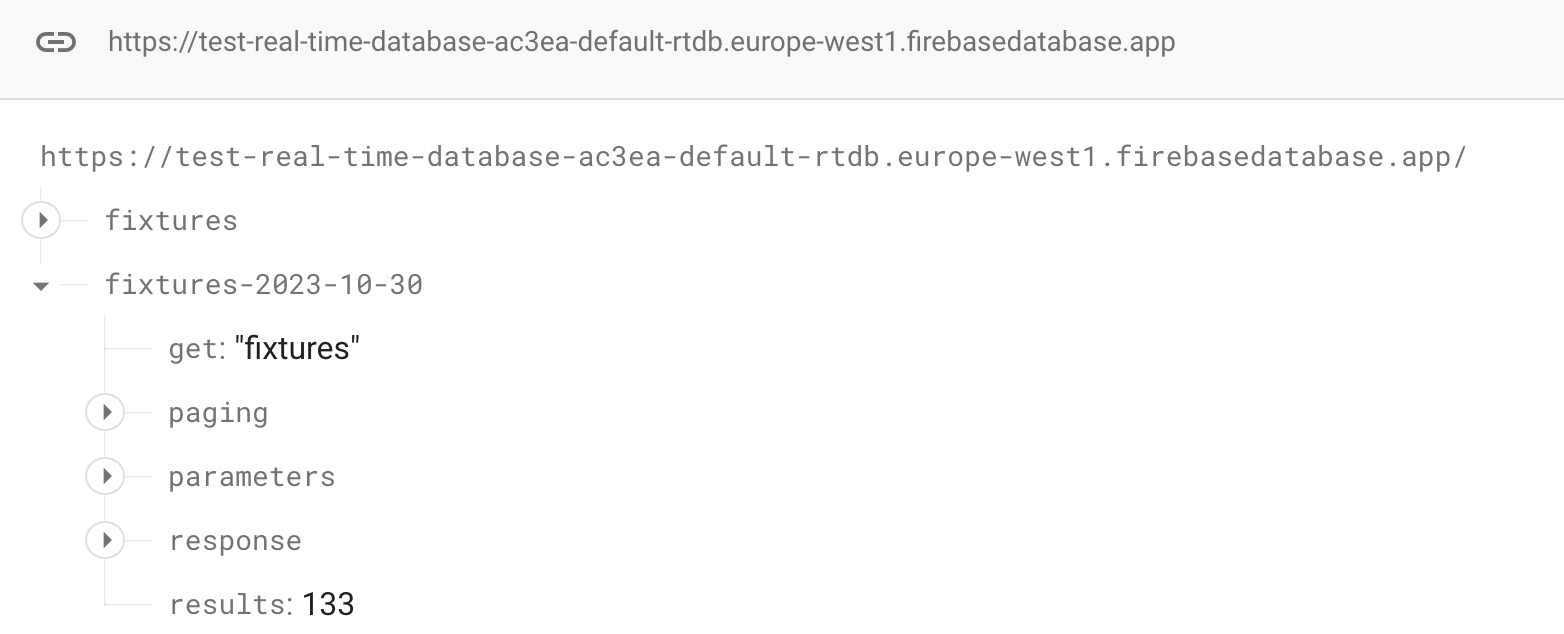
We do have a new object with the date.
There is also another possible improvement, because currently we are saving the entire API return in our database but the get, paging, parameters, errors, results and parameters fields have no use to be saved, we are only interested in the content of the response field.
We have to change this line :
set(databaseRef, apiData)
By :
set(databaseRef, apiData.response)
In this way only the content of the response field will be saved.
Let's try to see. Make the modification and relaunch the page in your browser.
Our script for saving API data into Firebase is now fully operational. Feel free to modify the code to match your needs.
Database Structure
We want to highlight a decision that provides flexibility to our users. Rather than prescribing a specific database structure, we've chosen to align our data storage with the structure of the API responses. This approach gives you the freedom to work with the data in its native format and structure, as provided by the API.
Why Use the API's Data Structure?
- Simplicity: By using the same structure as the API, you simplify the process of data storage. You don't need to transform or adapt the data into a different format before saving it to Firebase.
- Real-Time Updates: Data synchronization in Firebase's Realtime Database is more efficient when the data structure matches the API responses. This ensures that real-time updates occur smoothly.
- User Flexibility: We believe in empowering our users to define their own data structures if it better suits their application's needs. This flexibility can be especially beneficial for advanced users with specific requirements.
Defining Your Structure
While we encourage using the API's data structure for ease of integration, you're not bound to it. If your application demands a different structure, Firebase allows you to organize data as per your requirements. You can define your own structure and map the data accordingly.
In this way, you can strike a balance between simplicity and customization, tailoring your data structure to your application's unique needs. Whether you choose to adopt the API's structure or define your own, Firebase's real-time capabilities will continue to serve you effectively.
This approach offers you the flexibility to work with the data in a way that best suits your project, making the integration of API data and Firebase seamless.
Data Security
Firebase provides powerful security rules that allow you to control who can access and modify data in your database. It's important to configure security rules to protect your data. Here's what to consider:
- Read and Write Rules: Specify who can read and write data to different parts of your database. You can set rules based on user authentication or other conditions.
- Security Best Practices: Follow Firebase's security best practices to ensure the integrity and privacy of your data.
Real-Time Data Retrieval
Firebase's Realtime Database is designed to provide data updates in real-time. Here's how you can retrieve data that is continuously synchronized across all connected clients:
- Listening for Changes: Set up listeners in your application to monitor specific paths or references in your Firebase database. When data at these locations changes, your app will be notified.
- Data Events: Firebase offers various events to listen for changes, including child added, child changed, child removed, and value events. Choose the event that best suits your needs.
- Data Snapshot: When an event is triggered, you'll receive a snapshot of the data. This snapshot allows you to access the current data and any changes.
Full documentation on how to read the data is available on this page.
In our example, we're going to set up a page that displays all the fixtures in the database, following the Firebase documentation so that the data is updated automatically whenever there's a change in the database.
There are several ways of reading data for this type of database. In our case, we'll use onValue because it updates data automatically, unlike get, which only reads data when the page is opened.
Let's start by creating a fixtures.html file and insert the following code.
fixtures.html
<script type="module">
// Import Firebase modules
import { initializeApp } from "https://www.gstatic.com/firebasejs/10.5.2/firebase-app.js";
import { getDatabase, ref, onValue } from "https://www.gstatic.com/firebasejs/10.5.2/firebase-database.js";

// Replace these values with your Firebase project configuration
const firebaseConfig = {
    apiKey: " ",
    authDomain: " ",
    databaseURL: " ",
    projectId: " ",
    storageBucket: " ",
    messagingSenderId: " ",
    appId: " "
  };

// Initialize Firebase with your configuration
const app = initializeApp(firebaseConfig);

// Get a reference to the Firebase database
const database = getDatabase(app);

// Indicates the key containing the data
const databaseRef = ref(database, 'fixtures-2023-10-30');

// Read data from the database
// Listen for changes in real-time using onValue
onValue(databaseRef, (snapshot) => {
  if (snapshot.exists()) {
    // Data has changed or exists, you can access it using snapshot.val()
    const data = snapshot.val();
    console.log('Data read from Firebase database :', data);
  } else {
    console.log('No data found at this location.');
  }
}, {
  onlyOnce: false // Set this to true if you want to listen only once
});
</script>
Launch the file in your browser and look in the console, you should have the list of matches for that day.
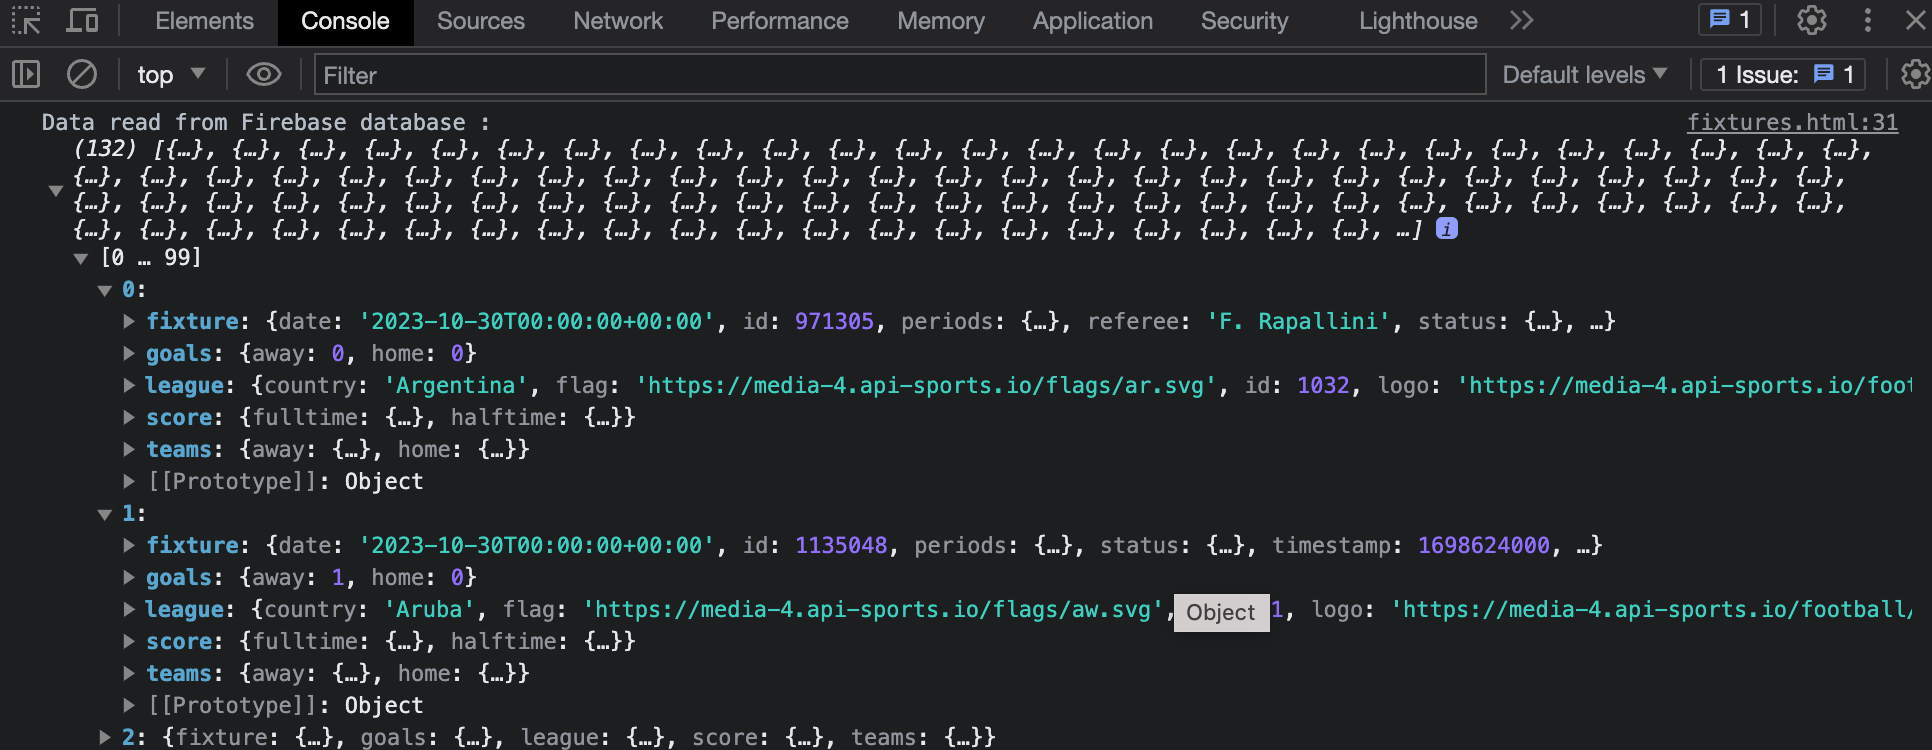
Now, as soon as a modification is made in the database, it will be automatically updated on the user side without any further action on his or your part.
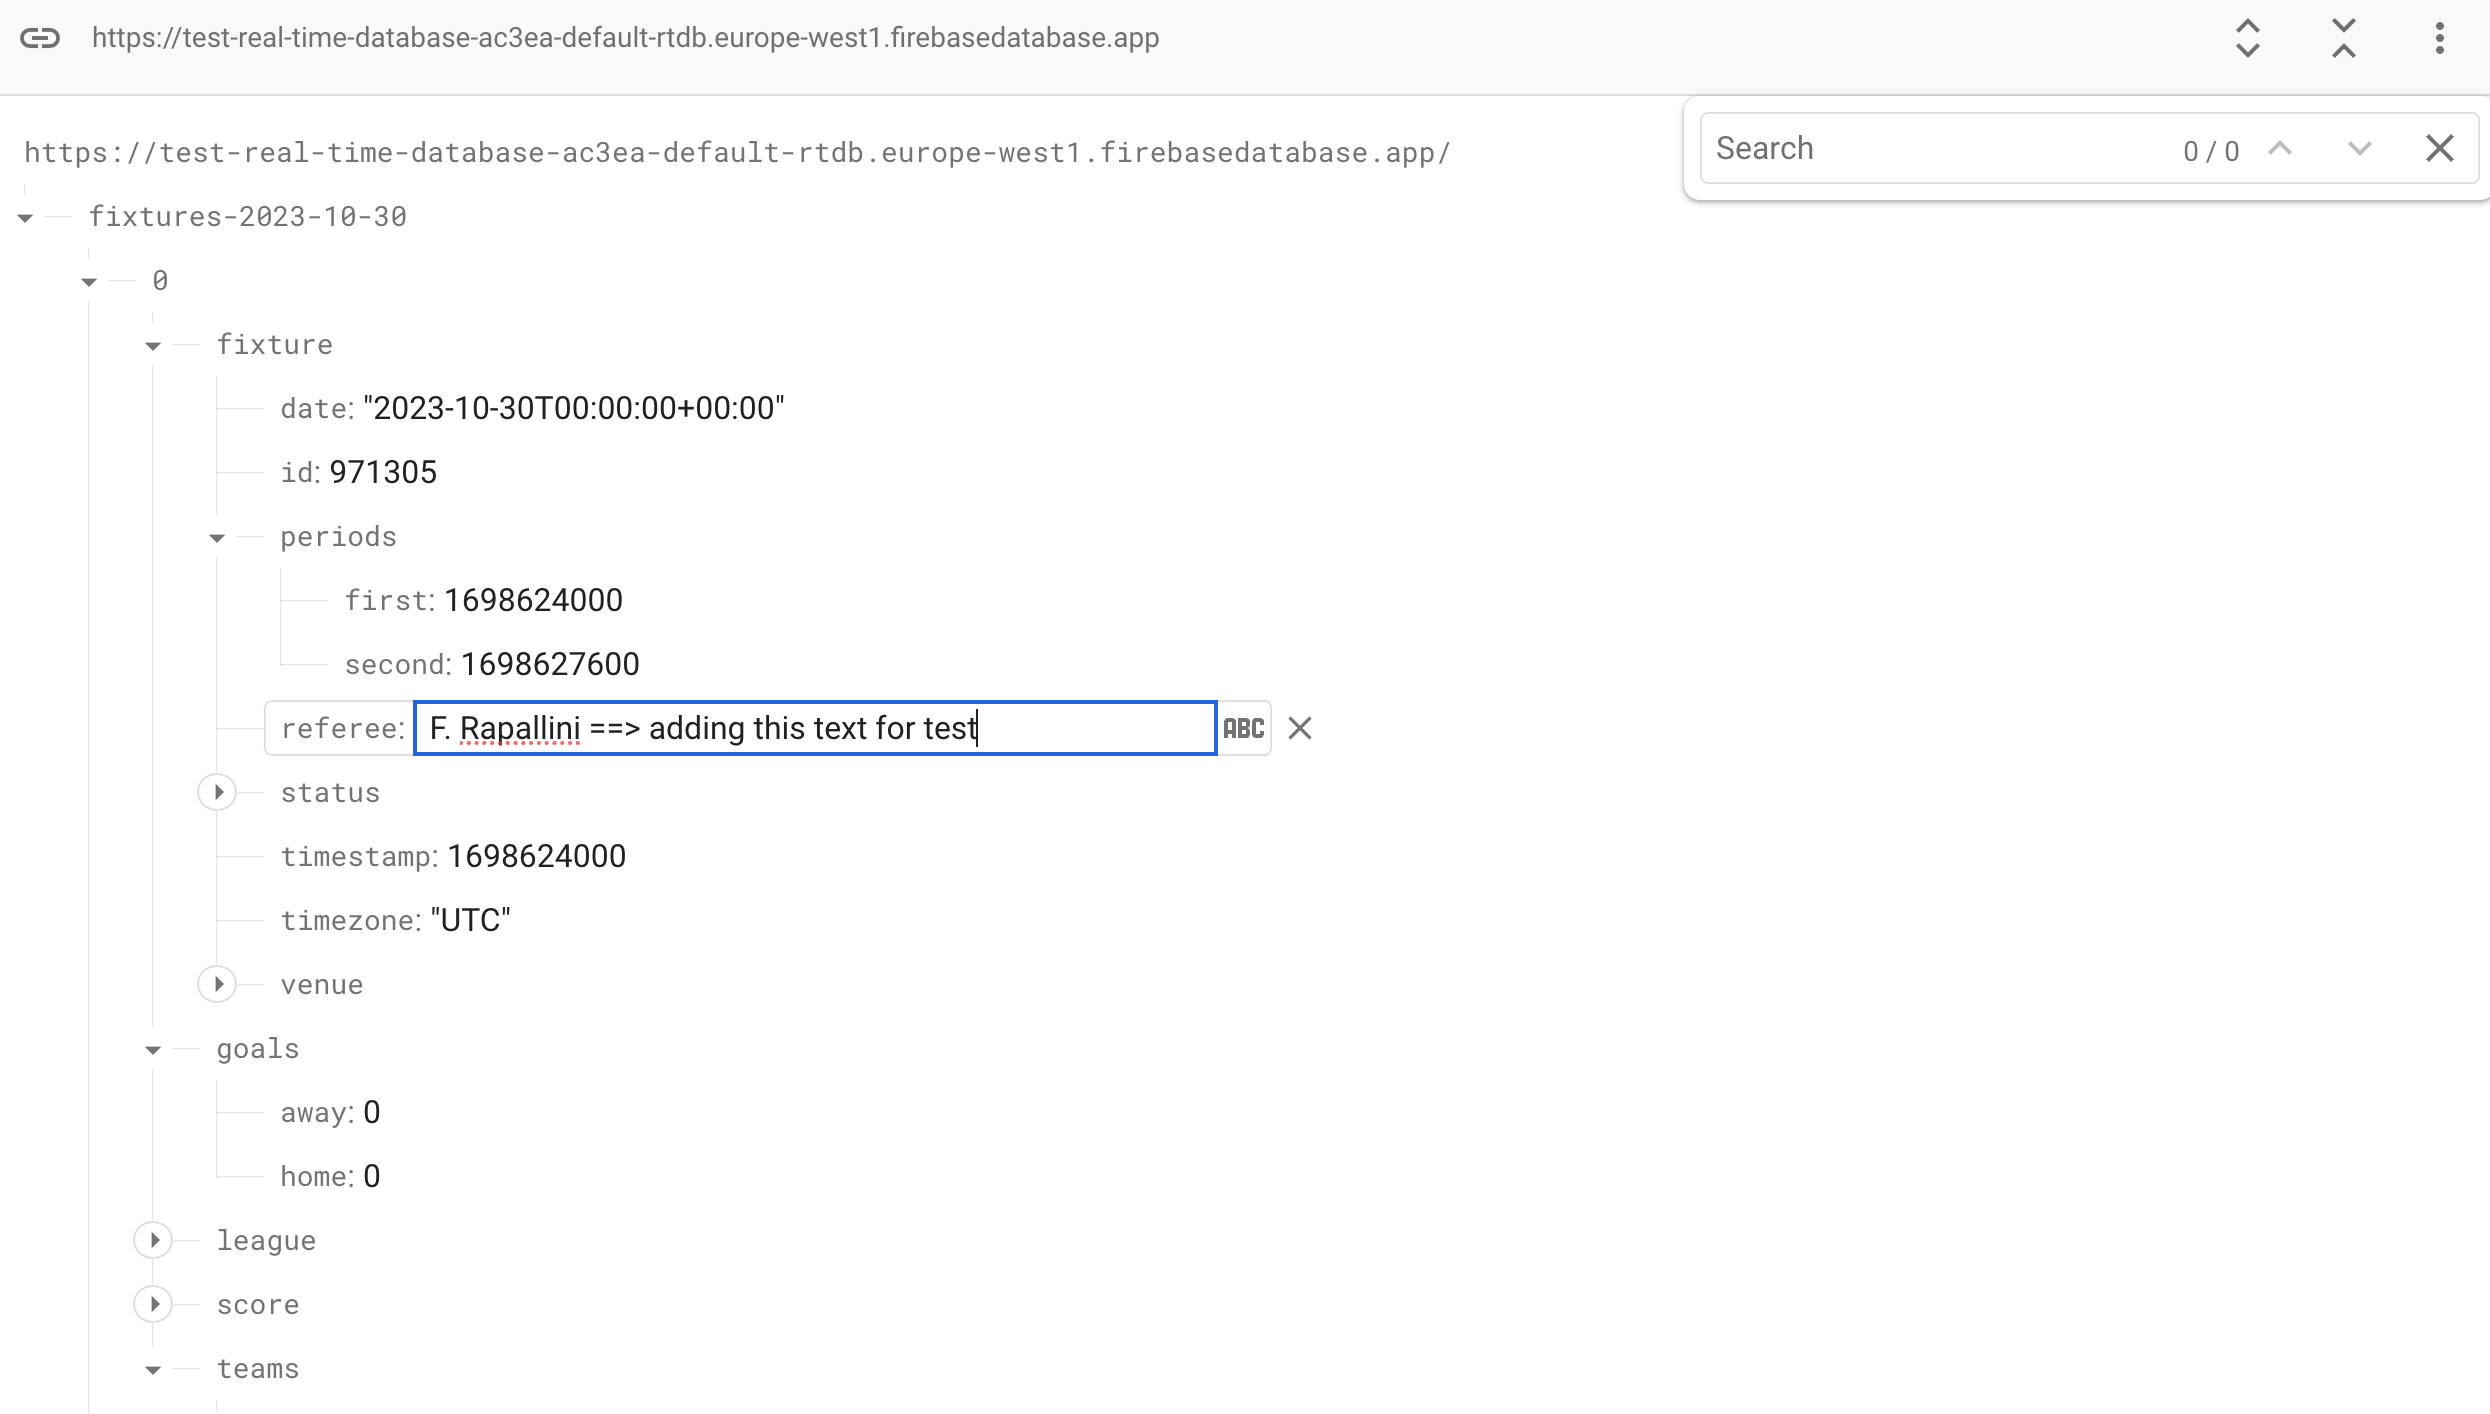
You can test this by directly modifying a field in one of the fixtures, and in the console you'll see a new line displayed with the updated data.

Go further
Now that you know how to use Firebase with the API, save and read data, you have the ability to develop a complete website or app that deals with the data you've selected. For updating data, you can utilize Firebase's Cloud Functions (requires a paid plan), which can serve as a backend to update API data into your Firebase database. You also have the option to use Firebase Hosting to host your website.
To help you with your project, we recommend you take a look at the complete Firebase database documentation.